5.4
5 - 13
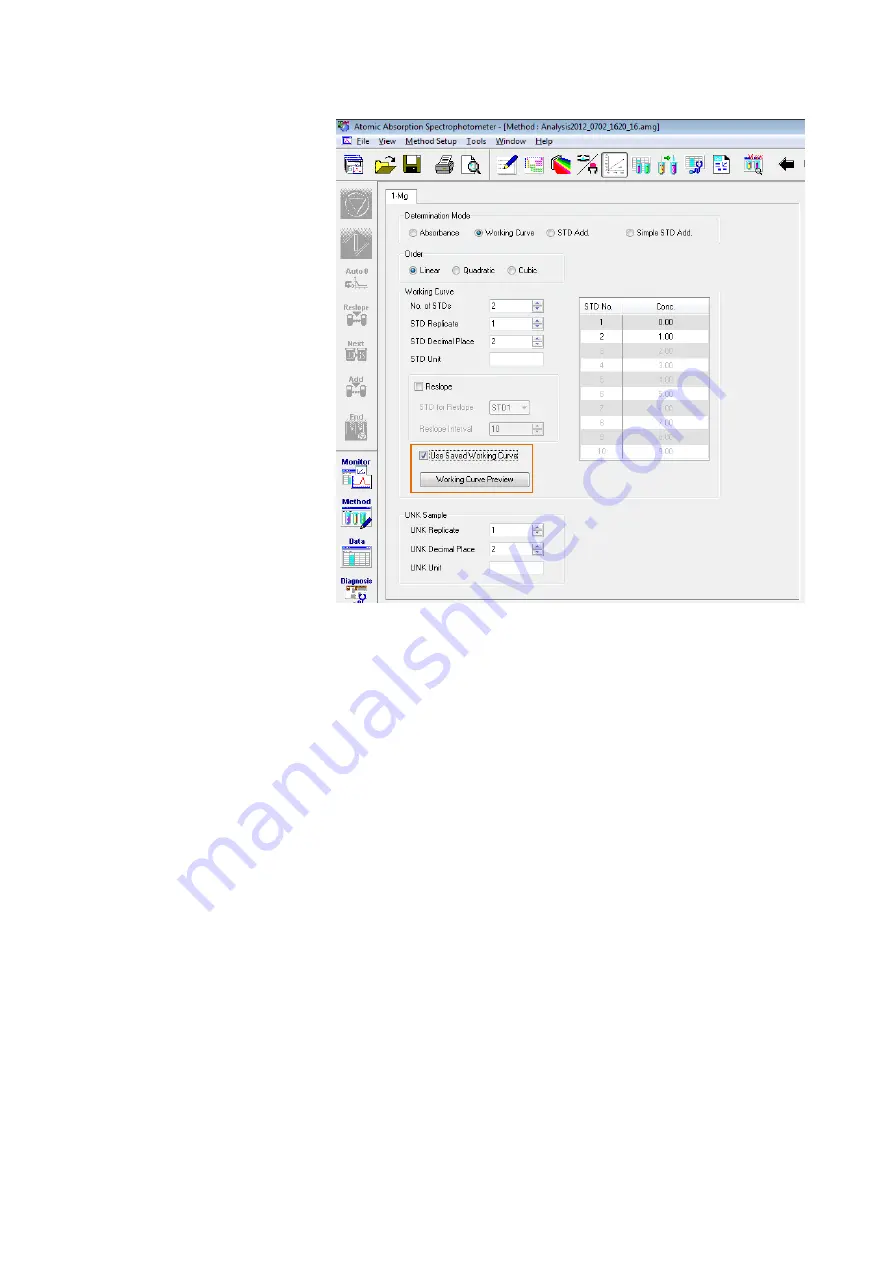
Fig. 5-11 Existing Working Curve Confirmation Window
(5) Clicking the [Working Curve Preview] button presents a list
of working curves copied. Then, when a working curve
corresponding to the analyte element is double-clicked, the
Working Curve Detail dialog box will open. In this dialog
box, check the conditions of the working curve concerned.
(6) Click the [Verify] button and start measurement.
NOTE
: Since the atomic absorption photometry is subject to
constant changes of sensitivity, use the existing
working curves measured as recently as possible.
Содержание ZA3000 Series
Страница 267: ...3 1 11 3 43 Fig 3 31 Parameter List Window Common conditions The setting of method is thus completed ...
Страница 357: ...5 5 Twin Injection 5 28 Fig 5 24 Dialog Box for Confirming Nozzle Position 7 Click Start measurement ...
Страница 423: ...9 3 5 9 11 Fig 9 14 Diagnosis Log Dialog Box ...
Страница 449: ...10 5 Reflecting on Analysis Conditions 10 24 Fig 10 16 Method Window Unmark the checkbox ...
Страница 455: ...INDEX 4 V Verify 3 34 W Working curve graph 4 1 Wavelength accuracy 9 1 ...
Страница 456: ...INSTRUCTION MANUAL 7J1 9027 000 Ver 1 February 2016 MODEL HFS 4 HYDRIDE FORMATION SYSTEM ...


