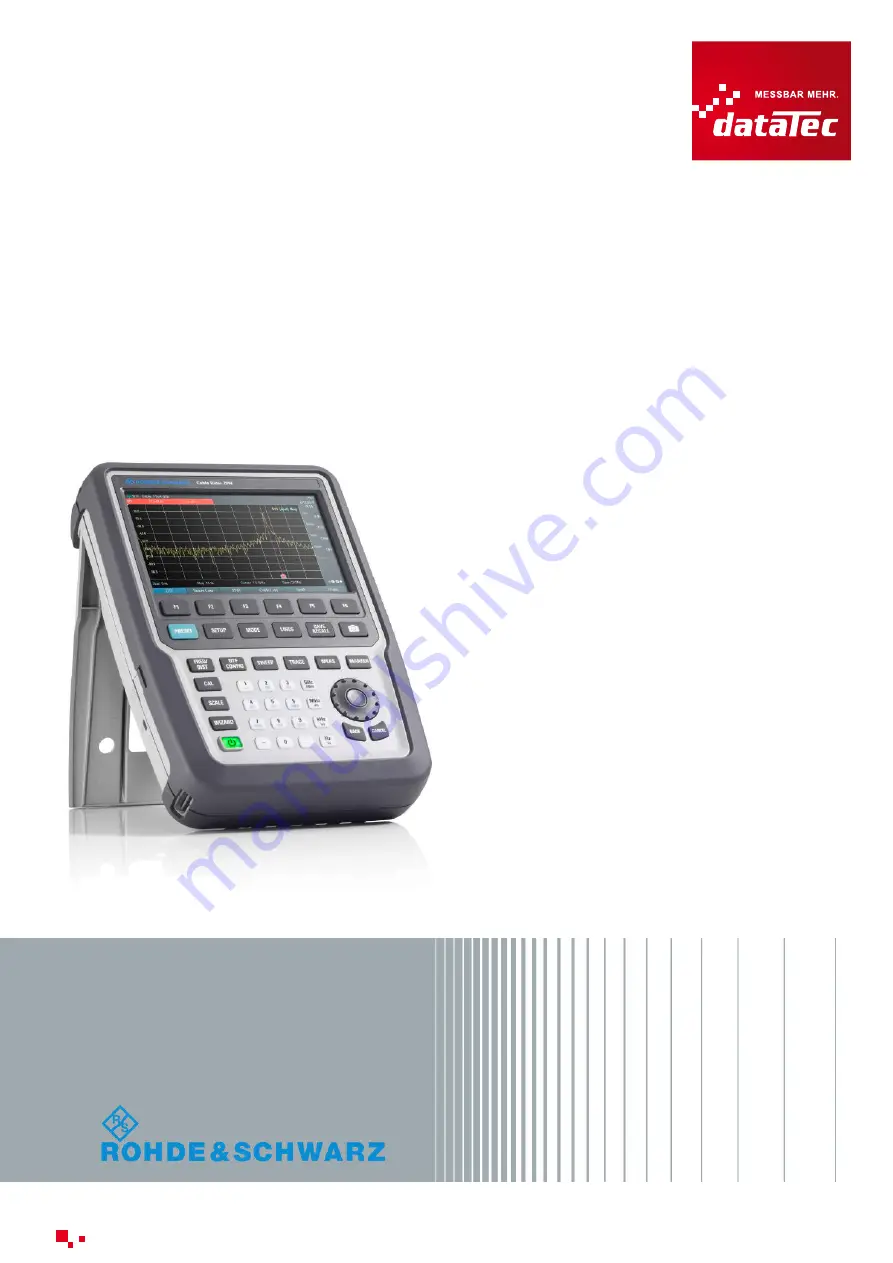
Rohde & Schwarz Cable Rider ZPH User Manual Download Page 1

R&S

®

Cable Rider ZPH

Handheld Cable and Antenna
Analyzer

User Manual


1321.0950.02 ─ 03

(=E9À2)

Ihr Spezialist für

Mess- und Prüfgeräte

User Manual

Distributed by:

dataTec

  ▪  Ferdinand-Lassalle-Str. 52  ▪  72770 Reutlingen  ▪  Tel. 07121 / 51 50 50  ▪  Fax 07121 / 51 50 10  ▪  [email protected]  ▪  www.datatec.de

Summary of Contents for Cable Rider ZPH

Page 1: ...d Antenna Analyzer User Manual 1321 0950 02 03 E9 2 Ihr Spezialist f r Mess und Pr fger te User Manual Distributed by dataTec Ferdinand Lassalle Str 52 72770 Reutlingen Tel 07121 51 50 50 Fax 07121 51...

Page 2: ...e Open Source Acknowledgement document which is available for download from the R S Cable Rider ZPH product page at http www rohde schwarz com product zph html Downloads Firmware Rohde Schwarz would l...

Page 3: ...e of the product The product is used for its designated purpose if it is used in accordance with its product documentation and within its performance limits see data sheet documentation the following...

Page 4: ...ation item 7 Signal words and their meaning The following signal words are used in the product documentation in order to warn the reader about risks and dangers Indicates a hazardous situation which i...

Page 5: ...afety is not observed either at all or to the extent necessary electric shock fire and or serious personal injury or death may occur 1 Prior to switching on the product always ensure that the nominal...

Page 6: ...t be fuse protected in such a way that anyone who has access to the product as well as the product itself is adequately protected from injury or damage 14 Use suitable overvoltage protection to ensure...

Page 7: ...masks and protective clothing must be worn 7 Laser products are given warning labels that are standardized according to their laser class Lasers can cause biological harm due to the properties of the...

Page 8: ...ckaging until they are ready to be used 4 Cells and batteries must not be exposed to any mechanical shocks that are stronger than permitted 5 If a cell develops a leak the fluid must not be allowed to...

Page 9: ...National waste disposal regulations must be observed 4 If handling the product releases hazardous substances or fuels that must be disposed of in a special way e g coolants or engine oils that must b...

Page 10: ...ien las informaciones de seguridad elementales as como la documentaci n del producto y entr guelas a usuarios posteriores Tener en cuenta las informaciones de seguridad sirve para evitar en lo posible...

Page 11: ...raves o incluso la muerte Indica una situaci n de peligro que si no se evita puede causar lesiones graves o incluso la muerte Indica una situaci n de peligro que si no se evita puede causar lesiones l...

Page 12: ...entaci n del producto o en la hoja de datos En caso de sobrecalentamiento del producto pueden producirse choques el ctricos incendios y o lesiones graves con posible consecuencia de muerte Seguridad e...

Page 13: ...0950 1 EN60950 1 o IEC61010 1 EN 61010 1 v lidos en cada caso 11 A menos que est permitido expresamente no retire nunca la tapa ni componentes de la carcasa mientras el producto est en servicio Esto p...

Page 14: ...manipulaci n mec nica y o t rmica o el desmontaje del producto debe tenerse en cuenta imprescindiblemente el cap tulo Eliminaci n protecci n del medio ambiente punto 1 5 Ciertos productos como p ej la...

Page 15: ...a las bater as y acumuladores o celdas pueden producirse explosiones incendios y o lesiones graves con posible consecuencia de muerte El manejo de bater as y acumuladores con electrolitos alcalinos p...

Page 16: ...sin clasificar sino que debe ser recogido por separado La eliminaci n se debe efectuar exclusivamente a trav s de un punto de recogida apropiado o del servicio de atenci n al cliente de Rohde Schwarz...

Page 17: ...sachtung der Anweisungen des Herstellers liegt in der Verantwortung des Benutzers Der Hersteller bernimmt keine Verantwortung f r die Zweckentfremdung des Produkts Die bestimmungsgem e Verwendung des...

Page 18: ...n und Akkumulatoren Das Ger t enth lt eine Batterie bzw einen Akkumulator Diese d rfen nicht ber unsortierten Siedlungsabfall entsorgt werden sondern sollten getrennt gesammelt werden Weitere Informat...

Page 19: ...und Betriebslagen Das Produkt darf nur in den vom Hersteller angegebenen Betriebszust nden und Betriebslagen ohne Behinderung der Bel ftung betrieben werden Werden die Herstellerangaben nicht eingehal...

Page 20: ...nische Schalter sind zur Netztrennung nicht geeignet Werden Produkte ohne Netzschalter in Gestelle oder Anlagen integriert so ist die Trennvorrichtung auf Anlagenebene zu verlagern 5 Benutzen Sie das...

Page 21: ...tion in oder am Produkt stattfinden k nnte oder ggf bereits stattgefunden hat z B wenn das Produkt von kalter in warme Umgebung bewegt wurde Das Eindringen von Wasser erh ht das Risiko eines elektrisc...

Page 22: ...rursachen In diesem Fall kann vom Betreiber verlangt werden angemessene Ma nahmen durchzuf hren Ger t der Klasse B Ein Ger t das sich f r den Betrieb im Wohnbereich sowie in solchen Bereichen eignet d...

Page 23: ...ggf unter Verwendung eines geeigneten Hebemittels z B Hubwagen bewegt bzw transportiert werden um R ckensch den oder Verletzungen zu vermeiden 2 Griffe an den Produkten sind eine Handhabungshilfe die...

Page 24: ...schriften zur Entsorgung sind zu beachten 4 Falls beim Umgang mit dem Produkt Gefahren oder Betriebsstoffe entstehen die speziell zu entsorgen sind z B regelm ig zu wechselnde K hlmittel oder Motoren...

Page 25: ...ur Le fabricant d cline toute responsabilit en cas d utilisation non conforme du produit Le produit est pr sum faire l objet d une utilisation conforme lorsqu il est utilis conform ment aux consignes...

Page 26: ...ppareil contient une batterie ou un accumulateur Ces pi ces ne peuvent pas tre limin es avec les d chets urbains non tri s mais doivent faire l objet d une collecte s par e Pour plus d informations vo...

Page 27: ...ant Tout obstacle la ventilation doit tre emp ch Le non respect des indications du fabricant peut provoquer des chocs lectriques des incendies et ou des blessures graves pouvant ventuellement entra ne...

Page 28: ...appareil du r seau lectrique Si des produits sans interrupteur d alimentation sont int gr s dans des b tis ou syst mes le dispositif de s paration doit tre report au niveau du syst me 5 Ne jamais uti...

Page 29: ...ons pouvant occasionner ou ayant d j occasionn le cas ch ant des condensations dans ou sur le produit par exemple lorsque celui ci est d plac d un environnement froid dans un environnement chaud L inf...

Page 30: ...et les environnements raccord s directement un r seau d alimentation basse tension qui alimente des b timents r sidentiels Remarque ces appareils peuvent provoquer des perturbations radio lectriques...

Page 31: ...atteries uniquement par le type Rohde Schwarz correspondant voir la liste des pi ces de rechange pour maintenir la s curit du produit 7 Il faut recycler les cellules ou batteries et il est interdit de...

Page 32: ...er des substances dangereuses poussi res contenant des m taux lourds comme par exemple du plomb du b ryllium ou du nickel Le d montage du produit ne doit donc tre effectu que par un personnel qualifi...

Page 33: ...e the batteries See the device manual or data sheet for the exact designation of the charger If the batteries are improperly charged there is a risk of explosion which can cause serious personal injur...

Page 34: ...de Rohde Schwarz Consulte en el manual o en las especificaciones t cnicas del equipo la denominaci n exacta del cargador Si las bater as se cargan de forma incorrecta existe peligro de explosi n lo qu...

Page 35: ...en werden Siehe Handbuch oder Datenblatt des Ger tes f r die genaue Bezeichnung des Ladeger tes Wenn Batterien unsachgem geladen werden besteht Explosionsgefahr was zu schweren Verletzungen bei Person...

Page 36: ...r sont indiqu es dans le manuel ou la fiche technique de l appareil Une recharge incorrecte des batteries peut entra ner des explosions susceptibles de causer des blessures graves 5 Recharger imp rati...

Page 37: ...ument up to date and to be informed about new application notes related to your instrument please send an e mail to the Customer Support Center stating your instrument and your wish We will take care...

Page 38: ...ion 13 3 1 2 Switching the Instrument On and Off 20 3 2 Instrument Tour 21 3 2 1 Front View 21 3 2 2 Top View 22 3 2 3 Left View 23 3 2 4 Right View 24 3 2 5 Rear View 24 3 2 6 Display Overview 24 4 B...

Page 39: ...aging Options with R S License Manager 53 4 5 Identifying Cable Faults 54 4 6 Using Power Meter 59 4 6 1 Using a Power Sensor 62 4 7 Saving and Recalling Results and Settings 66 5 Instrument Functions...

Page 40: ...orming and Configuring Measurements 89 6 2 Evaluating Results 98 7 Cable and Antenna Test Mode 100 7 1 Performing Cable and Antenna Measurements 102 7 1 1 Reflection Measurements 102 7 1 2 Distance to...

Page 41: ...ng the Power vs Time Result Display 150 10 2 1 Determining Pulse Characteristics 151 10 2 2 Selecting the Video Bandwidth 152 10 2 3 Averaging Traces 152 10 2 4 Triggering Measurements 153 10 2 5 Sele...

Page 42: ...ots 220 11 6 6 Configuring Data Capture 222 11 6 7 Configuring the Instrument 223 11 6 8 Status Reporting System 237 12 Menu and Softkey Overview 254 12 1 General Functions 254 12 1 1 General R S Cabl...

Page 43: ...ider ZPH 8 User Manual 1321 0950 02 03 12 4 3 SCALE Parameters 270 12 4 4 DTF CONFIG Parameters 271 12 4 5 SWEEP Parameters 273 12 4 6 TRACE Parameters 273 12 4 7 MARKER Parameters 274 12 4 8 CAL Para...

Page 44: ...software package This manual contains a description of all fea tures of the InstrumentView software package Service manual Describes the performance test for checking the rated specifications module...

Page 45: ...cumentation Convention Description Graphical user interface elements All names of graphical user interface elements on the screen such as dialog boxes menus options buttons and softkeys are enclosed b...

Page 46: ...ouchscreen or a key on the instrument or on a keyboard 1 2 3 Other Conventions Remote commands may include abbreviations to simplify input In the description of such commands all parts that have to be...

Page 47: ...able and antenna analyzer developed to meet demanding customer requirements Offering touchscreen input the analyzer enhances user experience in making measurements fast and easy This user manual conta...

Page 48: ...nstrument must be used in an appropriate manner to prevent electric shock fire personal injury or damage Do not open the instrument casing Read and observe the Basic Safety Instructions delivered as a...

Page 49: ...sign of condensation The instrument is positioned as described in the following sections The ambient temperature does not exceed the range specified in the data sheet Signal levels at the input connec...

Page 50: ...in the original packing material If the instrument needs to be transported or ship ped at a later date you can use the material to protect the control elements and con nectors 3 1 1 2 Accessory List T...

Page 51: ...e support on the back of the R S Cable Rider ZPH Before you turn on the R S Cable Rider ZPH you should insert the lithium ion battery included in the delivery into the battery compartment located at t...

Page 52: ...AC adapter to the DC port on the left side of the R S Cable Rider ZPH item 1 of Figure 3 1 Make sure to fully insert the AC adapter plug into the DC port Depending on the system you need firmly connec...

Page 53: ...ging current is reduced as the power is partially drained by the usage of the R S Cable Rider ZPH During operation in the field you can also charge the battery with the car adapter R S HA Z302 order n...

Page 54: ...ndling The battery has been designed for a specific application Do not use it for any other applications Do not connect batteries in series or parallel as it can cause serious damage Observe correct p...

Page 55: ...oltage be low or even 0 V the battery protection circuit may have gone into a sleep mode In that case reset the battery with an approved charger Transportation No special regulations apply for transpo...

Page 56: ...ication on POWER key LED indication on POWER key Descriptions Green LED Instrument is in operation mode Blue LED Instrument is in switch off mode with a fully charged battery A blink ing blue LED indi...

Page 57: ...iption of the keys see R S Cable Rider ZPH user manual Instrument damage caused by cleaning agents Cleaning agents contain substances that may damage the instrument For example cleaning agents that co...

Page 58: ...ever exceed the value specified on the housing Risk of instrument damage Make sure not to overload the RF input and keep within the maximum allowed sig nal levels Refer to the datasheet for the maximu...

Page 59: ...to connect a computer for remote control of the instrument and transfer data in both directions 3 2 5 Rear View The micro SD card slot is located behind the battery compartment of the R S Cable Rider...

Page 60: ...ew Risk of touchscreen damage during operation Never touch the screen with ball point pens or other pointed objects with sharp edges It is recommended that you operate the touchscreen by finger only A...

Page 61: ...ng and Recalling Results and Settings 66 4 1 Screen Layout and Elements The following figure shows the screen layout in the cable and antenna test operating mode Screen layouts that show specifics for...

Page 62: ...nfiguration overview 29 Currently selected softkey function 30 Available softkey function 4 1 1 Title Bar The Title bar is located at the top of the screen layout It is used to display static content...

Page 63: ...Measurement trace window Table 4 1 Selected marker Selected marker in the Measurement result view Selected marker in the Measurement trace win dow Note There is a blue frame around the selected marker...

Page 64: ...rameter view to adjust the configurations of the hardware settings See details of each of the parameter in Chapter 7 2 2 Config uring the Horizontal Axis on page 117 and Chapter 7 2 3 Configuring the...

Page 65: ...more configuration options used in the measurement Configuration overview is operation mode depend ent See Chapter 4 1 4 1 Configuration Overview on page 30 4 1 4 1 Configuration Overview This is a d...

Page 66: ...enna Measurements on page 102 Select Stimulus to configure the parameters related to the horizon tal axis of the trace window See Chapter 7 2 2 Configuring the Horizontal Axis on page 117 Select Cable...

Page 67: ...Measurement Points on page 123 Select Distance to configure the cable length and unit used to determine the cable length See Chapter 7 2 2 2 Setting the Start and Stop Distance for DTF Measurements o...

Page 68: ...select the Auto Accessory Detection item A drop down menu to select the accessory detection opens 2 Set the Auto Accessory Detection to On When this feature is on the name of the connected accessory...

Page 69: ...lly adjusted when the GPS receiver is enabled and a fix connection with enough satellites is established The Instrument Setup dialog box provides all settings necessary to configure the GPS receiver E...

Page 70: ...lite lock shown in the title bar is illustrated as follows indicates that the GPS receiver is enabled and that there is a fix connection with enough satellites for the GPS receiver to provide the coor...

Page 71: ...th the rotary knob After you have entered the time the R S Cable Rider ZPH verifies the validity of the time If it is not a valid time it sets to the next valid time Selecting the time zone 1 In the I...

Page 72: ...guese Korean Traditional Chinese 1 In the Instrument Setup dialog box select the Language item A drop down menu opens to select the language 2 Select one of the languages from the drop down menu 3 Reb...

Page 73: ...ess of the display depends on the intensity of the backlight To strike a balance between battery operating time and screen display quality set the backlight intensity to the minimum brightness needed...

Page 74: ...lay b Black White selects monochrome display c Printer Friendly inverts the colors Adjusting the keyboard backlight 1 In the Instrument Setup dialog box select the Keyboard Backlight item 2 Enter the...

Page 75: ...dio output of the system Setting the key click volume The key click volume sets the volume of the sound that the R S Cable Rider ZPH pro duces when you press a key or select a softkey 1 In the Instrum...

Page 76: ...nd every time it detects an overload 4 2 7 Configuring Power Supply The Current Power Source shows the source that the R S Cable Rider ZPH is pow ered by When you are using the battery to power up the...

Page 77: ...e selected Once the R S Cable Rider ZPH beeps once if the battery runs out of power For a continuous beep select Repetitive 3 Select Off to turn off the beeper 4 2 8 Performing Default Calibration Fac...

Page 78: ...cy Last Calibration and Last Cal Kit information 4 2 9 Configuring Calibration Kit Model The calibration kit setting loads the selected calibration kit model from the file manager For a list of suppor...

Page 79: ...operating mode This default setup allows you to define the instrument with a new configuration based on a defined measurement parameter without using parameters from a previous mea surement unintentio...

Page 80: ...ftware properly You can set up a connection between the R S Cable Rider ZPH and R S Instrument View either via its LAN port or its mini USB port You have to install the R S InstrumentView software on...

Page 81: ...A drop down menu opens to select the DHCP state 2 Select DHCP to on or off as required Setting an IP address and subnet mask To establish a connection the PC and the R S Cable Rider ZPH have to be in...

Page 82: ...1 10 IP address for R S Cable Rider ZPH 192 168 1 20 IP address 1 Identify the IP address of your PC i e in the Microsoft Windows TCP IP Proper ties 2 In the Instrument Settings dialog box select the...

Page 83: ...new network connection 4 Specify a name for the new network connection e g R S Cable Rider ZPH 5 Enter the IP address for the R S Cable Rider ZPH in this case 192 168 1 20 6 Confirm the entry with th...

Page 84: ...LAN Connection on page 45 After setting up the R S Cable Rider ZPH configure the R S InstrumentView software with the assigned IP address as described in Configuring the R S InstrumentView software p...

Page 85: ...vely you can connect the R S Cable Rider ZPH to the PC with a USB cable The mini USB interface is located behind a protective cap on the right side of the R S Cable Rider ZPH When you connect the R S...

Page 86: ...measurement tasks you can equip the R S Cable Rider ZPH with various firmware options 4 4 1 Enabling Options To enable options you have to enter a key code The key code is based on the unique serial n...

Page 87: ...talla tion successful If you have entered an incorrect code the instrument displays a message invalid key code 6 Enter the correct code again 4 4 2 Checking Options In the Setup menu the R S Cable Rid...

Page 88: ...License Manager In this part of the R S License Manager you can install and activate licenses on the R S Cable Rider ZPH This page features three areas The first area shows the details of the connect...

Page 89: ...s work in combination with several device IDs However you have to unregi ster it on one device before you can use it on another Move Portable License Follow this link if you want to move a portable li...

Page 90: ...2 RF cable 3 Calibration standard 4 Test cable DUT Connect the RF test cable to the RF input of the R S Cable Rider ZPH You should use the RF cable Otherwise measurement results may be invalid Starti...

Page 91: ...fixed at 10 kHz 1 Press the FREQ DIST key 2 Select the DTF Center Freq softkey The R S Cable Rider ZPH opens an input field to specify the center frequency 3 Enter the center frequency you required Sp...

Page 92: ...t results the cable should be specified 20 to 50 longer than the actual cable length Calibrating the test setup Using the calibration kit R S FSH Z28 or R S FSH Z29 the R S Cable Rider ZPH performs a...

Page 93: ...reflection measurement for example to test impedance matching Using markers The R S Cable Rider ZPH uses markers to read out signal levels and frequencies Markers are always positioned on the trace Bo...

Page 94: ...ss for any particular frequency 4 6 Using Power Meter R S Cable Rider ZPH option R S ZPH K19 order number 1321 0409 02 option is required to operate the R S Cable Rider ZPH in the power meter mode Equ...

Page 95: ...Rider ZPH provides a sig nal source which you can use to perform a cable loss measurement in DUT See Acti vating the signal source on page 61 Test setup A typical setup before power meter measurement...

Page 96: ...r ZPH transfers the new frequency to the internal power meter which then corrects the measured power readings Activating the signal source The R S Cable Rider ZPH comes with a built in signal source w...

Page 97: ...connector allows you to control the power sensor and supplies it with power For more information see USB type A connector on page 23 4 6 1 1 Measuring the Power with a Power Sensor For more informatio...

Page 98: ...f no power sensor has been connected or is not connected appropriately the R S Cable Rider ZPH shows nothing If there are communication problems between the R S Cable Rider ZPH and the power sensor th...

Page 99: ...he new frequency to the power sensor which then corrects the measured power readings 4 6 1 2 Measuring Power and Return Loss With the directional power sensors R S FSH Z14 and R S FSH Z44 you can mea...

Page 100: ...sensors for the R S Cable Rider ZPH have an asymmetrical design Hence you have to insert them into the test setup in such a way that the Forward arrow 1 2 on the sensor points toward the load in the...

Page 101: ...flash drive takes precedent over SD card as a storage device If both storage devices are not connected the internal memory of the instrument is used for storage The R S Cable Rider ZPH can store measu...

Page 102: ...in the user interaction with R S Cable Rider ZPH special touchscreen gestures are introduced The following illustra ted the list of special gestures that R S Cable Rider ZPH provides Change Center Fr...

Page 103: ...or down vertically in the trace window to adjust the reference level of the spectrum measurement Alternatively select the REF button in the Parameter View to adjust the reference level or press the S...

Page 104: ...m measurement or press the FREQ DIST key on the front panel and select the Span softkey label for adjustment 5 1 4 Add Marker Double tap in the trace window to create a new marker on the spectrum meas...

Page 105: ...er icon to change the marker position in the trace window Alternatively select the marker label in the Measurement Result View to adjust the marker position on the spectrum measurement or press the MA...

Page 106: ...m measure ment Alternatively press the MARKER key on the front panel and select the Delete Marker from the softkey label to delete all markers from the spectrum measurement 5 1 7 Hide or Unhide Measur...

Page 107: ...or right direction in the trace window to preview the screenshot Alternatively select the Prev or Next softkey to preview the screenshot 5 1 9 Skip Wizard Measurement Swipe horizontally to the left d...

Page 108: ...reen keyboard display can be switched on and off using the on screen key board icon highlighted at the top right hand corner 5 3 Front Panel Keys The following chapter illustrates the function of the...

Page 109: ...keys Descriptions PRESET Resets the instrument to the default state SETUP Provides basic instrument configuration functions Date time display audio and regional configuration Battery low indicator LA...

Page 110: ...on page 89 DTF Config Configure the cable model used in the measurement Display DTF List with reference to the DTF List Threshold setting See Chapter 7 2 Configuring Cable and Antenna Tests on page 11...

Page 111: ...act like an enter key function CANCEL key Closes all kinds of dialog boxes if the edit mode is not active Quits the edit mode if the edit mode is active In dialog boxes that contain a Cancel button i...

Page 112: ...R S Cable Rider ZPH resets all settings to their default state Restoring the default configuration has the advantage that old settings do not affect measurements The default setup is specific to the o...

Page 113: ...u press PRESET 7 Select Discard Calibration Data to define usage of calibration data after preset A drop down menu opens to select the usage of calibration data 8 Select On to apply calibration data o...

Page 114: ...ectory item 4 Select On to activate the customize folder directory or Off to use the default storage device in the R S Cable Rider ZPH See Data storage devices on page 84 5 Define the folder name in t...

Page 115: ...file format of screenshots is either png or jpg depending on your configuration in the User Preference menu 1 Press the SETUP key 2 Select the User Preference softkey 3 Select the Default Filename an...

Page 116: ...a sets available in its internal memory or an external storage device Datasets The R S Cable Rider ZPH supports various types of datasets The instructions below primarily describe the management of da...

Page 117: ...er to the documenta tion of the R S InstrumentView software package Data synchronization The R S InstrumentView features data synchronization that matches the data availa ble between the R S Cable Rid...

Page 118: ...sets 83 Restoring Datasets 86 Deleting Datasets 88 5 8 1 Saving Datasets The R S Cable Rider ZPH allows you to save the data that is analyzed at any time 1 Press the SAVE RECALL key 2 Select the Save...

Page 119: ...rage The folder structure shows all the available data storage devices Possible storage devices are the internal memory of the R S Cable Rider ZPH micro SD card or USB flash drive The default storage...

Page 120: ...der ZPH provides an alternative and more convenient way to save dataset 1 Press the SETUP key 2 Select the User Preference softkey 3 Configure the Default Filename Filename Counter Starts at and Captu...

Page 121: ...surement results with the recall function of the R S Cable Rider ZPH This function also provides easy access to previous measurement settings so that you do not have to set up the R S Cable Rider ZPH...

Page 122: ...onding mea surement settings During preview the R S Cable Rider ZPH does not yet activate the measurement settings of that dataset 1 Press the SAVE RECALL key 2 Select the File Manager softkey 3 Brows...

Page 123: ...Select the Edit softkey The R S Cable Rider ZPH displays a submenu for selection 5 Select the Delete menu item to delete the files or file directories Before deleting the R S Cable Rider ZPH shows a w...

Page 124: ...for measurements in all the operating modes For details on the individual measurements you can perform with the wizard refer to the corresponding chapters Chapter 7 Cable and Antenna Test Mode on pag...

Page 125: ...e measurement wiz ard set 3 Select the desired measurement wizard set from the file manager 4 Select the Load softkey to confirm the selection The R S Cable Rider ZPH loads the measurement wizard set...

Page 126: ...e measurement sequence as defined with the R S InstrumentView soft ware package The field allows you to reduce the number of individual measurements and perform only those measurements that are necess...

Page 127: ...der ZPH software but can also change the cable model on short notice if necessary See Chapter 7 2 1 3 Creating a Cable Model on page 115 Clear Cable Model Deactivates the currently active cable model...

Page 128: ...bration data folder to the measure ment configurations and required calibration methods in the measurement sequence If the R S Cable Rider ZPH has already been calibrated for a particular configura ti...

Page 129: ...on page 93 After having successfully calibrated the R S Cable Rider ZPH it starts to go through the measurements that are part of the measurement wizard set The sequence of the measurements is define...

Page 130: ...er ZPH prompts you to save measurement result and exit the wizard measurement Select the Interrupt softkey The R S Cable Rider ZPH opens the wizard interrupt dialog box There are three selections in t...

Page 131: ...ard message box Select the Continue softkey to proceed to the next measurement step if any Note Changing cable characteristics If necessary you can define different cable characteristics cable model a...

Page 132: ...uence Skip Skip a single measurement step and continue the subsequent measurement step Skipping individual measurements is possible when you turn on Allow to skip measurements and finish wizard sequen...

Page 133: ...PH includes the name of the measurement as defined in the wizard dialog or R S InstrumentView All result files that belong to a measurement set are stored in the same directory The directory is named...

Page 134: ...that you want to include in the report 3 Select the reporting parameters checkmarks that you want to show in the report e g checkmark to show marker data 4 Select the Generate button to create the re...

Page 135: ...defects in the system that cause a deterioration of the transmission quality See Figure 7 1 for the typical defects in a transmission sys tem Figure 7 1 Typical defects in a transmission system The R...

Page 136: ...1 Connect the RF cable to the RF input 2 Connect the test cable to the RF cable By default the R S Cable Rider ZPH is in the CAT mode after you have turned it on To switch to the CAT mode from another...

Page 137: ...ere is something wrong in the system A reference signal is transmitted along the transmission system and this signal is reflected back by a discontinuity along the transmission line usually by an impe...

Page 138: ...s the degree of the fault in dB From this information you can determine the component that has the fault and its seriousness In order to determine the distance to a cable fault the R S Cable Rider ZPH...

Page 139: ...ain The main DTF measurement is displayed in the upper screen window time domain and the reflection measurement is displayed in the lower screen window fre quency domain The Y axis on both screen wind...

Page 140: ...measurement format When the Short Open 2 format is selected additional calibration steps are required to terminate the end of the cable under test with a short and open before the cable loss measurem...

Page 141: ...cable loss over its entire frequency range Figure 7 6 shows the typical results of a cable loss measurement with a steadily declin ing loss in amplitude Figure 7 6 1 port cable loss measurement 7 1 4...

Page 142: ...nts of the impedance at the marker position The imaginary component is converted to inductance or capacitance Marker frequency and sign are taken into account G jB Shows the real and imaginary compone...

Page 143: ...item The R S Cable Rider ZPH opens an input field to select the reference impedance 4 Enter the reference impedance you require The value is from 1 m to 10 k 7 1 5 Phase Measurement The phase measure...

Page 144: ...ds You will need one of the available calibration standards R S FSH Z28 Z29 order number 1300 7810 03 1300 7610 03 or calibration kit R S ZN Z103 order number 3586 9392 00 To successfully calibrate th...

Page 145: ...measurements on that port The calibration routine requires the calibration standards open short and load to be connected one after another Easy 1 Port RF input port is calibrated for measurements on t...

Page 146: ...splayed the message Calibration unit detected 2 Connect the calibration kit R S ZN Z103 to RF OUT REFLECTION port of the R S Cable Rider ZPH 3 Select Continue to start the calibration The R S Cable Ri...

Page 147: ...oftkey The R S Cable Rider ZPH opens a file manager dialog to select the calibration kit model 3 Select the calibration kit model that you require The R S Cable Rider ZPH loads the selected calibratio...

Page 148: ...he Short of the calibration standard to the RF OUT REFLECTION port 8 Select the Continue softkey to start the calibration The R S Cable Rider ZPH calibrates the Short 9 Next the R S Cable Rider ZPH pr...

Page 149: ...you can use without doing anything If you want to test a cable that is not listed you can also define cable models manually either directly on the R S Cable Rider ZPH or with the Cable Model Editor of...

Page 150: ...InstrumentView is delivered with the R S Cable Rider ZPH With this software you can define a cable model on a com puter and then transfer it to the instrument For more information see Chapter 5 8 Mana...

Page 151: ...el 7 2 1 4 Working with a DTF List DTF Meas Overview DTF List and DTF Threshold are only available in the dis tance to fault DTF measurement The DTF list shows the results of the distance to fault mea...

Page 152: ...DTF Center Freq DTF Span settings in DTF measurement are coupled to frequency Start Stop Center Span settings in other measurements in CAT mode When set Off the frequency start stop span settings are...

Page 153: ...that you can set is 10 MHz Setting the displayed frequency range After you have selected the span you can set a particular frequency range whose results the R S Cable Rider ZPH displays In the default...

Page 154: ...able for further analysis 1 Press the FREQ DIST key 2 Select the Start Dist or Stop Dist softkey The R S Cable Rider ZPH opens an input field to specify the start distance or stop distance 3 Enter the...

Page 155: ...the frequency range independent of span and center frequency 4 Select the Start softkey and enter a start frequency 5 Select the Stop softkey and enter a stop frequency 7 2 2 4 Selecting a Signal Sta...

Page 156: ...change the position of the reference line 1 Press the SCALE key 2 Select the REF softkey The R S Cable Rider ZPH opens an input field to specify the reference level 3 Enter the reference level you req...

Page 157: ...ertical axis to display a scale from 0 dB to 50 dB 7 2 3 4 Setting the reference position The reference position defines the position of the reference line in the diagram The reference position is a l...

Page 158: ...he next depends on the currently set fre quency range span divided by number of points However the measurement points are spread evenly over the selected frequency range The number of points also defi...

Page 159: ...ce Mode softkey The R S Cable Rider ZPH opens a submenu to select the trace mode 3 Select the Clear Write or Average menu item 7 3 1 1 Working with Memory Traces The R S Cable Rider ZPH can transfer a...

Page 160: ...s the TRACE key 2 Select the Trace Math softkey The R S Cable Rider ZPH opens a submenu to select the trace math operation 3 Select the Trace Memory or Memory Trace menu item The R S Cable Rider ZPH c...

Page 161: ...marker is shown by a vertical line which extends from the top to the bottom of the measurement diagram The marker list above the diagram area shows the exact coordinates of all markers in use The pos...

Page 162: ...ace window is always the main marker the following markers added on the trace window are the delta markers Tab and drag on the marker icon to change the marker position See Chapter 5 1 4 Add Marker on...

Page 163: ...u can perform the following actions Enter a delta marker position with the number keys and confirm the entry with one of the unit keys Change the delta marker position with the rotary knob 3 Confirm t...

Page 164: ...er or the delta marker on the highest level value of the trace Set To Next Peak The Next Peak function places the active marker or delta marker on the next high est level value of the trace relative t...

Page 165: ...S Cable Rider ZPH deletes all markers and delta markers View List You can hide or un hide the display of the Measurement Result View Special touchscreen gesture Swipe up or down vertically on the Meas...

Page 166: ...al position e g frequency the other one the vertical posi tion With the R S Cable Rider ZPH you can build limit lines that consist of up to 1000 points Values that define the horizontal characteristic...

Page 167: ...u need to decide if you want to use it as an upper or lower limit line In case of upper limit lines the R S Cable Rider ZPH checks if the sig nal is above the limit line In case of lower limit lines t...

Page 168: ...t included in this report Using a display line you can use a line and are able to create a measurement report at the same time regardless if any limits have been violated or not The process of turning...

Page 169: ...frequency range defined by the limit line not the span Audio signal You can turn the acoustic signal that sounds in case of a limit violation on and off Select the Audio Beep menu item Once selected t...

Page 170: ...er meter It then always measures the power of the whole signal in the frequency range of the power sensor In most cases the signal shape has no effect on the measurement The R S Cable Rider ZPH suppor...

Page 171: ...ml 1 Press the MODE key 2 Select the Power Meter softkey The R S Cable Rider ZPH activates the mode for power measurements Figure 8 1 Screen layout of the power meter mode 1 Connected power sensor mod...

Page 172: ...een connected or it is not connected appropriately the R S Cable Rider ZPH shows nothing If there are communication problems between the R S Cable Rider ZPH and the power sensor the R S Cable Rider ZP...

Page 173: ...the frequency of the signal The R S Cable Rider ZPH transfers the new frequency to the power sensor which then corrects the measured power readings Zeroing the power sensor Offset voltages and current...

Page 174: ...level readout as the reference level 2 Select the To Ref softkey The R S Cable Rider ZPH sets the current result as the reference level It then displays the measured level relative to the reference le...

Page 175: ...CALE key 2 Select the Ref Offset softkey The entry box for the reference offset opens 3 Enter the offset you require The offset is taken into account in the power or level display 8 2 Using a Directio...

Page 176: ...H controls and powers the directional power sensors via a special interface on the top of the instrument Connect the power sensor cable via the USB to binder adapter to the USB port of R S Cable Rider...

Page 177: ...cy To get the most accurate results you should synchronize the frequency to that of the signal Note that the R S Cable Rider ZPH maintains the center frequency that you have set in another operating m...

Page 178: ...cting a standard To ensure that true results are output when measuring modulated signals the R S Cable Rider ZPH offers the possibility of taking correction values into account for sev eral common tel...

Page 179: ...nal coupler or an attenuator has to be connected ahead of the power sensor In such cases the coupling attenuation of the directional coupler or the attenuation value of the attenuator are entered as p...

Page 180: ...he DUT directly to the R S Cable Rider ZPH to perform power measurements 1 Power meter mode 2 Readout of the measured power 3 Reference for relative power measurements 4 Power offset 5 Analog readout...

Page 181: ...Using the Internal Power Meter R S Cable Rider ZPH 146 User Manual 1321 0950 02 03 For more information see Chapter 8 1 2 Performing and Configuring Measurements on page 138...

Page 182: ...the wideband power sensor 1 Press the MODE key 2 Select the Power Meter softkey The R S Cable Rider ZPH activates the mode for power measurements Connecting the power sensor You can connect the wideba...

Page 183: ...stics 3 Reference for relative power measurements 4 Power offset 5 Video bandwidth 6 Scale of the x axis 7 Diagram showing the pulse characteristics in a graphical format trace display 8 Measurement f...

Page 184: ...from the beginning of one pulse to the beginning of the next pulse Pulse Off Time Time in the displayed trace that is not occupied by the pulse Rise Time Time required for the pulse to transition from...

Page 185: ...dia gram Trace Min Minimum power of the signal displayed in the dia gram Positive Overshoot Height of the local maximum after a rising edge divided by the pulse amplitude The result is a per centage...

Page 186: ...the measurement result with that of a thermal power sensor Peak Assumes that the peak power of the pulse is also the top level of the pulse The top and base power is also the reference point for the...

Page 187: ...nt noise Using a small video bandwidth thus increases the measurement sensitivity and allows you to accurately determine the pulse peak power even for weak pulses Reducing the video bandwidth also inc...

Page 188: ...hen the actual measurement starts is either a rising slope in the signal or a falling slope Positive or Negative trigger 1 Press the SWEEP key 2 Select the Trigger softkey 3 Select either the Positive...

Page 189: ...ALE key 2 Select the Unit softkey 3 Select the unit you prefer The R S Cable Rider ZPH adjusts the y axis accordingly 10 2 6 Scaling the Y Axis For more information see Chapter 7 2 3 Configuring the V...

Page 190: ...IEEE 488 2 and aims at the standardization of device specific commands error handling and the status registers The tutorial Automatic Measurement Control A tutorial on SCPI and IEEE 488 2 from John M...

Page 191: ...VXI 11 Instrument access via VXI 11 is usually achieved from high level programming plat forms by using VISA as an intermediate abstraction layer VISA encapsulates the low level VXI 11 LAN or USB fun...

Page 192: ...ed via open network computing ONC remote procedure calls RPC With XDR VXI 11 legal RPC messages are known as VXI 11 standard Based on this standard messages are exchanged between the controller and th...

Page 193: ...strument for exclusive access This regulates access to the instrument of several controllers 11 2 Setting Up the Remote Control Connection 11 2 1 Preparing for Remote Control The short and simple oper...

Page 194: ...vi Cmd Len Cmd retCount set reference level to 10 dBm viclose vi viclose default RM The instrument now performs a sweep in the frequency range of 95 MHz to 105 MHz Changing the IP Address In order to...

Page 195: ...ter PRO GRAM MESSAGE TERMINATOR as defined in IEEE 488 2 or the interface mes sage DCL If the input buffer is full the traffic is stopped and the data received up to then are pro cessed Subsequently t...

Page 196: ...teration in the data set The data set management enters the new values e g frequency into the data set however only passes them on to the hardware when requested by the command recognition This only t...

Page 197: ...CPI is based on standard IEEE 488 2 i e it uses the same syntactic basic elements as well as the common commands defined in this standard Part of the syntax of the device responses is defined with gre...

Page 198: ...ice specific commands are of hierarchical structure The different levels are repre sented by combined headers Headers of the highest level root level have only one key word This key word denotes a com...

Page 199: ...are marked by square brackets in the description The full command length must be recognized by the instrument for reasons of compatibility with the SCPI standard Some commands are considerably shorte...

Page 200: ...cal stroke in parameter definitions indicates alternative possibilities in the sense of or The effect of the command differs depending on which parameter is used Example DISPlay FORMat SINGle SPLit If...

Page 201: ...to the command Entries without suffix are interpreted like entries with the suffix 1 Optional keywords must be specified if they select a function with the suffix Example SYSTem COMMunicate SERial2 BA...

Page 202: ...has to be separated from the header by a white space The type of parameter required for each command and the allowed range of values are specified in the command description Numeric Values 167 Special...

Page 203: ...t A Number NAN represents the value 9 91E37 NAN is only sent as device response This value is not defined Possible causes are the division of zero by zero the subtraction of infinite from infinite and...

Page 204: ...age A program message may consist of one or several commands It is terminated by the program message terminator which is the NL New Line character for LAN and USB connections Several commands in a pro...

Page 205: ...4 Responses to Queries A query is defined for each setting command unless explicitly specified otherwise It is formed by adding a question mark to the associated setting command According to SCPI the...

Page 206: ...should be terminated before other commands can be executed WAI Stops further command process ing until all commands sent before WAI have been executed Sending WAI directly after the command whose pro...

Page 207: ...t up and control basic instrument functions These commands are independent of the operating mode There fore they are listed separately Chapter 11 6 4 File Management on page 215 Chapter 11 6 5 Making...

Page 208: ...of the QUEStionable and the OPERation registers to zero The command does not alter the mask and transition parts of the registers It clears the output buffer Usage Setting only ESE Value Event status...

Page 209: ...een execu ted This bit can be used to initiate a service request The query form writes a 1 into the output buffer as soon as all preceding commands have been executed This is used for command synchron...

Page 210: ...er signal This common command complements the commands of the TRIGger subsystem Usage Event TST Self test query Initiates self tests of the instrument and returns an error code Note If you start a sel...

Page 211: ...valid for other operating modes If a command is available in another mode it is indicated by the list in the respective section List of commands SENSe FREQuency CENTer on page 176 SENSe FREQuency CEN...

Page 212: ...arameters CouplingState CENTerf DIVTen OFF CENTerf Sets the step size equal to the center frequency DIVTen Couples the step size to the span 10 OFF Turns off the coupling manual step size RST DIVTen E...

Page 213: ...nes the stop frequency for measurements in the frequency domain span 0 Parameters StopFrequency Range Depends on the operating mode and is specified in the datasheet RST fmax Default unit GHz Example...

Page 214: ...of the commands for configuring the vertical axis are also valid for other operating modes If a command is available in another mode it is indicated by the list in the respective section List of comm...

Page 215: ...ference level of 10 dB DISPlay 1 2 LOSS REFerence POSition RefPosition This command defines the position of the reference value in the diagram for the cable loss measurement format Each step shifts th...

Page 216: ...REFerence POSition RefPosition This command defines the position of the reference value in the diagram for the magni tude measurement format Each step shifts the reference position one grid line up o...

Page 217: ...cal axis for the magnitude measurement format The numeric suffix at DISPlay is irrelevant for this command Suffix 1 2 1 2 Parameters ScalingType LINear LOGarithmic LINear Selects a linear scale LOGari...

Page 218: ...mat The numeric suffix at DISPlay is irrelevant for this command Suffix 1 2 1 2 Parameters DisplayRange Numeric value in the range from 1 1 to 71 The number you enter is rounded up to the next possibl...

Page 219: ...er of sweep points Triggering Measurements The following commands set up trigger conditions if you are using a trigger for the measurement List of commands TRIGger SEQuence HOLDoff TIME on page 184 TR...

Page 220: ...ger signal 11 6 2 4 Working with Traces The following commands set up the trace and the various functions associated with it e g trace mathematics or the selection of the detector List of commands CAL...

Page 221: ...e This command turns the memory trace on and off The numeric suffix at DISPlay is irrelevant for this command The numeric suffix at TRACe selects the number of the trace Parameters State ON OFF RST OF...

Page 222: ...nd has no effect for data that you send to the R S Cable Rider ZPH The R S Cable Rider ZPH automatically recognizes the data it receives regard less of the format Parameters Format ASCii REAL ASCii Re...

Page 223: ...11 values Each value cor responds to one pixel of a trace The unit depends on the measurement and the unit you have set with UNIT 1 2 POWer Note If you use the auto peak detector the command reads out...

Page 224: ...late 1 2 MARKer 1 6 MAXimum PEAK on page 193 CALCulate 1 2 MARKer 1 6 MAXimum NEXT on page 193 CALCulate 1 2 MARKer 1 6 MINimum PEAK on page 194 CALCulate 1 2 MARKer 1 6 X on page 194 CALCulate 1 2 MA...

Page 225: ...nt trace maximum If necessary the corresponding delta marker is activated first This command is an event and therefore has no RST value and no query The numeric suffix at CALCulate selects the trace T...

Page 226: ...case this value is invalid If necessary the corresponding delta marker is activated first The numeric suffix at CALCulate selects the trace The numeric suffix at DELTamarker selects the deltamarker Pa...

Page 227: ...d reading out the result This is only possible in single sweep mode In spectrum analyzer mode the unit depends on the unit you have set and the scaling of the vertical axis Parameter or measuring func...

Page 228: ...MARKer 1 6 MAXimum PEAK This command positions a marker on the current trace maximum If necessary the corresponding marker is activated first This command is an event and therefore has no RST value an...

Page 229: ...invalid If necessary the corresponding delta marker is activated first The numeric suffix at CALCulate selects the trace The numeric suffix at MARKer selects the marker Parameters FrequencyOrTime Indi...

Page 230: ...seconds for measurements in the time domain Range Maximum span RST is set to the left diagram border when switching on search limits Default unit GHz Example See CALCulate 1 2 MARKer 1 6 X SLIMits 1...

Page 231: ...c suffix at MARKer selects the marker Parameters MarkerPosition Numeric value of the marker position Example INIT CONF OFF CALC MARK2 ON Turns on single sweep mode and marker 2 INIT WAI Starts a sweep...

Page 232: ...for this command The numeric suffix at LIMit selects the limit line Suffix 1 2 1 2 1 2 1 2 Example CALC LIM COMM Queries the description of limit line 1 Usage Query only CALCulate 1 2 LIMit 1 2 DEFine...

Page 233: ...event and therefore has no RST value and no query The numeric suffix at CALCulate is irrelevant for this command The numeric suffix at LIMit selects the limit line Suffix 1 2 1 2 1 2 1 2 Example CALC...

Page 234: ...mand queries the horizontal unit of a limit line This command is a query and therefore has no RST value The numeric suffix at CALCulate is irrelevant for this command The numeric suffix at LIMit selec...

Page 235: ...Culate 1 2 LIMit 1 2 UPPer SELect LimitLine This command selects the upper limit line This command is an event and therefore has no RST value and no query The numeric suffix at CALCulate is irrelevant...

Page 236: ...Defines a threshold of 10 dBm 11 6 2 7 Configuring and Using Measurement Functions This chapter provides information on how to configure one port measurements with the signal source The structure fol...

Page 237: ...List of commands MEASurement 1 2 MODE on page 202 MEASurement 1 2 MODE MeasMode This command selects the measurement mode The numeric suffix at MEASurement is irrelevant for this command Suffix 1 2 1...

Page 238: ...VSWR OFF Turns off the display of the maximum and average VSWR RST OFF Example CALC TRAC VSWR MAX STAT ON Displays the VSWR results MEASurement 1 2 FORMat MeasFormat This command selects the measurem...

Page 239: ...loss in dB Usage Query only CALCulate 1 2 TRACe VSWR AVG RESult This command queries the average VSWR measurement result The command is available when the calculation of the VSWR has been turned on wi...

Page 240: ...nue on page 206 CALibration 1 2 MODE on page 206 CALibration 1 2 STARt on page 207 SYSTem PRESet CALibration DISCard on page 207 CALibration 1 2 ABORt This command aborts calibration The numeric suffi...

Page 241: ...nue the calibration process and finish it successfully The numeric suffix at CALibration is irrelevant for this command This command is a query and therefore has no RST value Suffix 1 2 1 2 Example CA...

Page 242: ...uming calibration Connect Short to port 1 Connect the short to port 1 before resuming calibration Connect Load to port 1 Connect the short to port 1 before resuming calibration Disconnect DUT from por...

Page 243: ...only CALCulate 1 2 TRANsform DTFault PEAK DATA 1 10 This command queries the DTF list The numeric suffix at CALibration is irrelevant for this command and the number suffix at DATA selects an entry i...

Page 244: ...3 Remote Commands of the Power Meter The chapter provides information on remote commands that configure and perform power measurements with the power sensor These commands are available in power meter...

Page 245: ...LCulate 1 2 PMETer RELative MAGNitude on page 210 CALCulate 1 2 PMETer RELative MAGNitude AUTO on page 210 CALCulate 1 2 PMETer RELative MAGNitude OFFSet on page 211 UNIT 1 2 PMETer POWer on page 211...

Page 246: ...2 Not available Table 11 5 Power measurement with R S FSH Z14 and R S FSH Z44 Unit 1 Forward power Unit 2 Reflected power Suffix 1 2 1 2 Parameters Unit DBM DB WATT VSWR W DUVM DBUV W_M2 V_M Note on...

Page 247: ...UTO on page 212 CALibration 1 2 PMETer ZERO AUTO ONCE This command starts to zero the power sensor This command is an event and therefore has no RST value and no query The numeric suffix at CALibratio...

Page 248: ...tions SENSe PMETer DETector FUNCtion on page 212 CALCulate 1 2 PMETer PRESet STATe on page 214 CALCulate 1 2 PMETer PRESet SELect on page 214 List of commands CALCulate 1 2 PMETer PRESet BANDwidth VID...

Page 249: ...r sensor Note that the selection of a standard is available only for the power sensors R S FSH Z1 Z14 Z18 and Z 44 List of commands CALCulate 1 2 PMETer PRESet STATe on page 214 CALCulate 1 2 PMETer P...

Page 250: ...IT on page 218 MMEMory LOAD STATe on page 218 MMEMory MDIRectory on page 219 MMEMory MOVE on page 219 MMEMory RDIRectory on page 219 MMEMory STORe STATe on page 220 SYSTem SET LOCK on page 220 SYSTem...

Page 251: ...arameters SourceFile String containing the path and filename of the source file Destination String containing the path and name of the destination file Example MMEM COPY Public Standards cdmaOne obwst...

Page 252: ...bytes 2 digits 20 indicates the number of subsequent binary data bytes Contents of the file store 20 binary bytes characters to the file MMEM DATA Public User Testfile txt Transfers the contents of t...

Page 253: ...file The sequence of entry is hour minute second Parameters FileName String containing the path and filename Hour Range 0 to 23 Minutes Range 0 to 59 Seconds Range 0 to 59 Example MMEM FILE TIME Publi...

Page 254: ...e filename specified there This command is an event and therefore has no RST value and no query Parameters SourceFile String containing the path and filename of the source file Destination String cont...

Page 255: ...nd adds write protection to a dataset Parameters arg0 String containing the path and name of the dataset Example SYST SET LOCK Dataset001 set Protects the file Dataset001 set from overwriting SYSTem S...

Page 256: ...stores a screenshot of the current screen in a file Test png Usage Setting only HCOPy DEVice LANGuage Format This command selects the file format for screenshots Parameters Format PNG JPG Example HCOP...

Page 257: ...commands configure the data capture These commands are independent from the operating mode List of commands SYSTem CAPTure COUNter on page 222 SYSTem CAPTure DATaset STATe on page 222 SYSTem CAPTure...

Page 258: ...ent mea surement SYSTem CAPTure SCReen STATe State This command includes or excludes screenshots from the data capture Parameters State ON OFF RST ON Example SYST CAPT SCR ON Includes screenshots into...

Page 259: ...ects the operating mode Parameters OperatingMode SANalyzer PM ADEModulation RECeiver ACT SANalyzer spectrum analyzer PM power meter ADEModulation analog modulation RECeiver receiver MAPS map ACT cable...

Page 260: ...ies the altitude of the current position of the R S Cable Rider ZPH Example SYST POS ALT Return value would be for example 554 1 Usage Query only SYSTem POSition GPS CONNected This command queries if...

Page 261: ...nnection between the R S Cable Rider ZPH and a GPS signal transmitter is established Parameters State ON OFF RST OFF Example SYST POS GPS ON Activates the GPS receiver SYSTem POSition LATitude This co...

Page 262: ...page 227 DISPlay CMAP on page 227 DISPlay CMAP DEFault on page 228 DISPlay DATE FORMat on page 228 DISPlay BRIGhtness Brightness This command sets the brightness of the display backlight Parameters B...

Page 263: ...FORM DDMMyyyy 11 6 7 4 Audio Settings This chapter describes all commands to control the audio functions of the R S Cable Rider ZPH List of commands SYSTem AUDio VOLume on page 228 SYSTem BEEPer VOLum...

Page 264: ...nicate SOCKet ADDRess on page 230 SYSTem COMMunicate SOCKet DHCP STATe on page 230 SYSTem COMMunicate SOCKet PORT on page 230 SYSTem COMMunicate LAN ETHernet This command queries the MAC address of th...

Page 265: ...s State ON OFF RST ON Example SYST COMM SOCK DHCP ON Activates DHCP SYSTem COMMunicate SOCKet PORT Port This command sets the port number for the connection Parameters Port Port number RST 5555 Exampl...

Page 266: ...UTdown on page 236 SYSTem TZONee on page 237 SYSTem VERSion on page 237 INPut IMPedance PAD PadType This command selects the matching pad connected to the R S Cable Rider ZPH Parameters PadType RAM RA...

Page 267: ...urns automatic detection of connected measurement accessories on and off Parameters State ON OFF Example SYST ACC AUTO ON Turns on automatic accessory detection SYSTem BNC MODE BNCUsage This command c...

Page 268: ...no RST value Example SYST ERR ALL Usage Query only SYSTem ERRor CODE NEXT This command queries the code of the next error in the error queue This command is a query and therefore has no RST value Exam...

Page 269: ...ZPH version SYSTem HELP HEADers This command returns a list of all available remote control commands This command is a query and therefore no RST value Example SYST HELP HEAD Returns the syntax of all...

Page 270: ...uery only SYSTem POWer STATus This command queries the remaining power of the battery This command is a query and therefore has no RST value Example SYST POW STAT Usage Query only SYSTem PRESet Resets...

Page 271: ...of the user defined preset state SYSTem REBoot This command initiates a reboot of the R S Cable Rider ZPH This command is an event and therefore has no RST value and no query Example SYST REB Restarts...

Page 272: ...The register status byte STB defined in IEEE 488 2 and its associated mask register service request enable SRE form the uppermost level The STB receives its information from the standard event status...

Page 273: ...0 the EVENt bit is not set This part can be written into and read at will Its contents is not affected by reading NTRansition part The Negative TRansition part also acts as an edge detector When a bi...

Page 274: ...Its contents is not affected by reading Sum bit As indicated above the sum bit is obtained from the EVENt and ENABle part for each register The result is then entered into a bit of the CONDition part...

Page 275: ...l feature is that bit six acts as the sum bit of the remaining bits of the status byte The STATUS BYTE is read using the command STB or a serial poll The STB is linked to the SRE The latter correspond...

Page 276: ...set if one of the bits in the event status register is set and enabled in the event status enable register Setting of this bit indicates a serious error which can be specified in greater detail by pol...

Page 277: ...mmand is received which is undefined or syntactically incorrect An error message with a number between 100 and 200 which denotes the error in greater detail is entered into the error queue 6 Not used...

Page 278: ...d 10 CALibration The bit is set if a measurement is performed unaligned label UNCAL 11 to 14 Not used 15 This bit is always 0 STATus QUEStionable FREQuency Register This register contains information...

Page 279: ...ment results exceeding or falling short of expected values It can be read using the commands STATus QUEStionable SYNC CONDition and STATus QUEStionable SYNC EVENt 11 6 8 5 Application of the Status Re...

Page 280: ...here to SCPI or IEEE 488 2 The VISUAL BASIC command for executing a serial poll is IBRSP Serial poll is mainly used to obtain a fast overview of the state of several instruments connected to the contr...

Page 281: ...ar Selected Device Clear RST or SYS Tem PRE Set STA Tus PRESet CLS Effect 0 1 Clear STB ESR yes yes Clear SRE ESE yes Clear PPE yes Clear EVENt parts of the registers yes yes Clear ENABle parts of all...

Page 282: ...Tus QUEStionable FREQuency EVENt on page 249 STATus QUEStionable LIMit EVENt on page 249 STATus QUEStionable POWer EVENt on page 249 STATus QUEStionable CONDition on page 250 STATus QUEStionable FREQu...

Page 283: ...ueue is empty the error number 0 no error is returned This command is identical with the command SYSTem ERRor Example STAT QUE Usage Query only STATus OPERation EVENt This command reads out the EVENt...

Page 284: ...ciated bit of the corresponding EVENt register Parameters DecimalValue Range 0 to 65535 STATus QUEStionable EVENt This command reads out the EVENt section of the QUEStionable register The command at t...

Page 285: ...r The command does not delete the contents of the EVENt section Usage Query only STATus QUEStionable ENABle DecimalValue This command controls the ENABle part of the QUEStionable register The ENABle p...

Page 286: ...1 in the enable register and its associated event bit transitions to true a positive transition occurs in the summary bit reported to the next higher level Parameters DecimalValue Range 0 to 65535 STA...

Page 287: ...ng EVENt register Parameters DecimalValue Range 0 to 65535 Example STAT QUES NTR 65535 STATus QUEStionable PTRansition DecimalValue This command control the Positive TRansition part of the QUEStionabl...

Page 288: ...EVENt register Parameters DecimalValue Range 0 to 65535 STATus QUEStionable POWer PTRansition DecimalValue This command control the Positive TRansition part of the QUEStionable register Setting a bit...

Page 289: ...l R S Cable Rider ZPH Setup 254 File Management 258 Operating Mode Selection 259 12 1 1 General R S Cable Rider ZPH Setup The SETUP key opens the setup menu that contains functionality to set up the R...

Page 290: ...ty Factor Loss Amplitude Reference Level Linear Scale On Off Scale 50 dB Analysis Trace Mode Clear Write Average Avg Count Points Distance Start Dist Stop Dist Length Unit Meter Feet Instrument Setup...

Page 291: ...gth Unit Feet Meter Display Display Backlight 0 100 Display Color Scheme Color Black White Printer Friendly Keyboard Backlight 0 100 Keyboard Backlight Delay 1 10 s Touch Interface On Off Audio Key Cl...

Page 292: ...d Calibration Data On Off Working Directory User working directory On Off Working directory Public Capture Capture Screen On Off Capture Dataset On Off Default Filename Measurement Filename Counter St...

Page 293: ...vice ID Install Option Installation Status Exit 12 1 2 File Management The SAVE RECALL key opens the file manager that contains functionality to manage datasets and other files Softkey Menu or Dialog...

Page 294: ...ers selection Power Meter See Chapter 8 Power Meter on page 135 Cable Antenna See Chapter 12 4 1 Cable Antenna Mea surements on page 269 12 2 Functions of the Power Meter This section contains all sof...

Page 295: ...Long 1 If Freq Mode see Frequency Parameters is set to Channel the softkey displays Channel Directional Power Meter with R S FSH Z14 R S FZH Z44 Softkey Menu or Dialog items Parameters Parameters sel...

Page 296: ...Channel 2 Only for R S FSH Z44 Power Meter Softkey Menu or Dialog items Parameters Parameters selection SigGenOn Freq1 Unit dBm W dB Rel To Ref 1 If Freq Mode see Frequency Parameters is set to Chann...

Page 297: ...m Integration Peak Ref Power Config Low Ref Power 0 100 High Ref Power 0 100 Ref Power 0 100 Set to Default Related to Power Related to Voltage 12 2 2 Frequency Parameters The FREQ DIST key opens a me...

Page 298: ...ns functionality to configure level parameters Table 12 4 Power Meter Directional Power Meter Channel Power Meter Softkey Menu or Dialog items Parameters Parameters selection Unit dBm W dB Rel Offset...

Page 299: ...t Normal Long Table 12 7 Pulse Power Measurement Softkey Menu or Dialog items Parameters Parameters selection Trace Time 52 us to 1 s Conf Meas Single Meas Trigger Free Run Positive Negative Trigger L...

Page 300: ...lection Trace Mode Clear Write Average Detector Average Max Peak Show Enable Trace 2 Enable Memory 1 Enable Memory 2 Trace Memory 12 2 7 Marker Parameters The MARKER key opens a menu that contains fun...

Page 301: ...asurement WIZARD Measurement Wizard 266 12 3 1 Measurement Wizard The WIZARD key opens a menu that contains the functionality to perform wizard mea surement Softkey Menu or Dialog items Parameters Par...

Page 302: ...upt Finish Wizard Cancel Interrupt Leave Menu1 Resume Sequence Cancel Skip Continue Interrupt Skip Finish Wizard Cancel Finish Wizard Cancel Yes No Finish Wizard Cancel Yes Save Result Discard Result...

Page 303: ...Edit Rename Cut Copy Paste Delete Preview Prev Next Exit Refresh Exit Exit 1Press WIZARD key to resume back the wizard measurement 12 4 Functions of the Cable Antenna This section contains all softke...

Page 304: ...or Dialog items Parameters Parameters selection DTF Split Screen Return Loss SWR Return Loss SWR Cable Loss Normal Open Short 2 Continue Continue Cancel Cancel Smith Phase Others Electrical Length El...

Page 305: ...s Smith Phase Softkey Menu or Dialog items Parameters Parameters selection Start Stop Center Span Signal Standard Select Downlink Mark Edit Preview Load Refresh Exit Select Uplink Mark Edit Preview Lo...

Page 306: ...log items Parameters Parameters selection Range SWR Range Scale Max Scale Min Auto Scale Table 12 15 Phase Softkey Menu or Dialog items Parameters Parameters selection Ref Range SWR Range Scale Max Sc...

Page 307: ...e Model Mark Edit Preview Load Refresh Exit User Model User Setting Frequency Velocity Factor Loss Clear Model DTF Meas Overview Exit DTF List DTF List Threshold Exit DTF List Threshold Exit Table 12...

Page 308: ...og items Parameters Parameters selection Number of Points Hold Single Sweep Continuous Sweep 12 4 6 TRACE Parameters The TRACE key opens a menu that contains the functionality to set the trace Table 1...

Page 309: ...le Loss Phase Softkey Menu or Dialog items Parameters Parameters selection New Marker Clear Write Average Marker Type Delete Marker Delete Selected Delete All Data Delete All Select Marker View List S...

Page 310: ...rage Marker Type Delete Marker Delete Selected Delete All Data Delete All Select Marker Marker Mode Normal dB Magn Phase Lin Magn Phase Rho Real Img Rho R Jx G jB R jX Z0 G jB Y0 Ref Impedance Set Mar...

Page 311: ...12 4 8 CAL Parameters The CAL key opens a menu that contains the functionality to calibrate the instrument Table 12 23 DTF Return Loss SWR Cable Loss Smith Phase Softkey Menu or Dialog items Paramete...

Page 312: ...2 Clear status Remote 173 Command sequence Remote 175 Command Sequence and Command Synchronization 171 Common Commands 172 Configuring Cable and Antenna Tests 114 Configuring the Horizontal Axis 114 C...

Page 313: ...n remote 174 Managing options with R S License Manager 53 P Package contents 15 Performing Cable and Antenna Measurements 102 1 Port cable loss measurement 102 Distance to Fault Measurements 102 Phase...

Page 314: ...cture of an SCPI Status Register 237 Switching on and off the instrument 20 Synchronization Data 81 System keys 74 T Touchscreen Configuration overview 30 Measurement result view 27 Measurement trace...

Reviews: