Setting Up: Your Network
56
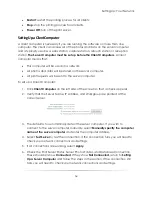
Setting Up a Canon Printer with Direct Connectivity
Some Canon printers have direct connectivity with the software. You’ll only need to
plug it in, turn it on, and attach it to the computer. The software will instantly recognize it
and set it up, no drivers are necessary, when connected directly via USB.
The following Canon printers support direct connectivity:
Pixma Pro 9000, 9500 Mark I and II
IPF 5100, 6100, 6200, 8100, 9100
To add and set up a Canon printer with direct connectivity via USB:
1.
Attach the printer to the computer.
2.
The printer will be automatically detected and added to the Canon printers list. If
it is not automatically detected, select
[Add Canon Printer]
and select your
printer from the list.
3.
Select
[Setup]
to the right of the printer. A window appears.
4.
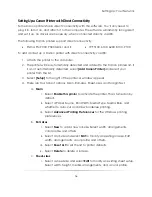
There are four tabs of options: Main, Roll-sizes, Sheet-sizes, and Margin Text.
a.
Main
:
i.
Select
Enable this printer
to activate the printer. This is turned on by
default.
ii.
Select a Paper Source, Roll Width, Media Type, Media Rule, and
whether to auto-cut and allow borderless printing.
iii.
Select
Advanced Printing Preferences
for the Windows printing
preferences.
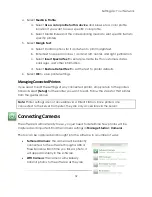
b.
Roll-sizes
:
i.
Select
New
to add a new roll-size. Select width, arrangements,
color profile, and offsets.
ii.
Select a roll-size and select
Edit
to modify an existing roll-size. Edit
width, arrangements, color profile, and offsets.
iii.
Select
Reset List
to set the list to printer defaults.
iv.
Select
Delete
to delete a roll-size.
c.
Sheet-sizes
:
i.
Select a sheet-size and select
Edit
to modify an existing sheet setup.
Select width, height, media, arrangements, and a color profile.
Summary of Contents for Studio Solution
Page 1: ...User Guide ...
Page 366: ...Index 366 Zoom 296 ...


