


Using the Avaya Installation Wizard (IW)
Issue 10.2 May 2007
135
7. Select either
Install this media server as a Main server
or
Install this media server as
an LSP
. Leave the
IP Defaults
checkbox unchecked.
8. Click
Continue
, after which you will be asked to confirm your choice of Wizard Usage
before continuing.
After reviewing a checklist of required and optional items for continuing the installation, you
then have the option to run the
nvram initialize
command, which restores all factory
default settings on all available media gateways, as well as the P330 Stack Processor. For a
new installation, this is unnecessary.
9. Click
Continue
to begin the
Media Server
tasks.
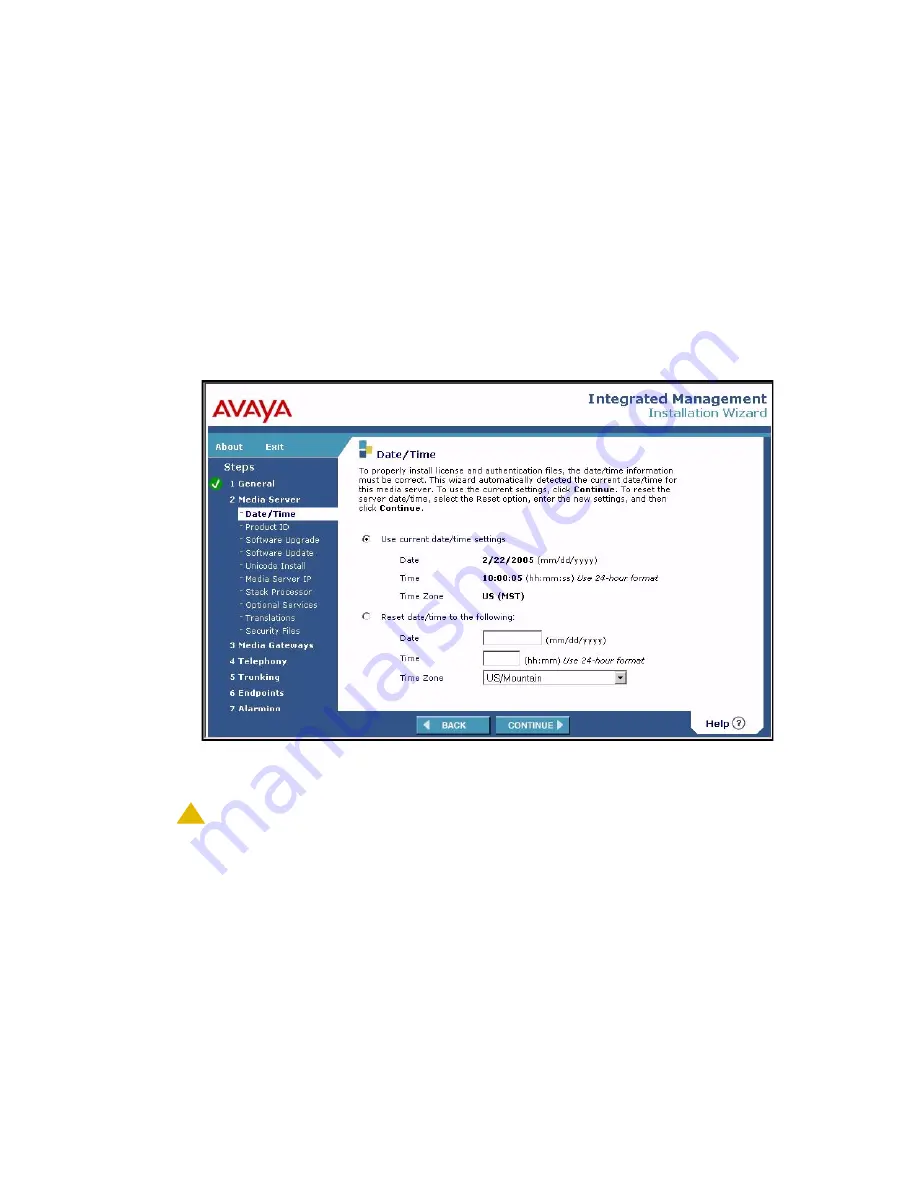
The
Date/Time
screen appears.
Date/Time screen
10. Choose the current date and time information that the IW detects on the S8300. If
necessary, you can reset the date, time, and time zone.
!
CAUTION:
CAUTION:
If you are installing an LSP, you must set the time of the LSP to the same time
zone as the primary controller even if the LSP is physically located in a different
time zone.
11. Click
Continue
.
The IW displays the Product ID screen, which Avaya installers use. The screen is not used
by business partners.
Summary of Contents for G700
Page 38: ...38 Installing and Upgrading the Avaya G700 Media Gateway and Avaya S8300 Media Server ...
Page 404: ...404 Installing and Upgrading the Avaya G700 Media Gateway and Avaya S8300 Media Server ...
Page 808: ...808 Installing and Upgrading the Avaya G700 Media Gateway and Avaya S8300 Media Server Index ...