


Install the S8300
Issue 10.2 May 2007
125
4. Type
display
and press
Enter
to confirm that
Sending only CR
is set.
5. Close the window by clicking on the
X
in the upper-right corner.
This resets your Microsoft telnet defaults and does not need to be done each time you use
Telnet.
Remastering the hard drive and installing the software
To do before you start the upgrade
1. Verify that the S8300 is inserted in slot V1.
2. Verify good AC power connections to the G700.
3. Avaya recommends using a UPS backup for media servers.
If a UPS is present, make sure the G700 is plugged into the UPS.
4. Verify that all Ethernet connections are secure, to ensure the file transfer process is not
interrupted.
To begin the upgrade
1. Click
Start > Run
to open the
Run
dialog box.
2. Type
telnet 192.11.13.6
and press
Enter
.
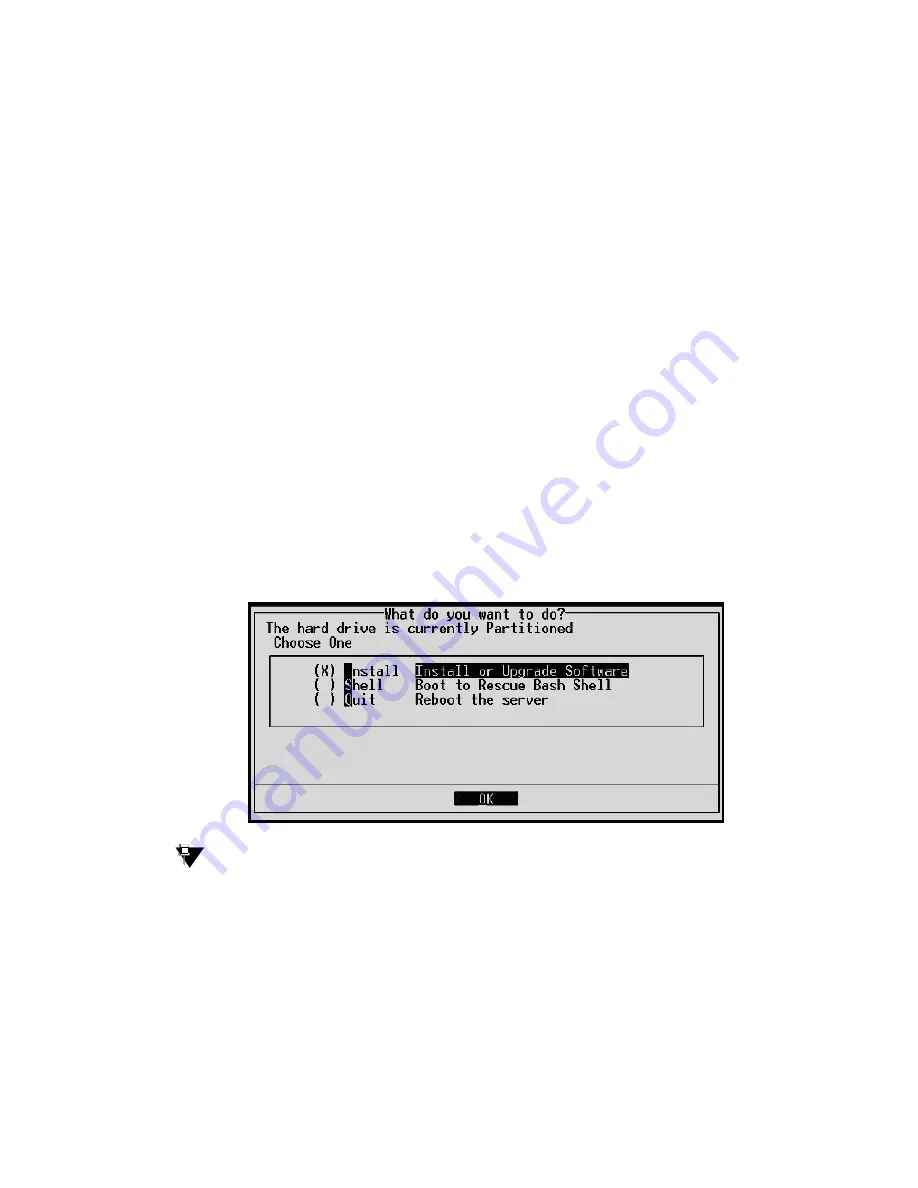
The first RP screen
I
Tip:
Tip:
To navigate on these screens, use the arrow keys to move to an option, then
press the space bar to select the option. Press
Enter
to submit the screen.
Summary of Contents for G700
Page 38: ...38 Installing and Upgrading the Avaya G700 Media Gateway and Avaya S8300 Media Server ...
Page 404: ...404 Installing and Upgrading the Avaya G700 Media Gateway and Avaya S8300 Media Server ...
Page 808: ...808 Installing and Upgrading the Avaya G700 Media Gateway and Avaya S8300 Media Server Index ...