IDA8 Global-Net User Manual
244
© 2017, ATEÏS, member of PAX ProAV Group
o
Green: Available
o
Red: Off-line
o
Gray: Busy
In case of changing a device button names, you can use Ateis Studio software to change
the name of LAP, ECS and IDA8 and edit the names of Terracom device's on web interface.
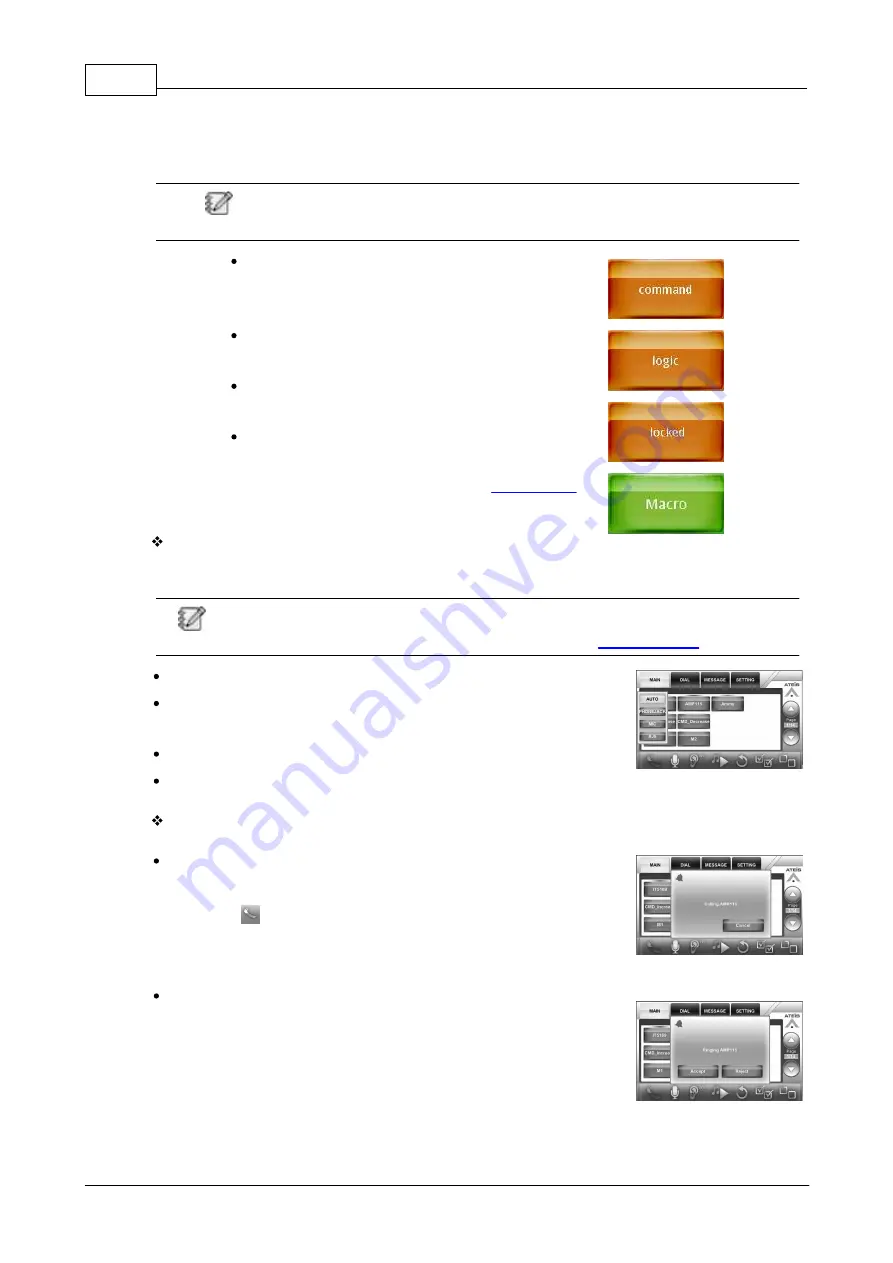
Command Button (Orange): Press to perform the
Command (string) function which has defined on the
web interface.
Logic Out Button (Orange): Press to perform the Logic
(Out) function which has defined on the web interface.
Locked Button (Orange): Locked button to similar to
Command button, but it holds the Up/Down status.
Macro Button (Green): Manage the buttons like a folder.
After create a Macro button, press to enter in its page.
See how to create a Marco button from
chapter.
Switch between the Audio Input/Output Set:
Press the hardware button on the front panel, a pop-up window will be displayed for switching the
audio source.
Please note the action of the three hardware buttons on CDM-T5 needs to be programmed via
web interface >Steup 1 > Machine Windows > Parameter Setting >
Auto: Automatically detect the audio input/output set.
Phone Jack: For plugging the external speaker and mic, the 1/8 inch
(3.5mm) jack close to the RJ9 connector is the input.
Mic: Use the internal speaker and microphone of PPM-IT5.
RJ9 Connector: For plugging a RJ9 telephone handset.
SIP Call:
Call to other devices (one to one):
1. Select a zone button which user wishes to call.
2. Then press
SIP Call button.
The call from other devices (one to one):
1. When receiving the SIP call from external device, a confirmation
window will display and ask whether to [Accept] or [Reject] the call.


