


5-95
4
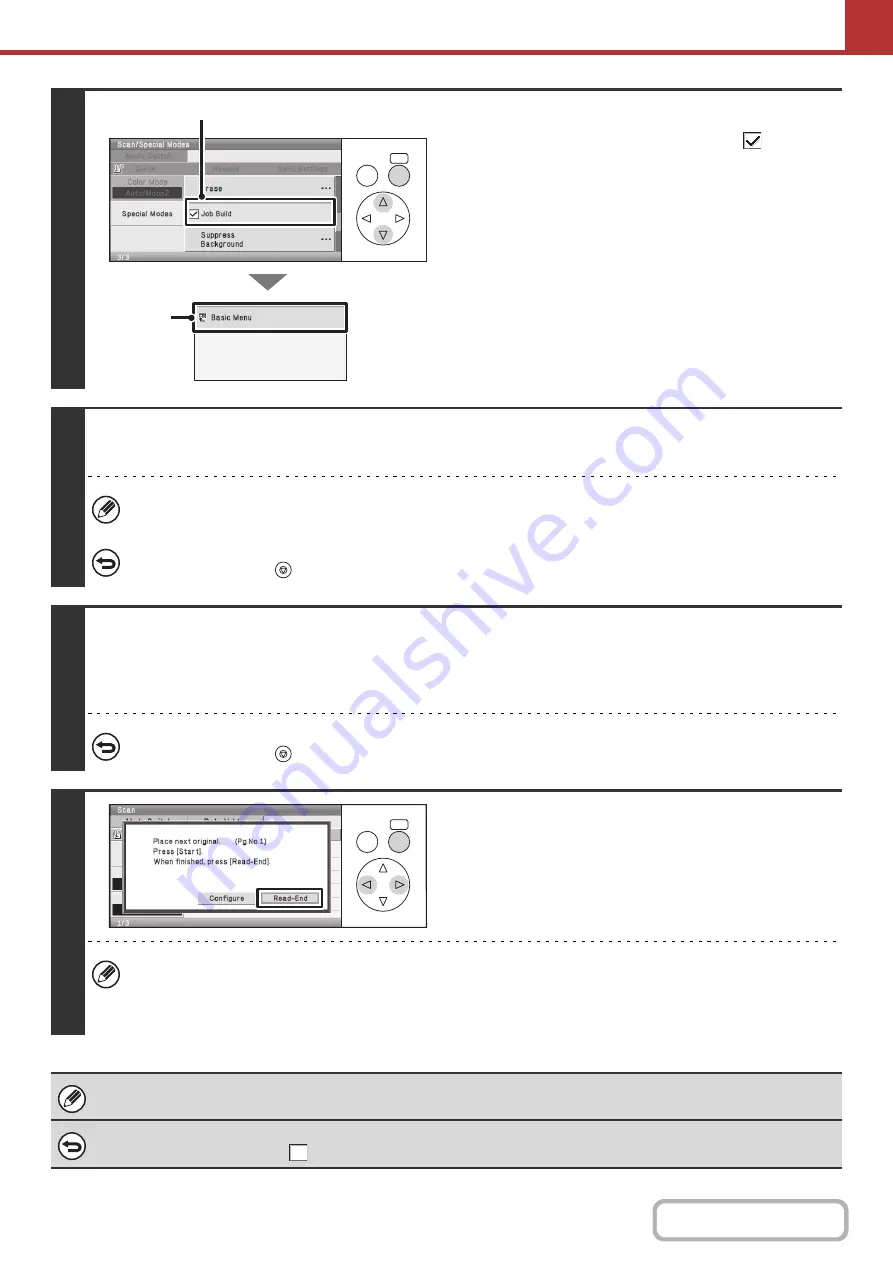
Select job build mode.
(1) Set the [Job Build] checkbox to
.
(2) Select the [Basic Menu] key.
5
Press the [COLOR START] key or the [BLACK & WHITE START] key to scan the
first set of originals.
If the destination is an Internet fax destination, press the [BLACK & WHITE START] key.
To cancel scanning...
Press the [STOP] key (
) to cancel the operation.
6
Insert the next set of originals and press the [COLOR START] key or the [BLACK
& WHITE START] key.
Press the [START] key pressed in step 5.
Repeat until all originals have been scanned.
To cancel scanning...
Press the [STOP] key (
) to cancel the operation. All scanned data will be cleared.
7
Select the [Read-End] key.
• If no action is taken for one minute after the confirmation screen appears, scanning automatically ends and the
transmission is reserved.
• The [Configure] key can be selected to change the exposure, resolution, scan size, and send size for each original
page scanned.
If the memory becomes full during scanning, a message will appear and the transmission will be canceled.
To cancel the job build function....
Set the [Job Build] checkbox to
in the screen of step 4.
OK
BACK
(2)
(1)
OK
BACK
Summary of Contents for DX-C310 Operation
Page 5: ...Make a copy on this type of paper Envelopes and other special media Transparency film ...
Page 10: ...Conserve Print on both sides of the paper Print multiple pages on one side of the paper ...
Page 33: ...Search for a file abc Search for a file using a keyword ...
Page 34: ...Organize my files Delete a file Periodically delete files ...
Page 226: ...3 18 PRINTER Contents 4 Click the Print button Printing begins ...