


5-68
3
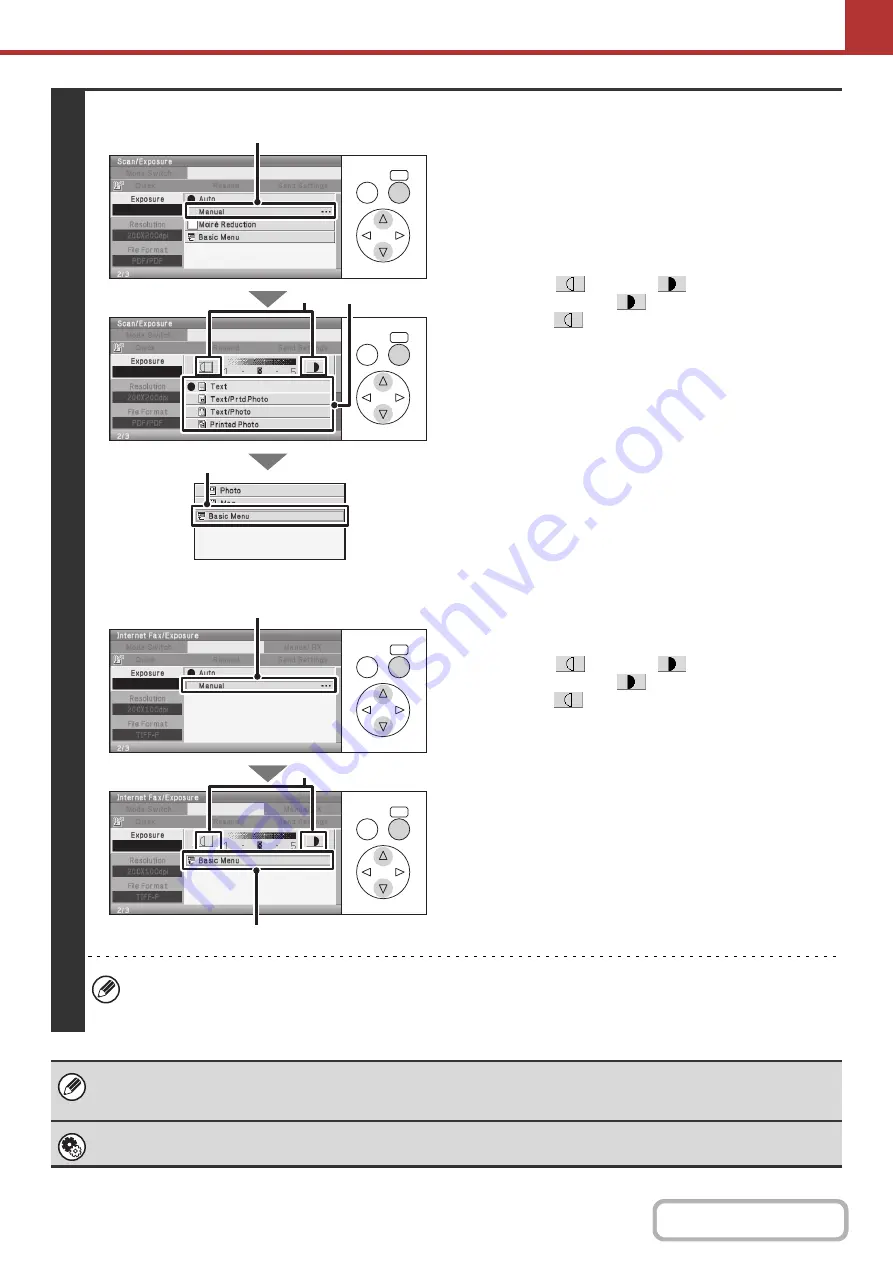
Scan mode, USB memory mode, Data entry mode
Internet fax mode
Select the exposure and original image
type.
(1) Select the [Manual] key.
(2) Select the original image type.
Select the original image type key that matches the
original image type.
(3) Adjust the exposure.
Select the
key or the
key. To darken the
exposure, select the
key. To lighten the exposure,
select the
key.
(4) Select the [Basic Menu] key.
(1) Select the [Manual] key.
(2) Adjust the exposure.
Select the
key or the
key. To darken the
exposure, select the
key. To lighten the exposure,
select the
key.
(3) Select the [Basic Menu] key.
• In Internet fax mode, the original image type and moiré reduction cannot be selected.
• To reduce the checkerboard pattern (Moiré) that sometimes occurs when printed matter is scanned, select the
[Moiré Reduction] checkbox.
When using the document glass to scan multiple original pages, the exposure setting can be changed each time you change pages.
When using the automatic document feeder, the exposure setting cannot be changed once scanning has begun. (However, when
"Job Build" is used in the special modes, the exposure can be changed each time a new set of originals is inserted.)
System Settings (Administrator): Default Exposure Settings
This is used to change the default exposure setting.
OK
BACK
OK
BACK
(3)
(2)
(1)
(4)
OK
BACK
OK
BACK
(2)
(1)
(3)
Summary of Contents for DX-C310 Operation
Page 5: ...Make a copy on this type of paper Envelopes and other special media Transparency film ...
Page 10: ...Conserve Print on both sides of the paper Print multiple pages on one side of the paper ...
Page 33: ...Search for a file abc Search for a file using a keyword ...
Page 34: ...Organize my files Delete a file Periodically delete files ...
Page 226: ...3 18 PRINTER Contents 4 Click the Print button Printing begins ...