


4-103
F-CODE CONFIDENTIAL TRANSMISSION
Follow the steps below to send a confidential fax by adding a F-code to the fax number.
Keys in the display can be selected with the arrow keys and the [OK] key.
1
Place the original.
Place the original face up in the document feeder tray, or face down on the document glass.
When the original is a different size than the size setting, set the original size.
☞
SPECIFYING THE SCAN SIZE AND SEND SIZE
(page
)
2
Enter the destination fax number.
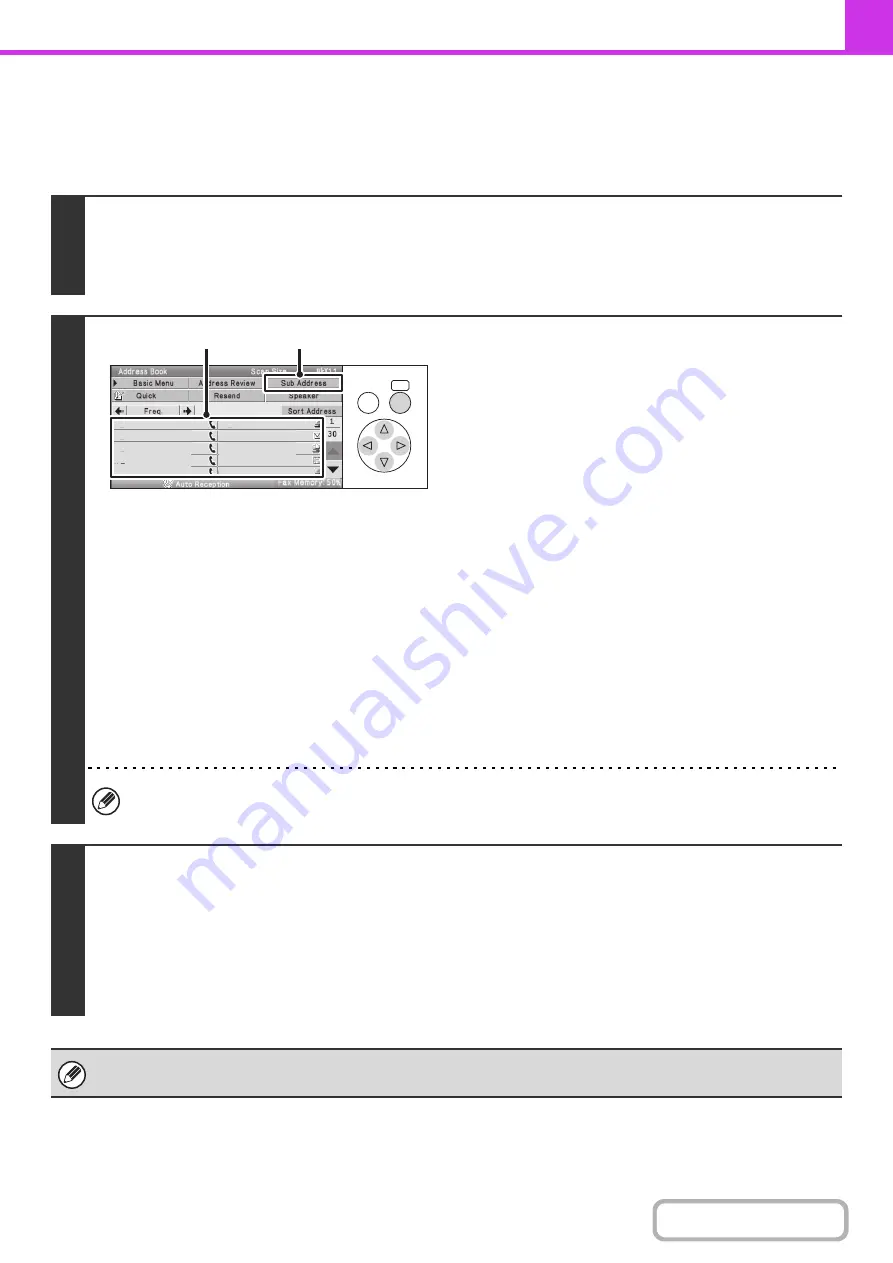
(1) Select the [Address] key in the base screen.
For the [Address] key, see "
" (page 4-8).
(2) Select the one-touch key of the desired
destination.
If the destination is not stored in the address book, enter
the fax number with the numeric keys.
If the sub-address and passcode are stored in the one-touch
key, the following sub-steps are not necessary. Go to step 3.
(3) Select the [Sub Address] key.
"/" appears.
(4) Enter the sub-address with the numeric
keys.
(5) Select the [Sub Address] key.
"/" appears.
(6) Enter the passcode with the numeric keys.
If a passcode has been omitted in the memory box of the other machine, (5) and (6) are not necessary.
3
Press the [BLACK & WHITE START] key.
Scanning begins.
• If you inserted the original pages in the document feeder tray, all pages are scanned.
A beep will sound to indicate that scanning is finished.
• If you are scanning the original on the document glass, scan each page one page at a time.
When scanning finishes, place the next original and press the [BLACK & WHITE START] key. Repeat until all pages have
been scanned and then select the [Read-End] key.
A beep will sound to indicate that scanning is finished.
This function can be used in combination with a broadcast transmission or timer transmission. This function can also be
stored in a program.
OK
BACK
AAA AAA
BBB BBB
CCC CCC
DDD DDD
EEE EEE
FFF FFF
GGG GGG
HHH HHH
III III
JJJ JJJ
(3),(5)
(2)
Summary of Contents for DX-C310 Operation
Page 5: ...Make a copy on this type of paper Envelopes and other special media Transparency film ...
Page 10: ...Conserve Print on both sides of the paper Print multiple pages on one side of the paper ...
Page 33: ...Search for a file abc Search for a file using a keyword ...
Page 34: ...Organize my files Delete a file Periodically delete files ...
Page 226: ...3 18 PRINTER Contents 4 Click the Print button Printing begins ...