


2-53
3
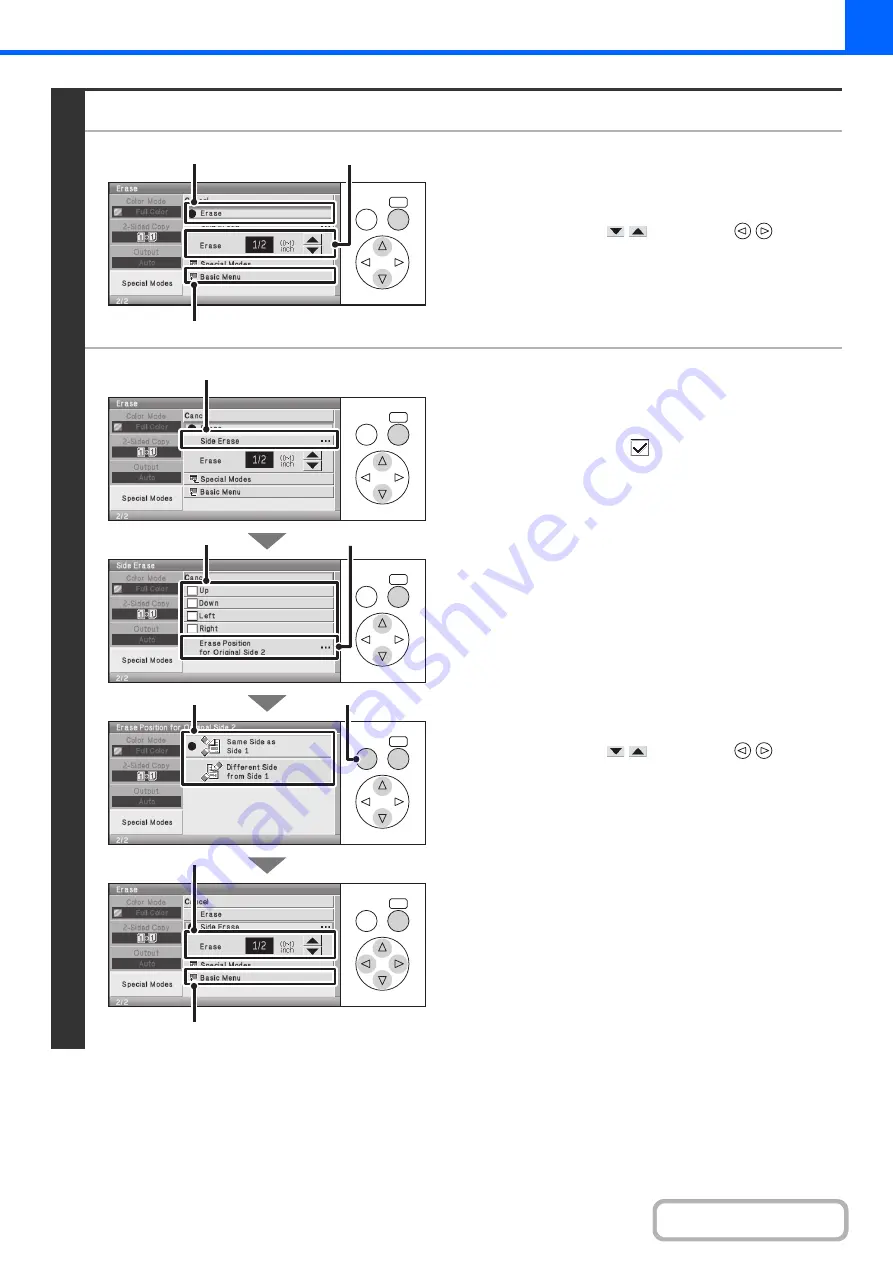
Select the erase settings.
●
When [Erase] is selected
(1) Select the [Erase] key.
(2) Set the erasure width.
Select either of the
keys with the
keys and
press the [OK] key repeatedly to change the number.
0" to 1" (0 mm to 20 mm) can be entered.
(3) Select the [Basic Menu] key.
You will return to the base screen of copy mode.
●
When [Side Erase] is selected
(1) Select the [Side Erase] key.
(2) Set the sides to be erased
Select the checkboxes
of the sides that you wish to
erase.
(3) Select the [Erase Position for Original Side 2]
key.
(4) Set the erase edge on the reverse side.
When performing 1-sided to 2-sided copying or 2-sided to
2-sided copying, set the erase edge on the reverse side.
• If you select the [Same Side as Side 1] key, the edge in
the same position as on the front side will be erased.
• If you select the [Different Side from Side 1], the edge in
the position opposite to the erased edge on the front
side will be erased.
(5) Press the [BACK] key.
(6) Set the erasure width.
Select either of the
keys with the
keys and
press the [OK] key repeatedly to change the number.
0" to 1" (0 mm to 20 mm) can be entered.
(7) Select the [Basic Menu] key.
You will return to the base screen of copy mode.
OK
BACK
(1)
(2)
(3)
OK
BACK
OK
BACK
OK
BACK
OK
BACK
(5)
(6)
(7)
(4)
(2)
(3)
(1)
Summary of Contents for DX-C310 Operation
Page 5: ...Make a copy on this type of paper Envelopes and other special media Transparency film ...
Page 10: ...Conserve Print on both sides of the paper Print multiple pages on one side of the paper ...
Page 33: ...Search for a file abc Search for a file using a keyword ...
Page 34: ...Organize my files Delete a file Periodically delete files ...
Page 226: ...3 18 PRINTER Contents 4 Click the Print button Printing begins ...