286
Detail program description - Control adjust
Pitch
Thr setting AR
Tailoffset AR
Gyro suppress
0%
Swash rotation
0°
OFF
Autorot
–90%
0%
Swash limiter
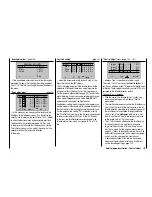
The line "Thr. setting AR" is important. Enter the value
to the right depending on the servo direction to either
approxi125 % or -125 %.
0%
0°
Autorot
0%
SEL
–125%
Pitch
Thr setting AR
Tailoffset AR
Gyro suppress
Swash rotation
OFF
Swash limiter
In doing so, the motor is safely switched off in the
autorotation phase (in case of emergency). Later, when
you have gained enough experience to practice the
autorotation fl ight, a more stable idle can be entered
here.
Adjustment notice for electric helicopters:
Since the motor must also be shut off for electrically
powered helicopters in case of an emergency, this
setting is adopted without change.
The further submenus are not important at the moment.
By switching off "autorotation", it returns to the fi rst
menu list.
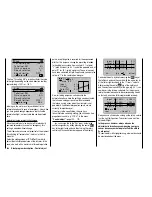
Select the setting screen of "
C1
Tail
" in order to
adjust the static torque balance at the tail rotor. In this
case, also work with a maximum of three interpolation
points; everything else is reserved for the experienced
pilot. For this purpose, change the presetting intended
for heading lock systems from a uniform 0 % at point
"L" (pitch minimum) to -30 % and at the opposite end, at
point "H" to +30 % (pitch maximum). These values may
have to be corrected in fl ight. If applicable, you must also
set point "1" in the center when doing so:
0%
0%
0%
Tail
C1
Input
Output
Point
Nor mal
Cur ve
off
?
Now, for testing purposes, switch back to the
autorotation phase. Here the setting is also deactivated;
the tail servo no longer reacts to pitch movements
(no torque usually arises when the main rotor is not
powered). All additional interpolation points are not
currently of importance yet.
If, contrary to the specifi cation, the gyro has a
transmitter-side sensitivity setting, you still need a free
proportional control, e.g. CTRL 7. In the menu …
"Control adjust"
(page 100 … 107)
… you can assign this to the "Gyr" input. Activate the
control assignment by briefl y pressing the central
SET
key of the right touch pad and then turning the rotary
control until its control number appears in the display:
Input 5
offset
0%
0%
0%
–––
0%
Throt
Gyro
Input 8
–––
–––
GL
GL
GL
GL
typ
nor mal
6
7
Ct7
Conclude this entry by briefl y pressing the
ESC
key of
the left touch pad and then switch with the arrow key
of the left or right touch pad to the "- " column.
After pressing the central
SET
key of the right touch
pad, the maximum sensitivity of the gyro, e. g. 50 %, can
now be set in the inverse value fi eld. For this purpose,
rotate the selected control to the corresponding screen
so that only one value fi eld is represented inversely:
–
+100%
+100%
+100%
+100%
+100%
+100%
+100%
Nor mal
Input 5
Throt
Gyro
Input 8
6
7
+50%
Now you have a fi xed value as long as the rotary control
is at the right limit position. The correct value must be
adjusted in fl ight.
In the process, however, always observe the
adjustment instructions accompanying your gyro
sensor, because your helicopter will not be able to
fl y otherwise!
To conclude this initial programming, a few words should
be mentioned about the menu …
Summary of Contents for mx-20 Hott
Page 41: ...41 Your notes...
Page 49: ...49 Your notes...
Page 55: ...55 Your notes...
Page 81: ...81 Your notes...
Page 85: ...85 Your notes...
Page 89: ...89 Your notes...
Page 99: ...99 Detail program description Control adjust...
Page 127: ...127 Detail program description Control adjust...
Page 131: ...131 Detail program description Control adjust...
Page 163: ...163 Detail program description Control adjust...
Page 191: ...191 Detail program description Control adjust...
Page 207: ...207 Detail program description Control adjust...
Page 228: ...228 Detail program description Control adjust...
Page 229: ...229 Detail program description Control adjust...
Page 251: ...251 Detail program description Control adjust...


