105
Detail program description - Control adjust
the – digital – C1 trim. You should thus (initially) leave this
value at +100%.
Furthermore, this variable "limiting" of throttle travel not
only gives you a convenient method for starting and
stopping the motor, but may also prove to have added
a not inconsiderable increase in safety! For example,
just imagine what could happen if you were carrying the
helicopter to the take-off site with the motor running and
you accidentally moved the C1 stick …
Accordingly, if the carburetor or speed controller is open
too far, an audible warning is heard as soon as you turn
on the transmitter, and the message below is shown on
the basic display:
Throttle
too
high !
Tip:
You can use the
"Servo display"
menu to observe
the infl uence of the throttle limit slider. This menu
can be accessed from almost any other menu by
simultaneously pressing the
keys on the left touch
pad. Bear in mind that servo output 6 controls the
throttle servo on the
mx-20
HoTT!
Basic idle setting
Start by turning the throttle limiter – by default the
CTRL 6 proportional rotary control on the top left of the
transmitter – clockwise as far as it will go. Set the throttle/
collective pitch stick to the maximum pitch position and
also check the submenu "C1
Thr" on the menu …
"Helicopter mixers"
(pages 164 … 179)
… to ensure you have an active standard throttle curve.
If, for example, the standard throttle curve has already
been changed following the initialization of a model
memory, then this must be reset at least temporarily to
the values "Point 1 = -100%", "Point 3 = 0%" and "Point
5 = +100%":
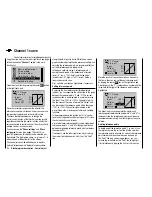
Input
Output
Point
?
0%
0%
–100%
C1
Nor mal
Thr
Cur ve off
Note:
As the throttle trim lever has no effect if the throttle
limiter is open, its position here is unimportant.
Now – without starting the glow motor – adjust the
throttle servo, preferably mechanically and optionally
using the servo 6 travel adjustment option in the
"
Servo adjustments
" menu, so that the carburetor is
completely open.
Now, close the throttle limiter completely by turning the
CTRL 6 proportional rotary control in an anti-clockwise
direction as far as it will go. Use the trim lever on the
throttle/collective pitch stick to move the trim position
marker to the "Motor OFF" position – see the fi gure in
the next column.
Note:
In contrast, when the throttle limiter is closed,
the position of the throttle/collective pitch stick is
meaningless. It can therefore remain at the maximum
collective pitch position so that, when adjusting
carburetor linkages, the throttle limiter alone can be
used to switch between full throttle (throttle limiter open)
and "Motor OFF" (throttle limiter closed).
Now, with the throttle limiter closed, adjust the
carburetor linkages so that the carburetor is (just)
completely closed. Take extreme care to ensure that the
throttle servo cannot travel mechanically to either of the
two extreme positions (full thr./Motor OFF).
To complete this basic confi guration, the idle trim
adjustment range must now be matched against point
"L" on the throttle curve. To do so, set point "L" for the
mixer "C1
Thr" on the "
Helicopter mixers
" menu
from about -65% to -70%:
Input
Output
Point L
0%
0%
C1
Nor mal
Thr
Cur ve off
–66%
To confi gure a smooth transition from the idle trim to the
throttle curve
exactly
, the collective pitch stick should
be moved to and fro slightly at its minimum position with
the throttle limiter closed and the idle trim fully open.
The throttle servo must not move as well! Any further
adjustments to the throttle curve must of course be
made later in fl ight.
The motor is always started with the throttle limiter fully
closed, whereby idle is set exclusively by using the trim
lever of the throttle/collective pitch stick.
Throttle limit in conjunction with digital trim
In conjunction with the CTRL 6 throttle limit rotary
control, the C1 trim sets a marker (
) in the motor's
confi gured idle position, from which the motor can be
switched off via the trim. If, on the other hand, a further
Summary of Contents for mx-20 Hott
Page 41: ...41 Your notes...
Page 49: ...49 Your notes...
Page 55: ...55 Your notes...
Page 81: ...81 Your notes...
Page 85: ...85 Your notes...
Page 89: ...89 Your notes...
Page 99: ...99 Detail program description Control adjust...
Page 127: ...127 Detail program description Control adjust...
Page 131: ...131 Detail program description Control adjust...
Page 163: ...163 Detail program description Control adjust...
Page 191: ...191 Detail program description Control adjust...
Page 207: ...207 Detail program description Control adjust...
Page 228: ...228 Detail program description Control adjust...
Page 229: ...229 Detail program description Control adjust...
Page 251: ...251 Detail program description Control adjust...


