54
Digital trim
Digital trim
Functional description and description of C1 cut-off
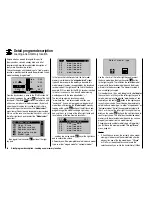
Digital trim with visible and audible indicators
Both joysticks are equipped for digital trimming. When
you give the trim lever a brief push (one "click"), the
neutral position of the associated joystick channel
changes by one increment. If you hold the trim lever in
one direction, the trim value changes continuously in the
corresponding direction with increasing speed.
These changes can be made "audible" by way of different
frequency tones. This makes fi nding the mid-point during
fl ight easy, without looking at the screen. When the mid-
point is overrun, a brief pause will be inserted.
Current trim values are automatically stored when a
model memory change is made. Furthermore, digital trim
exercises fl ight phase specifi c control within a memory
location (except for throttle/brake fl aps trim) – the so-
called "C1" (channel 1) control function –.
This C1 trim includes yet another special function
for winged aircraft and helicopter models, it allows
the carburetor's idle setting to easily be found for a
combustion motor.
Since the trim functions described in these instructions
are only effective in the direction "Motor off", the
presentation in the screen of your transmitter may only
change with respect to individual throttle or Pitch-min
positioning of the C1 joystick in the "forward" or "back"
direction, such as throttle/pitch "left stick" or "right stick".
The illustrations in these instructions are always based
on "Throttle/Pitch right" for both types of models and
"Throttle back" for winged aircraft and helicopters.
2. Helicopter models
In addition to the "Cut-off trim" function described
below in "Winged aircraft models", C1 trimming also
has another characteristic which is made possible by
combining it with a so-called "Throttle limit" function see
page 104. As long as the throttle limit control remains in
the "left" half of its travel path, i. e. in the startup range,
C1 trimming acts on the throttle servo as idle trim and the
indication for idle trim is visible in the screen's display.
GRAUBELE
#01
3:33h
stop
flt
K78
0:00
0:00
RX0.0V
5.2V
Last idle position
2.4
M
motor OFF position
CTRL 6
Throttle limit control
Current trim position
Trim at
However, in contrast to winged aircraft models, the
position indicator (
) will be hidden and any preset idle
position will be deleted when the throttle limit control is
in the "right" half of its travel path.
GRAUBELE
#01
3:33h
Stop
Flt
K78
0:00
0:00
RX0.0V
5.2V
M
2.4
CTRL 6
Throttle limit control
Notice for helicopters:
C1 trimming affects only the throttle servo, not the pitch
servo. Notice also that the helicopter throttle servo must
be connected to receiver output 6, see receiver layout
on page 59.
1. Winged models
C1 trimming has a special cut-off trim function intended
especially for combustion motors. This cut-off trim
function is confi gured as follows. First put the motor into
a safe idle speed.
Now if you push C1 trim
in a single motion
toward its
"Motor cut-off" direction until it is in its furthest travel
position then an additional end-position marker will
remain in the display. When the motor is restarted you
can again immediately set the last idle speed with a
single
movement in the direction of "more gas".
GRAUBELE
#01
3:33h
Stop
Flt
K78
0:00
0:00
RX0.0V
5.2V
Current
trim position
Current trim position
2.4
Ch 1 trim lever
Idle direction
M
Trim at motor OFF position
This cut-off trim will be deactivated when "None" is
entered on the "Motor at C1" line of the
"Model Type"
menu, see page 82.
Notice:
Since this trim function is only effective in the "Motor
off" direction, the display illustrated above will change
appropriately if the C1 joystick's control direction for
minimum throttle is changed from "back" to "front" (on
which the above illustration is based) in the "Motor at
C1" line of the
"
Basic Settings
"
menu.
Summary of Contents for mx-20 Hott
Page 41: ...41 Your notes...
Page 49: ...49 Your notes...
Page 55: ...55 Your notes...
Page 81: ...81 Your notes...
Page 85: ...85 Your notes...
Page 89: ...89 Your notes...
Page 99: ...99 Detail program description Control adjust...
Page 127: ...127 Detail program description Control adjust...
Page 131: ...131 Detail program description Control adjust...
Page 163: ...163 Detail program description Control adjust...
Page 191: ...191 Detail program description Control adjust...
Page 207: ...207 Detail program description Control adjust...
Page 228: ...228 Detail program description Control adjust...
Page 229: ...229 Detail program description Control adjust...
Page 251: ...251 Detail program description Control adjust...


