44
Putting the transmitter into operation
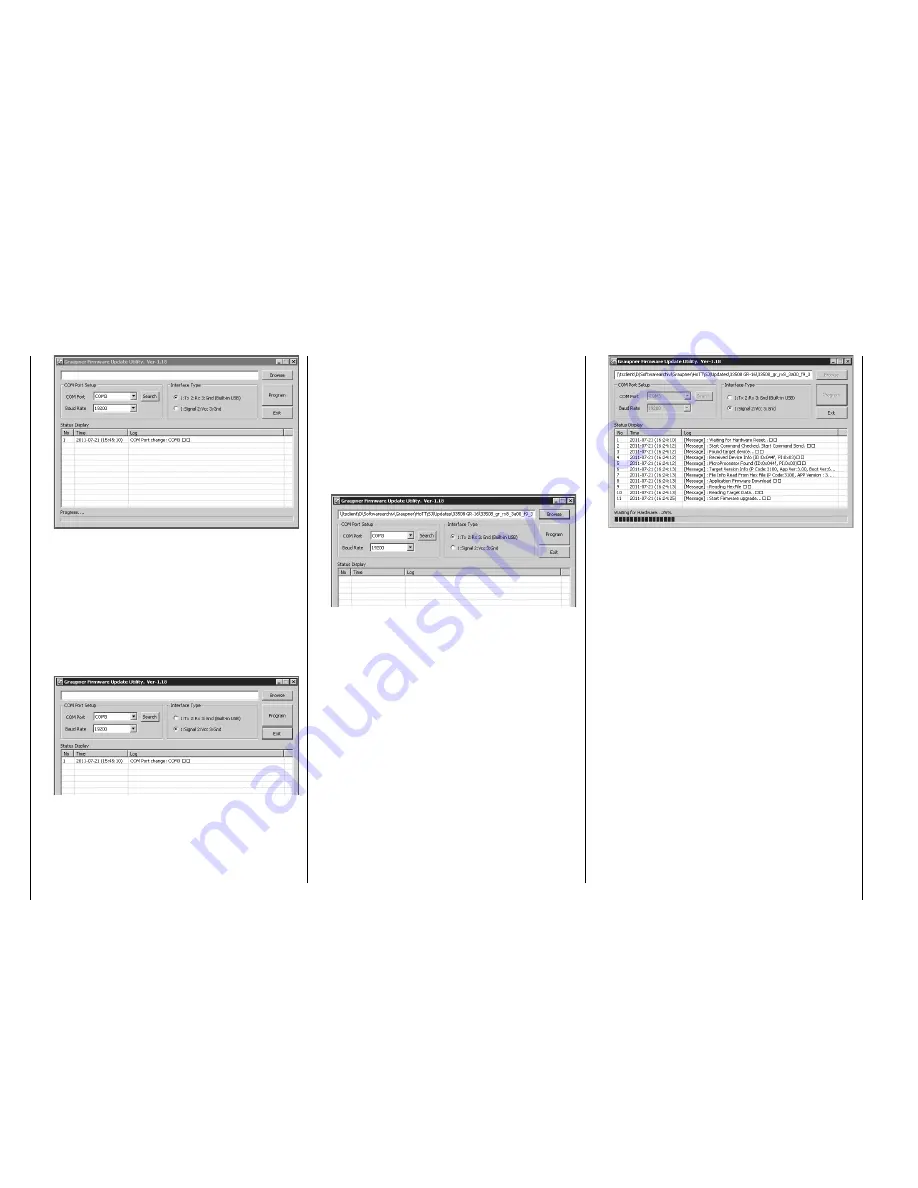
In the "COM Port Setup" group box, select the COM
port to which the USB interface is connected. If you
are not sure which selection is correct, press the
"Search" control, choose the connection labeled
"Silicon Labs CP210x USB to UART Bridge" from the
popup window and then activate "OK". The "Baud
Rate" setting should be "19200".
Afterwards, click on the "Signal 2:Vcc3:Gnd" radio
button in the "Interface Type" group box.
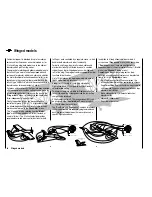
Now click on the control labeled "Browse" that is
located at the top right corner of the window. From
the "Open fi le" window which appears, select the
appropriate fi rmware update fi le for your receiver.
Such fi les always have the ".bin" fi lename extension.
Typically this fi le can be found in the folder whose
name is prefi xed with the order number of the
receiver to be updated. This folder should contain
the ZIP fi le that was downloaded and unpacked.
Its fi lename should also be prefi xed with the order
number of the receiver to be updated. For the
standard GR-12 receiver included in this set, the
folder would be designated "33512_12CH_RX". The
fi lename will appear in the corresponding window.
Firmware fi les are product-specifi cally coded, i. e. if
you should accidentally select a fi le which does not
correspond to the product (e. g. transmitter update
fi le instead of a receiver update fi le), the "Product
code error" popup window will appear and the block
the update process from starting.
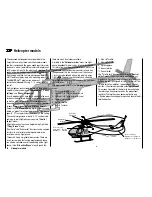
Activate the control labeled "Program". Wait for the
progress bar to start. Depending on the speed of the
computer being used, this may take several seconds.
Now press and hold the receiver's
SET
button while
switching on the receiver's power supply. After a few
seconds the "Found target device …" message will
appear in the status display. Now you can release
the receiver's button. The actual fi rmware update
will begin autonomously after this message has
appeared.
However, if the receiver is not detected, the "Target
device ID not found" popup window will appear.
If this process terminates before reaching the 100 %
mark, switch off your receiver's power supply then try
to start the update process all over again. Do this by
performing the above steps again.
The status display and progress bar will show you
the progress of the fi rmware update. The update is
concluded when the text "Complete … 100 %" or
"Complete!!" appears in the bottom line of the status
display.
Summary of Contents for mx-20 Hott
Page 41: ...41 Your notes...
Page 49: ...49 Your notes...
Page 55: ...55 Your notes...
Page 81: ...81 Your notes...
Page 85: ...85 Your notes...
Page 89: ...89 Your notes...
Page 99: ...99 Detail program description Control adjust...
Page 127: ...127 Detail program description Control adjust...
Page 131: ...131 Detail program description Control adjust...
Page 163: ...163 Detail program description Control adjust...
Page 191: ...191 Detail program description Control adjust...
Page 207: ...207 Detail program description Control adjust...
Page 228: ...228 Detail program description Control adjust...
Page 229: ...229 Detail program description Control adjust...
Page 251: ...251 Detail program description Control adjust...


