116
Detail program description - Control adjust
Channel 1 curve
Control characteristics for throttle/spoiler joystick
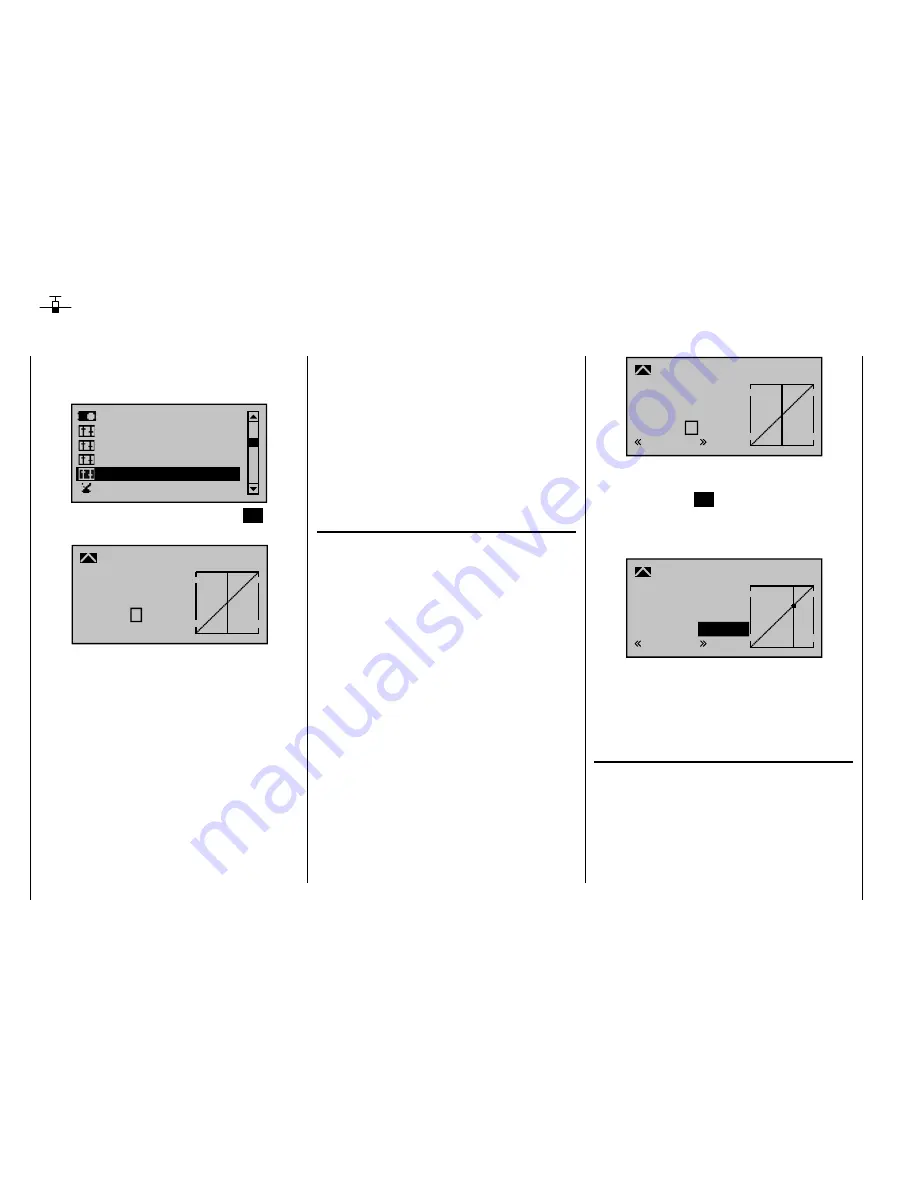
Using the arrow keys on the left or right touch pad, page
to the menu option "
Channel 1 curve
" in the multi-
function list:
Ser vo adjustment
Stick mode
Switch display
Control adjust
Dual Rate / Expo
Channel 1 cur ve
Open this menu item by pressing the center
SET
button
in the right touch pad.
Input
Output
Point
?
0%
0%
0%
C1
nor mal
Cur ve
Cur ve off
Since the carburetor response or the effect of the
airbrakes or spoilers is often non-linear, you can make
compensatory adjustments to these in this menu.
The menu therefore enables you to change the
control characteristics of the throttle / airbrake joystick
,
regardless of whether this control function affects the
servo connected to control channel 1 directly or affects
multiple servos via various mixers.
If you have used the "
Phase settings
" and "
Phase
assignment
" menus (see pages 128 and 134) to
specify fl ight phases, this option can be adjusted per
fl ight phase. The fl ight phase name – e. g. "normal" – is
always shown at the bottom left of the screen.
The control curve can be defi ned by up to 6 points
(termed "reference points" below) placed anywhere
along the path of joystick travel. While the on-screen
graph considerably simplifi es the process of setting and
adjusting the reference points, we recommend that you
set fewer reference points to begin with.
In the basic software set-up, 2 reference points –
namely the end-points at the bottom end of joystick
travel ("L", low = -100% travel) and the top end of
joystick travel ("H", high = +100% travel) – defi ne a
linear characteristic curve.
First, switch to your chosen fl ight phase, if necessary.
Setting reference points
By moving the transmitter control (throttle/airbrake
joystick), you can reposition the vertical line in the graph
between the two end-points "L" and "H". The current
joystick position is also displayed in numerical form on
the "Input" line (-100% to +100%). The point at which
this line crosses the curve is termed the "Output", and
can be varied at the reference points within the range
-125% to +125%. The control signal altered in this
way will then affect all subsequent mixer and coupling
functions.
In the example above, the joystick is at 0% of control
travel and also generates an output signal of 0%, since
the characteristic curve is linear.
Up to 4 additional reference points can be set between
the two end-points "L" and "H", although the distance
between neighboring reference points must not be less
than approx. 25%.
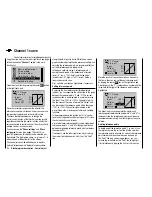
If necessary, use the left or right arrow key
to drag
the marker frame downwards, until it is at the "Point"
line:
?
0%
0%
0%
Nor mal
off
Input
Output
Point
C1 Cur ve
Cur ve
Move the joystick. If a question mark can be seen in
the frame, then you can set the next reference point
by tapping the center
SET
key on the right touch pad.
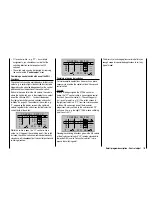
Simultaneously, the "?" is replaced by a number and the
value fi eld to the right of the reference point number is
highlighted:
1
+50%
+50%
+50%
Nor mal
off
Input
Output
Point
C1 Cur ve
Cur ve
The order in which you generate the (maximum) 4
reference points between the end-points "L" and "H" is
irrelevant, since the reference points are continuously
renumbered automatically from left to right as they are
entered.
Deleting reference points
To delete one of the reference points (1 to max. 4), use
the joystick to move the vertical line into the vicinity of
the reference point in question. As soon as the reference
point number and its associated value is shown on
the "Point" line (see screen image above), you can
activate the value fi eld on the "Point" line to highlight
it by simultaneously tapping the
or
keys on
Summary of Contents for mx-20 Hott
Page 41: ...41 Your notes...
Page 49: ...49 Your notes...
Page 55: ...55 Your notes...
Page 81: ...81 Your notes...
Page 85: ...85 Your notes...
Page 89: ...89 Your notes...
Page 99: ...99 Detail program description Control adjust...
Page 127: ...127 Detail program description Control adjust...
Page 131: ...131 Detail program description Control adjust...
Page 163: ...163 Detail program description Control adjust...
Page 191: ...191 Detail program description Control adjust...
Page 207: ...207 Detail program description Control adjust...
Page 228: ...228 Detail program description Control adjust...
Page 229: ...229 Detail program description Control adjust...
Page 251: ...251 Detail program description Control adjust...


