123
Detail program description - Control adjust
Control switches
Programming the control switches
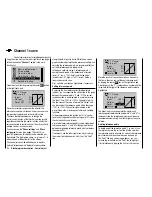
Using the arrow keys on the left or right touch pad,
page to the menu option "
Control switch
" in the multi-
function list:
Switch display
Channel 1 cur ve
Phase settings
Phase assignment
Phase trim
Control switch
Tap the center
SET
key on the right touch pad to open
the menu shown below:
SEL
0%
0%
0%
C1
C2
C3
–––
C4
CONTROL SWITCH
Gb1
Gb1
0%
STO
–––
–––
–––
With many functions, it makes sense not to trigger
their actuation by using one of the normal switches,
but to trigger them automatically by the specifi c, freely
programmable position of a transmitter control or joystick.
Typical applications:
Activation or deactivation of an onboard glowplug
•
heating system depending on carburetor setting or
motor speed (in this case, the switch for glowplug
heating is controlled on the transmitter by a mixer)
Switching a stopwatch on or off to measure the
•
simple running time of electric motors
Automated switch-off of a combi "aileron
•
rudder"
mixer when extending the airbrakes, e. g. so as to
match the bank attitude of the model to the ground
slope when landing on a ridge, without the direction
of fl ight also being affected by the rudder (if the mixer
were active).
Lowering landing fl aps, adjusting elevator trim and/
•
or executing specifi c Dual Rate, Exponential and
Differential switchings when coming in to land, as
soon as the throttle joystick is moved beyond the
switching point. If required, a control switch can be
overridden using a separately assigned switch in the
5th column.
The
mx-20
HoTT program is equipped with a total of
4 of these control switches ("C1" to "G4").
Accordingly, anywhere where switches can be assigned
you have the option not only of using the 9 possible
transmitter switches, but also of choosing and assigning
one of the "C1" … "C4" control switches from the list
of expanded switches – as described in the section
"Assigning transmitter controls, switches and control
switches" on page 52.
Furthermore, combining a control switch with an
additional switch (as described later) also permits more
complex switching permutations.
Basic procedure:
If no transmitter control is assigned, the
1.
corresponding input fi eld in the column above the left
switch icon will be displayed empty.
Using the arrow keys on the left or right touch pad,
2.
select the line for the control switch you want (1 to 4).
Briefl y tap the center
3.
SET
key on the right touch pad.
Move your selected transmitter control.
4.
The associated transmitter control number appears
in the input fi eld of the column above the left switch
icon.
Using the arrow keys on the left or right touch pad,
5.
move to the right and the column above
STO
.
Move the transmitter control to the desired switching
6.
point and then briefl y tap the center
SET
key on the
right touch pad to save the switching point.
Complete the remaining settings such as switching
7.
direction, etc.
Exit from the menu by using the center
8.
ESC
key on
the left touch pad.
Assigning a transmitter control to a control switch
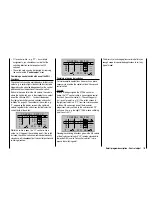
Using the arrow keys on the left or right touch pad,
select your chosen line (1 to 4). After completing the
activation of transmitter control assignment by tapping
the center
SET
key on the right touch pad, the following
message is shown:
SEL
+75%
0%
0%
G1
G2
C3
–––
C4
CONTROL SWITCH
Gb1
Gb1
–75%
STO
–––
–––
–––
Move desired
control adj.
As an example, the CTRL 6 proportional rotary control
on the upper left is now to be assigned to the "C3"
control switch. Accordingly, turn the dial of this control in
any direction you want. As soon as this is detected, the
control name appears on the display:
Summary of Contents for mx-20 Hott
Page 41: ...41 Your notes...
Page 49: ...49 Your notes...
Page 55: ...55 Your notes...
Page 81: ...81 Your notes...
Page 85: ...85 Your notes...
Page 89: ...89 Your notes...
Page 99: ...99 Detail program description Control adjust...
Page 127: ...127 Detail program description Control adjust...
Page 131: ...131 Detail program description Control adjust...
Page 163: ...163 Detail program description Control adjust...
Page 191: ...191 Detail program description Control adjust...
Page 207: ...207 Detail program description Control adjust...
Page 228: ...228 Detail program description Control adjust...
Page 229: ...229 Detail program description Control adjust...
Page 251: ...251 Detail program description Control adjust...


