288
Detail program description - Control adjust
The assignment of the switch takes place in the menu …
"Phase assignment"
(page 134)
Under "C" and "D" assign the three-stage switches SW
4 + 5, for example:
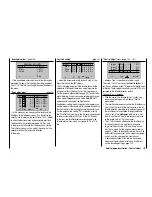
PHASE ASSIGNMENT
A B
C D E F
1 Nor mal
2
4
5
prior
combi
Now you must assign the corresponding fl ight phase
from the
"Phase setting"
menu to the respective switch
position. Since you have already assigned names, the
name of the phase "1 Normal" appears to the right in the
display. If the already assigned autorotation switch was
activated, the following warning message appears in the
display:
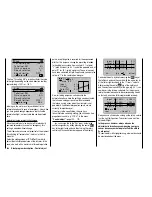
PHASE ASSIGNMENT
A B
C D E F
1 Nor mal
2
4
5
prior
combi
Autorot
As a reminder:
The autorotation phase has absolute precedence.
Therefore, move the autorotation switch back and then
move the selected switch, in our example the three-
stage switch SW 4 + 5, to the one limit position. Then
switch to the bottom right with the arrow keys and
activate this input fi eld:
A B
C D E F
2
4
5
1 Nor mal
PHASE ASSIGNMENT
prior
combi
Now select the desired fl ight phase for this switch
position - for example, "2 Hover" ...
A B
C D E F
2
4
5
2 Hover
PHASE ASSIGNMENT
prior
combi
… and confi rm this selection by briefl y pressing the
central
SET
key of the right touch pad or move the
switch to the other limit position and defi ne the name for
this switch position, such as "3 Speed".
A B
C D E F
2
4
5
3 Speed
PHASE ASSIGNMENT
prior
combi
The switch center then receives the name "1 Normal" as
shown above to the left.
Notice:
Exchanged or different name assignments for the
three switch positions are, of course, also possible.
For example, with the use of one of the rotational speed
controllers programmed according to the description
in the next column, a sequences like "normal / hover /
acro" would be logical.
The model settings made before the assignment of a
phase switch are now in the fl ight phase "Normal". This
is the phase which is called after the above defi nition in
the switch center position.
This normal setting, which was already tested in fl ight,
can be copied to a different fl ight phase so that fl ying
can take place in the same manner in every phase at
fi rst. For this purpose, use the menu ...
"Copy / Erase"
(page 64)
=>
=>
=>
=>
=>
=>
=>
Copy flight phase
Erase model
Copy model–>model
Expor t to SD
Impor t from SD
With the operation of the fl ight phases, it is possible
to carry out changes in the phase-dependent menu
for each individual phase. Since the
mx-20
HoTT
has digital trimming, in addition to the fl ight-phase
dependent menu settings in the helicopter program,
the trim positions of roll, nick and tail rotor joystick are
also saved depending on the fl ight phase, see menu
"Joystick setting"
page 94:
Thr.
Roll
Nick
Tr
+
time
4
4
4
0.0s
0.0s
0.0s
4
0.0s
Tail
0.0s
0.0s
0.0s
0.0s
TL
GL
GL
GL
St
Summary of Contents for mx-20 Hott
Page 41: ...41 Your notes...
Page 49: ...49 Your notes...
Page 55: ...55 Your notes...
Page 81: ...81 Your notes...
Page 85: ...85 Your notes...
Page 89: ...89 Your notes...
Page 99: ...99 Detail program description Control adjust...
Page 127: ...127 Detail program description Control adjust...
Page 131: ...131 Detail program description Control adjust...
Page 163: ...163 Detail program description Control adjust...
Page 191: ...191 Detail program description Control adjust...
Page 207: ...207 Detail program description Control adjust...
Page 228: ...228 Detail program description Control adjust...
Page 229: ...229 Detail program description Control adjust...
Page 251: ...251 Detail program description Control adjust...


