background image

106

Detail program description - Control adjust

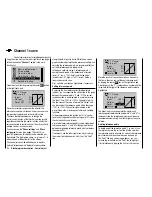
marker is located at the 

end-point 

(see the partial 

display screenshot shown below), then you can simply 
click once to restore the original idle confi guration (see 
also page 54).
This switch-off trim functions as an idle trim 

only in the 

left half 

of the throttle limit rotary control's path. That 

is: only within this range is the marker line set and also 
stored. 

GRAUBELE

#01

3:33h

stop
 flt

K78

0:00
0:00

RX0.0V

5.2V

Last idle position

2.4

M

motor OFF position

CTRL 6

Throttle limit control


Current trim position

Trim at 

For this reason, the marker is hidden and may even be 
erased while the throttle limit rotary control points to the 
right of its center position:

GRAUBELE

#01

3:33h

Stop
Flt

K78

0:00
0:00

RX0.0V

5.2V

M

2.4

CTRL 6

Throttle limit control

Notes:

Since this trim function only takes effect in the 

• 

"Motor OFF" direction, the screen image shown 
above changes appropriately if you alter the control 
direction for the pitch minimum position of the C1 
stick from "back" (as shown in the above image) to 

"forward" in the "min. pitch" line on the menu 

"

Base 

setup model

"

. The effects as shown also swap to 

the other side if you swap pitch right (as shown in the 
above screen images) to pitch left in the "Stick mode" 
line on the "

Base setup model

" menu (see page 74).

You can use the 

• 

"Servo display"

 menu to observe 

the infl uence of the throttle limit slider. This menu 
can be accessed from almost any other menu by 
simultaneously pressing the 




keys on the left 

touch pad. Bear in mind that servo output 6 controls 
the throttle servo on the mx-20 HoTT!
A servo connected to output 12 can be used 

• 

independently of this for other purposes by means of 
mixers, provided that you separate the servo from the 
transmitter control at function input 12 on the "

MIX-

only channel

" menu; see page 193.

The throttle restriction set by the throttle limiter 

• 

is shown as a horizontal bar in the throttle curve 
diagram on the second display page of the "Channel 

 Throttle" option on the "

Helicopter mixers

menu (see page 168). The output signal for the 
throttle servo cannot be higher than the level set by 
the horizontal bar: 

Input
Output
Point

2

0%
0%
0%

C1

Nor mal

Thr

Cur ve

off

Throttle limiter 
position

The above diagram shows precisely this scenario: in 
the above example, the throttle limit control is set to 
-60% and thus restricts the movement of the throttle 
servo to -60% of full travel.

 Time delay for the throttle limiter

To safely avoid the carburetor opening too rapidly, you 
should assign throttle limiter input 12 a time delay that 
takes effect only in the direction of full throttle. This 
applies especially if you are controlling the throttle limiter 
using a switch and not the default CTRL 6 proportional 
rotary control.
To set a delay time, proceed as follows: turn the throttle 
limit control as far to the right as it will go or move the 
relevant switch to the full-throttle position; then use the 
arrow keys on the left or right touch pad to select the 
"–time+" column: 

– time +

0.0
0.0
0.0
0.0

0.0
0.0
0.0
0.0

Nor mal

Input  9
Input 10
Input
Th.L.12

11

After briefl y tapping the center 

SET

 key on the right 

touch pad, you can then use the arrow keys on the left 
or right touch pad to select your desired time delay, e. g. 
5 seconds:

Summary of Contents for mx-20 Hott

Page 1: ...Programming Manual 33124 mx 20 HoTT 1 en H O P P I N G T E L E M E T R Y T R A N S M I S S I O N mx 20...

Page 2: ...17 Opening the transmitter housing 17 Changing joystick behavior 18 Transmitter description 20 Operating elements 20 Backside of the transmitter 21 Headset connector 21 Mini USB connector 21 Data jack...

Page 3: ...or switch 252 Parallel operating servos 254 Using flight phases Example 1 256 Example 2 260 Control of temporal processes 266 Eight flap wing 268 Delta and flying wing models 272 F3A model 276 Helicop...

Page 4: ...er expose these units to vibrations or excessive hot or cold temperatures Remote control operation may only be performed under normal outdoor temperatures i e within a range of 15 C to 55 C Avoid mech...

Page 5: ...er ship or car Never fly over spectators or other pilots Never endanger humans or animals Never fly in the vicinity of high voltage wires Do not operate the model in the vicinity of sluice locks or wh...

Page 6: ...further details about interference filters refer to the Graupner RC main catalog or in Internet at www graupner de Servo interference filters for extension cables Order No 1040 The servo interference...

Page 7: ...evaluate every individual product made by other companies to assess if they are safe to use Liability exclusion damage compensation This manual serves only as a source of information and can be change...

Page 8: ...atteries presents a danger of ignition explosion chemical burns and combustion burns Use of an extinguishing blanket CO2 fire extinguisher or sand are suitable methods of extinguishing such a fire Lea...

Page 9: ...inuous current load the lower the battery s service life will be Use your battery until its performance degrades or the under voltage warning sounds Attention A cell voltage of 1 2 V should not be und...

Page 10: ...ve buttons located to the left and right of the high contrast display Thus with only little practice the pilot learns to implement all of the remote controlled model options with which he she has expe...

Page 11: ...Bidirectional communications between transmitter and receiver Five different languages German English French coming soon per software update Italian and Spanish Ultra fast response times due to relia...

Page 12: ...limiter 150 servo adjustment for all servo outputs independently adjustable per side Single Side Servo Throw Sub trim in the 125 range for setting all neutral servo positions Servo reverse can be prog...

Page 13: ...context that receiver input voltage is applied without regulation to connected servos but the voltage range for most connectible servos speed controls gyros etc is only 4 8 to 6 V The Order No 33124...

Page 14: ...with over voltage Also for this reason be sure all connectors are always plugged in securely and have good contact mx 20 HoTT charging jack polarity The charger cables on the market from other manufac...

Page 15: ...higher than when the transmitter was last used e g because the battery was charged GRAUBELE 01 0 00h Stop Flt normal K78 0 00 0 00 0 0V 5 9V Mx HoTT Lithium battery CR 2032 At the left side of the tra...

Page 16: ...e charging jack or special charging connector integrated into the switch The switch in the power supply cable must be in its OFF position for charging Receiver battery connection polarity General char...

Page 17: ...ure to remove it too Once the battery and any micro SD card have been removed loosen the six countersunk screws on the rear of the transmitter with a Phillips size PH1 screwdriver see illustration Hou...

Page 18: ...de just below the middle Now turn this screw down until the respective joystick is free to move from limit to limit or turn the screw out until the joystick again completely self restoring Do not touc...

Page 19: ...clockwise return softer horizontal horizontal vertical vertical Notice The aggregate for the right joystick is a mirror image of the left joystick so corresponding screws for the right joystick are l...

Page 20: ...flexibility all other operating elements CTRL 6 8 SW 1 9 are designated as free by the software These other operating elements can be freely assigned to actuators as described in the text for the Cont...

Page 21: ...d a PC running a Windows operating system XP Vista or Windows 7 The PC software required such as a suitable USB driver can be found on the download page for the given product on the Graupner website a...

Page 22: ...er s ON OFF switch in the OFF position as only in this position does the transmitter s RF module remain inactive after the DSC cable is inserted This also reduces the transmitter s power consumption s...

Page 23: ...he transmitter and inserted into the card slot of a PC or laptop the respective log files can be found in a sub folder designated NoName There is a PC program available on the transmitter s download w...

Page 24: ...e and charge state bars if the preset threshold voltage is underrun a warning will appear see Warnings on page 36 and an acoustic warning tone will sound optical indication of trim lever positions or...

Page 25: ...t any menu position to the Servo display menu Keys to the right of the display SET button After switching the transmitter on briefly pressing 1 the SET key will cause a jump from the displayed base sc...

Page 26: ...vidual graphic displays Briefly touching the centered ESC or SET key will cause a return back to the base screen HIDDEN MODE language selection and contrast Press and hold arrow keys of the left touch...

Page 27: ...el limit to the right of column travel is concealed To reach this column use the pointing triangle at the bottom left of the screen to push the frame marker with the arrow key of the left or right tou...

Page 28: ...selection at the time this handbook was printed German English French The Italian and Spanish languages are planned for inclusion at a later point in time These will then be made available by way of...

Page 29: ...VOICE STICK CALI ENGLISH ENGLISH 22 100 I The loading process is finished as soon as the progress bar at the lower edge of the display disappears HIDDEN MODE CONTRAST LANGUAGE 0 VOICE STICK CALI ENGL...

Page 30: ...12 0 0 0 0 Regardless of the number of self neutralizing joystick functions available on your transmitter if these checks produce four 0 results and eight 100 results then your transmitter s joysticks...

Page 31: ...other joystick planes are calibrated analogously Notice Correct any bad calibrations by repeating the respective process Within a given joystick plane each of the three calibration positions can be se...

Page 32: ...E ONCE R LOW V 4 6 22 C This screen presents the RX DATAVIEW of the Telemetry menu s SETTING DATA VIEW see page 209 with data processed and displayed graphically The displayed items are as follows Val...

Page 33: ...ceiver s telemetry connection GPS N W E S Kmh 0 km h DIS m m s ALT m 0 0 0 0 0 If attached to the receiver this display will depict the data from a GPS module with integrated Vario Order No 33600 The...

Page 34: ...rnet at www graupner de in the web page for the given product Depending on how this module is equipped with sensors this screen can permanently display the data shown in the adjacent table The current...

Page 35: ...isplay along the screen s right edge will display a list of current cell voltages for a LiPo battery with up to six cells or operational data current altitude with respect to the starting location asc...

Page 36: ...IVE DATA OK No bound receiver in range No pupil signal Connection between teacher and pupil is interrupted SD CARD INSERT OK No SD or SDHC memory card in the card slot or card is not legible Is the wi...

Page 37: ...r Proportional controls CTRL 7 and 8 The touch keys can be locked out to prevent unintended access and operation of settings This lockout is established when the mx 20 HoTT transmitter is displaying i...

Page 38: ...to red again and the transmitter s display will show the screen depicted below GRAUBELE 01 0 33h Stop Flt K78 0 00 0 00 0 0V 5 2V M HoTT The symbol combination means that the currently active model me...

Page 39: ...on is available in Internet at www graupner de under the download link for the given product Notice You will automatically be notified of new updates per email after registering your transmitter at ht...

Page 40: ...ar and the block the update process from starting Now switch on the transmitter then start the transmitter update by clicking on the Download Start button After a brief period a warning will appear st...

Page 41: ...41 Your notes...

Page 42: ...ttery connections These two connections plus the servo s respective connections can be combined into a single connector at each end by way of a V or Y cable Order No 3936 11 Do not reverse the polarit...

Page 43: ...ver s battery If necessary charge the battery before beginning with an update Installing drivers 1 If not already done install the required driver software for the USB interface Order No 7168 6 as des...

Page 44: ...lename will appear in the corresponding window Firmware files are product specifically coded i e if you should accidentally select a file which does not correspond to the product e g transmitter updat...

Page 45: ...l update process you MUST perform a receiver initialization procedure before using the receiver again This is necessary for reasons of safety Do this by pressing and holding the receiver s SET button...

Page 46: ...arings to protect them from vibration Do not tighten the fastening screws down too tight as this would negate the vibration protection to be provided by the rubber bush spacer Only when servo fastenin...

Page 47: ...e receiver Just use a V or Y cable Order No 3936 11 to accomplish this see figure if you should need one or both of the receiver s connectors to attach a servo speed controller etc This double connect...

Page 48: ...s which have been specifically approved for operation in this higher voltage range Please note however that practically all servos speed controllers gyros and other devices built in the past and most...

Page 49: ...49 Your notes...

Page 50: ...ifferences between the physical control s number and the number of the downstream control channel can indeed emerge Control channel From the point at which a signal contains all control information ne...

Page 51: ...manently on e b timers closed fixed switch or off open fixed switch or they can provide a fixed input signal for a control function e g FXI 100 and FX 100 For example in flight phase programming these...

Page 52: ...ts 5 through 12 Control assignment Wherever programming permits a switch to be assigned a switch symbol will appear in the screen s bottom display line Use the arrow keys in the left or right touch pa...

Page 53: ...er Automatic switch on off of the timer to measure pure flight time for a helicopter by way of a control switch on the throttle limiter Automatic switch off of the AI Rud when brake flaps are extended...

Page 54: ...see page 104 As long as the throttle limit control remains in the left half of its travel path i e in the startup range C1 trimming acts on the throttle servo as idle trim and the indication for idle...

Page 55: ...55 Your notes...

Page 56: ...h servos Up to 7 flight phases can be programmed into each of the 24 model memory locations Except for C1 trim digital trim will be stored on a flight phase basis C1 trim permits easy location of a ca...

Page 57: ...r having up to two aileron elevator servos and up to 2 flap elevator servos Receiver power supply Free or aux function Free or aux function Right elevon Right elevon Free or aux function Receiver powe...

Page 58: ...Copy Erase menu Dual Rate and Exponential functions can be coupled for roll nick and tail rotor and programmable in two variations in every flight phase There are 8 freely assignable linear mixers Th...

Page 59: ...afety features see text beginning on page 104 See page 169 about this Receiver layout for helicopter models with 1 to 3 swashplate servos Receiver power supply Free or aux function Free or aux functio...

Page 60: ...us also non bound If you wish to program a winged aircraft model then after leaving the Model select menu by tapping on the center ESC button of the left touch pad programming of the model can begin r...

Page 61: ...y will switch to the base screen of the freshly occupied model memory At this time the warning BIND N A OK will appear in the screen for a few seconds as notification that a bond to a receiver does no...

Page 62: ...rst be appropriately connected with one or more receivers before the servos attached to the receiver s can be operated More about this can be found in the section Binding on page 69 or 75 A fundamenta...

Page 63: ...del in its Basic settings model menu page 68 or 74 and the code if present for the receiver bound to the model memory location Select the Model select menu with the arrow keys of the left or right tou...

Page 64: ...with the arrow keys of the left or right touch pad followed by confirmation of the selection by briefly pressing the SET button will erase the selected model memory Attention This erase process canno...

Page 65: ...ell ULTIMATE export NO YES 01 SD Karte A NO response will cancel the process and return the screen to the originating screen However if the YES response is selected then confirmed by pressing the SET...

Page 66: ...e arrow keys of the left or right touch pad 05 frei EXTRA ALPINA COBRA BELL47G import from SD CARD 11 03 10 11 03 11 11 03 11 11 03 12 Notice The export date posted at the right end of each model name...

Page 67: ...t touch pad then its hide display status switched over by means of the center SET button in the right touch pad Model select Base setup model Model type Copy Erase Suppress models Suppress TOG Tip If...

Page 68: ...ttle Motor idle Aileron left Aileron right Motor full throttle Rudder left Rudder right Motor idle Stick forward Stick back Aileron left Aileron right Stick forward Stick back Aileron left Aileron rig...

Page 69: ...o receivers is begun by first binding the individual receivers as described below In subsequent operation of the model only one of these receivers will establish a telemetry bond to the transmitter th...

Page 70: ...Analogous to the channel correlation function in the Telemetry menu on page 212 described as Channel Mapping it is very simple to use this menu item to freely distribute the 12 control channels inputs...

Page 71: ...ransmitter s RF transmission on and off to specific models while the transmitter is in operation For example to save power while a model is being programmed If this line option was set to OFF it will...

Page 72: ...ing the center SET button in the right touch pad SEL 99sec DSC output PPM10 RF Range Test R12 R08 OFF BASIC SETTINGS MODEL Rcv Ch Map RF transmit Now you can use the right arrow keys to choose between...

Page 73: ...smit The upper preset value in the middle column ensures the motor can be stopped throughout the maximum possible positioning range of the servo or speed controller alone by the switch to be assigned...

Page 74: ...il Motor Pitch Roll Roll Motor Pitch Tail Tail Motor Pitch Motor Pitch Nick Nick Roll Roll Nick Nick Roll Roll Motor Pitch Motor Pitch Tail Tail Motor Pitch Motor Pitch Roll Roll Nick Nick Tail Tail B...

Page 75: ...Ch Map If not already off now switch the receiver on The red LED on the receiver will blink Press and hold the SET button on the receiver while the LED continues to blink red for about 3 seconds then...

Page 76: ...ry menu on page 212 described as Channel Mapping it is very simple to use this menu item to freely distribute the 12 control channels inputs to the outputs servo connections of the bound receiver spec...

Page 77: ...ge test The built in range test reduces transmission power to an extent that a function test can be carried out even within a distance of up to about 50 m Perform the range test on the Graupner HoTT s...

Page 78: ...also to the Principle of the Auto C1 Pos topic which follows The Autorotation name is permanently assigned to phase 1 and it is included in the base screen of all flight phase dependent menus This na...

Page 79: ...n emergency OFF position for example to avoid restarting the motor after every landing during autorotation practice In this case it is better to use this option as a cut off rather than as an emergenc...

Page 80: ...if you wish to set a lower threshold by which an underrun will cause the throttle servo or speed controller with closed switch to switch into the cut off position reduce the preset servo travel and i...

Page 81: ...81 Your notes...

Page 82: ...stick C1 is at the front i e away from the pilot The warnings Throttle too high see page 36 as well as the cut off option in the Basic settings model see page 72 are activated and the Brake settings...

Page 83: ...he default setting for input 1 will remain as it is and the brake will be operated by way of the non neutralizing C1 joystick However use of input 7 8 or 9 makes it possible to operate the brake in an...

Page 84: ...brake settings at neutral At the same time the effective control path is automatically spread to 100 Tip Preferably the servo intended for operating any airbrake flaps that may be on the model should...

Page 85: ...85 Your notes...

Page 86: ...icopter models operated with only 1 pitch servo will be operated WITHOUT the transmitter s mixer functions for pitch nick and roll the Swashplate mixer menu item in the Multifunction menu will be hidd...

Page 87: ...ar to a substantial Expo setting Rotor rotation After selecting the Rotor direct line rotor direction with the arrow keys of the left or right touch pad the corresponding entry field will be framed 3S...

Page 88: ...servo via input Th L 12 in the Control adjust menu Since your models will typically be operated with the same pitch min direction this specification can be conveniently preselected in the transmitter...

Page 89: ...89 Your notes...

Page 90: ...respective receiver outputs to which they are connected provided that no swapping of transmitter and or receiver outputs has been specified This means that even a change of stick mode will not effect...

Page 91: ...he arrow key of the left or right touch pad analogous to the pointers at the bottom of the screen to the right beyond the trv column S1 S2 S3 Rev cent lim 0 0 0 150 150 150 150 150 150 0 0 150 150 150...

Page 92: ...play Control adjust Open this menu item by pressing the center SET button in the right touch pad Ch 1 Aile Elev Tr time 4 4 4 0 0s 0 0s 0 0s 4 0 0s Rudd 0 0s 0 0s 0 0s 0 0s GL GL GL GL St This menu ad...

Page 93: ...separately This means that respective servos will then follow rapid control position changes only at an accordingly delayed rate This time delay has a direct effect on the control function and therefo...

Page 94: ...Copy Erase Suppress menus Open this menu item by pressing the center SET button in the right touch pad Model select Base setup model Model type Copy Erase Suppress models Suppress TOG This menu adapt...

Page 95: ...tive field back to 4 Column time The time column entries influence joystick acceleration speed s if applicable for each movement direction for the four control sticks 1 through 4 separately This means...

Page 96: ...iddle positions Even though this may seem inconvenient at first glance it is indeed just this state which offers full freedom to select and assign these other operating elements as desired and leaves...

Page 97: ...can be incorporated in this Control adjust menu as Ct9 or C10 also offer a middle position Simultaneously pressing the or keys of the right touch pad CLEAR for an active control or switch assignment...

Page 98: ...ng the or keys in the right touch pad CLEAR will reset the changes parameter in the inverse video entry field back to 100 Important In contrast to the servo travel setting control travel setting effec...

Page 99: ...99 Detail program description Control adjust...

Page 100: ...an a little awkward at first glance this is the only way to ensure that you can select any of the additional transmitter controls as you wish and in addition do not need to waste time disabling contro...

Page 101: ...keys on the left or right touch pad select an input Input 5 Throt 6 Gyro 7 Input 8 11 or Th L 12 Briefly tap the center SET key on the right touch pad to activate the assignment option Input 5 offset...

Page 102: ...100 Important In contrast to altering servo travel changing the control travel setting affects all downstream mixer and coupling inputs i e any and all servos that could be actuated by the transmitte...

Page 103: ...oint of these predefined static flight phase specific settings you can then use a transmitter control assigned to the Gyro 7 line e g one of the rotary potentiometers CTRL 7 or 8 to vary the gyro gain...

Page 104: ...pter carburetor never approaching Throttle limit function anything near its idle speed under normal flight conditions and that the motor can therefore neither be started or stopped cleanly without som...

Page 105: ...ustment option in the Servo adjustments menu so that the carburetor is completely open Now close the throttle limiter completely by turning the CTRL 6 proportional rotary control in an anti clockwise...

Page 106: ...servo output 6 controls the throttle servo on the mx 20 HoTT A servo connected to output 12 can be used independently of this for other purposes by means of mixers provided that you separate the serv...

Page 107: ...tting and can also stop the motor In this case you should turn the throttle limiter fully to the left unlike the previously described setting on the Control adjust menu and adjust the side of the trav...

Page 108: ...on of the linkage point on the output disc You can counteract this effect with Expo values greater than 0 so that angular travel increases over proportionately as stick travel increases The Expo setti...

Page 109: ...ogether with a switch icon that indicates the switch s respective direction when moved 100 100 100 Ail Ele Rud DUAL 3 SEL normal If you select the right hand column at the lower edge of the display ma...

Page 110: ...xamples Servo travel Servo travel Servo travel Stick deflection Stick deflection Stick deflection Expo 100 DR 125 Expo 100 DR 50 Expo 100 DR 50 Asymmetric setting of Dual Rate and Expo To make an asym...

Page 111: ...111 Detail program description Control adjust 100 100 Ail Ele Rud DUAL C3 SEL normal 111 Set the Expo values in the same way...

Page 112: ...ases the control surface rate of travel over the control linkage continually decreases depending on the position of the linkage point on the output disc You can counteract this effect with Expo values...

Page 113: ...ve desired switch to ON position ext switch SET The switch so assigned appears on the display together with a switch icon that indicates the switch s switching direction With G switches from the expan...

Page 114: ...ples Servo travel Servo travel Servo travel Stick deflection Stick deflection Stick deflection Expo 100 DR 125 Expo 100 DR 50 Expo 100 DR 50 Asymmetric setting of Dual Rate and Expo To make an asymmet...

Page 115: ...115 Detail program description Control adjust 100 100 DUAL C3 SEL normal Roll Nick Tail 111 Set the Expo values in the same way...

Page 116: ...oving the transmitter control throttle airbrake joystick you can reposition the vertical line in the graph between the two end points L and H The current joystick position is also displayed in numeric...

Page 117: ...entirely independently of the control position 2 50 75 75 Trim point Normal Input Output Point C1 Curve Exit from trim point function setting by tapping the center key ESC on the left touch pad Trim...

Page 118: ...t or right touch pad to move the marker frame in an upwards direction to the Curve line Now briefly tap the center SET key on the right touch pad to activate the value field on the Curve line 1 50 0 0...

Page 119: ...or C1 curve In the basic software set up 2 reference points namely the end points at the bottom end of joystick travel L low 100 travel and the top end of joystick travel H high 100 travel define a li...

Page 120: ...the value field is active i e highlighted you can use the up or down arrow keys on the left touch pad to jump to reference points already set In this case a triangle is shown on the graph to indicate...

Page 121: ...is configured as presented above tap the center ESC button on the left touch pad to deactivate the value field Then use the arrow keys on the left or right touch pad to move the marker frame in an up...

Page 122: ...9 and the programmable control switches If a switch is pressed the switch number is revealed by one of the display items changing from an OFF to an ON symbol or vice versa To improve the legibility of...

Page 123: ...u have the option not only of using the 9 possible transmitter switches but also of choosing and assigning one of the C1 C4 control switches from the list of expanded switches as described in the sect...

Page 124: ...the 3 stage switch will reliably exceed this value If you do not the switching function will be unreliable since the control switch triggers only if a value unambiguously fails to meet or exceeds the...

Page 125: ...en the C1 control switch is active i e it triggers at the switching point if the switch is closed the control switch now remains permanently closed as well independently of the control position and sw...

Page 126: ...de in the Phase settings menu For heli programs you either start with the Base setup model menu if you wish to set up autorotation or if not you also start programming with the Phase settings menu In...

Page 127: ...127 Detail program description Control adjust...

Page 128: ...ses and are programmed in the corresponding menus Depending on the setting Throttle min forward back or None in the Motor on C1 line of the Model type menu your transmitter s display will look as foll...

Page 129: ...2 timer must first be stopped by using the ESC key on the right touch pad Application In addition to the motor runtimes for example the unpowered glide times between these could also be recorded Tappi...

Page 130: ...ing from e g Phase 1 to Phase 3 the switch time is set to 2 0 s and to 3 0 s when switching from Phase 1 or 3 to Phase 2 Launch Such asymmetric transition times can be useful when e g switching betwee...

Page 131: ...131 Detail program description Control adjust...

Page 132: ...can then be modified as appropriate Name column The first line and thus the flight phase with top priority is reserved for auto rotation flight see the Base setup model menu Accordingly the predefine...

Page 133: ...ase into Phase 1 For safety reasons however the transition to the auto rotation flight phase ALWAYS occurs without any time delay The angled bracket in the Sw time column at the end of the Auto line i...

Page 134: ...model type and whose switch is assigned on the Base setup model menu always takes precedence Accordingly as soon as the auto rotation switch in question is activated the following warning appears A B...

Page 135: ...settings menu However since this example assumes just four flight phases you can leave the default phase name as 1 Normal for this switch position You can leave this menu in the familiar way by pressi...

Page 136: ...al Dist 0 0 0 0 0 0 ELEV column In this column you can store a phase specific elevator trim setting Important notice Settings made in this column have an immediate effect on elevator trim and accordin...

Page 137: ...for flight phase transitions In this menu you can now deactivate the transition delay set previously per flight phase and for individual control channels e g for the motor channel for electric models...

Page 138: ...as required This switch is assigned and erased again as required as described in the section Assigning transmitter controls switches and control switches on page 52 Tapping the or keys on the right t...

Page 139: ...ch they must complete certain tasks The timer is started in precisely the same way as the flight time timer To stop the timer first ensure the timer switch is at its OFF position Then press and hold t...

Page 140: ...top Flt K78 10 01 0 00 0 0V 5 9V M HoTT After the assigned switch is activated the stopwatch starts at the initial value set and runs backwards countdown function Once the timer reaches zero it does n...

Page 141: ...ng the or keys on the right touch pad at the same time CLEAR to reset them Remember that the timer switches also remain active during programming On the basic display simultaneously tapping the or key...

Page 142: ...pad Clks 1 2 and 3 These timers are started and stopped via a switch or control switch To do so first use the arrow keys to select the appropriate column via the switch icon at the bottom right Then...

Page 143: ...time even if it has not been stopped separately in the other flight phases Lap counter timetable SEL 0 00 0 00 0 00 0s 0s SEL 0s Timer1 Timer2 Timer3 Lap time tim tab Lap Display On the Lap time tim...

Page 144: ...display and the Lap Display 01 02 03 04 SEL 01 23 4 02 34 5 03 45 6 05 SEL 04 56 7 05 67 8 07 08 09 10 00 00 0 00 00 0 00 00 0 11 12 00 00 0 00 00 0 00 00 0 06 06 78 9 go to the line Lap Display SEL 0...

Page 145: ...l mixer 3 3 4 Servo 4 8 V C 577 Best Nr 4101 Servo 4 8 V C 577 Best Nr 4101 4 V tail mixer Control function inputs Control channels receiver outputs Elevator stick Rudder stick Right rudder elevator L...

Page 146: ...mmed specific to a flight phase Comments Using the menu Model type page 82 control of the airbrake mixers can be reprogrammed from control input 1 to 7 or 8 to 9 and the associated offset point can al...

Page 147: ...fore establishing the offset point in the Motor at C1 line Note If the offset is not set right at the end of the transmitter travel the rest of the travel is a dead zone i e the transmitter control do...

Page 148: ...e for each side regardless of the direction of rotation of the aileron servos While 0 corresponds to a normal linkage i e no differential 100 or 100 represents the split function For aerobatic flying...

Page 149: ...Ele Curve off Normal If required i e if you have the feeling that you will need to set pitch trim compensation when the airbrakes are extended you can program an appropriate automatic mixer affecting...

Page 150: ...iciently strong braking effect note that you should try to lower the flap as low as is mechanically possible From the second line on this display screen you can switch to the sub menu Elevat curve by...

Page 151: ...downward oriented elevator i e in opposite directions Optionally this mixer can be activated and deactivated by using one of the switches that do not reset themselves SW 2 8 or a control switch To co...

Page 152: ...To reliably prevent the servos mechanically striking their end stops which draws a heavy current you can set an appropriate limit value in the lim column of the Servo adjustments menu page 90 then fin...

Page 153: ...round 50 is usually highly appropriate Settings are always made symmetrically relative to the neutral point of the aileron joystick If you tap the or keys on the right touch pad CLEAR at the same time...

Page 154: ...iver as described on page 57 and select them appropriately on the Model type menu see page 82 then the abbreviations AI and FL refer to the following flaps AI left FL FL AI right Since the options ava...

Page 155: ...if values are preset to 2AIL 4FL then all configuration options for the aileron pair FL 0 0 fl pos EL FL 0 0 0 AILE Normal Diff 0 Ail tr AI 100 100 are shown and one step to the right all options for...

Page 156: ...means choosing the maximum number of control surface servos the columns AILE FL 0 0 fl pos EL FL 0 0 0 AILE Normal Diff 0 Ail tr AI 100 100 and AILE2 0 0 0 0 0 AILE2 0 100 100 FL fl pos EL FL Normal D...

Page 157: ...0 FLAP 0 0 0 fl pos Normal Diff Ail tr AI In the line AI you can set the percentage extent to which the wing flap pair FLAP and if present FL2 follow when an aileron command is given the value can be...

Page 158: ...ns that apply to each flight phase The adjustment range of 100 to 100 makes it possible to set the correct direction of travel regardless of the direction of rotation of the aileron and flap servos If...

Page 159: ...d Motor on C1 forward back on the Model type menu see page 82 and entered Yes for the currently active flight phase in the Motor column of the Phase settings menu see page 128 Switch the flight phase...

Page 160: ...n as an alternative you can set a free mixer which connects up the brake control channel you have selected with the airbrake servo channel To activate two airbrake servos the best approach is to leave...

Page 161: ...duction value greater than the aileron differential configured will eliminate the latter even before the full travel of the airbrake joystick Values can be set in the range 0 to150 If you tap the or k...

Page 162: ...the aileron that is deflected upwards Settings are always made symmetrically relative to the neutral point of the aileron joystick The adjustment range of 150 lets you set the direction of deflection...

Page 163: ...163 Detail program description Control adjust...

Page 164: ...ing the center SET key on the right touch pad Use the arrow keys to configure the mixer ratio Otherwise you will need to switch to the second screen page where you can set up the appropriate curve mix...

Page 165: ...ithin the range 125 to 125 A control signal modified in this way affects only the collective pitch servos In the example to the left the joystick is at exactly 0 of control travel and also generates a...

Page 166: ...ion setting by tapping the center ESC key on the left touch pad Trim offset function Assuming the value field is active i e highlighted you can not only use the up or down arrow keys on the left touch...

Page 167: ...ouch pad to set the value field from off to on and complete this setup procedure by briefly tapping the center SET key on the right touch pad or the center ESC key on the left touch pad 50 50 50 3 Pit...

Page 168: ...at a glow motor runs at a speed considerably higher than idle speed and the clutch is firmly engaged The starting and stopping of the motor whether glow or electric always takes place using the thrott...

Page 169: ...ry therefore adjust the travel setting of the throttle limiter as appropriate on the Th L 12 line of the Control adjust menu Leave the default value of GL in the Type column alone however to configure...

Page 170: ...he speed governor used and on the target motor speed that is desired and can of course be varied according to the flight phase For auto rotation flight an automatic switch over is made from this mixer...

Page 171: ...or right and this must first be set correctly on the Helicopter type menu For left hand rotation systems the throttle follows the tail rotor when the tail rotor joystick is moved to the left and vice...

Page 172: ...n is set to 100 the gyro gain is reduced to zero as the tail rotor deflection increases For values between 100 and the maximum value of 199 the gyro can be fully suppressed depending on the transmitte...

Page 173: ...nally via the transmitter control the gyro s own control 1 must be used to set the weaker gyro gain e g for aerobatics and control 2 the stronger gyro gain e g for hovering Even though a proportional...

Page 174: ...l or pitch axis alone to 149 no effective limit In addition the function can be set to Off and hence completely deactivated The swash limiter can also be configured per model and per flight phase This...

Page 175: ...elis The idle setting described in detail on pages 105 to 107 always takes place with the throttle limiter closed normally with the trim lever of the C1 function and only in special cases is the throt...

Page 176: ...e collective pitch stick The idle position that you set is displayed on the transmitter s basic display by a horizontal bar alongside the display of the C1 trim lever position Refer to the description...

Page 177: ...troller is open too far when the motor starts there is a danger that the motor will run up to speed immediately after starting and the centrifugal clutch will engage immediately Accordingly you should...

Page 178: ...er even as rotational speed is falling off To do so briefly tap the center SET key on the right touch pad to switch to the Pitch graph page and then use the joystick to move the vertical line to point...

Page 179: ...not driven by the motor but by the windmill principle Since this in turn does not generate any torque for which the tail rotor must compensate all corresponding mixers are switched off automatically...

Page 180: ...n such cases For more complex applications mixers can be switched in sequence In this case it is not the transmitter signal at the output of a control function which forms the input signal of the seri...

Page 181: ...ription given in the section Assigning transmitter controls switches and control switches page 52 Using the arrow key 7 on the left or right touch pad switch to the column and then tap the center SET...

Page 182: ...M1 M2 M3 6 EL C1 EL M4 M5 S EL Tr C4 4 2 Mixer switches In the sample screen image shown above switches 4 and 2 have been assigned to linear mixers 1 and 4 and to mixer 2 of the control switch G4 The...

Page 183: ...effect of the C1 trim lever on the mixer output will depend on the function assigned to it on the Model type menu page 82 in the Motor on C1 column for fixed wing models Trim Effect on mixer output N...

Page 184: ...ixer to affect the default software coupling of aileron camber changing flap or collective pitch servos Fixed wing models Depending on the number of wing servos set on the Aile flaps line of the Model...

Page 185: ...nd 7 as flaps by default as you can see by consulting the above table Leave the default value of GL in the Type column alone however to configure this setting globally for all flight phases as is the...

Page 186: ...then use the arrow keys on the left or right touch pad to set or readjust the offset value manually in increments of 1 By selecting SET and then activating the value field by tapping the center SET ke...

Page 187: ...control travel and H high 100 control travel along the control travel If you have already read the description of the Channel 1 curve menu or the method of programming 6 point curves on the Helicopte...

Page 188: ...h pad at the same time CLEAR The selected reference point is erased and the numbering of the remaining reference points is updated as required Briefly tap the center ESC key on the left touch pad to c...

Page 189: ...n upwards direction to the Curve line as required Now briefly tap the center SET key on the right touch pad to activate the value field on the Curve line 0 12 normal 8 10 0 Input Output Point C MIX 9...

Page 190: ...Y CHANNEL only normal 1 2 3 4 5 6 and follow this by programming a free mixer C1 C1 so as to restore your ability to control the airbrakes via servo 1 If you also assign a switch to this mixer then yo...

Page 191: ...191 Detail program description Control adjust...

Page 192: ...ght phases Switch to your chosen flight phase and use the arrow keys to page through this menu The mixers on the Free mixers menu are displayed in the center column Following the activation of the val...

Page 193: ...e from the mixers programmed to its control channel i e with MIX ers only Accordingly for any channel set to MIX only you can utilize both its control function and its control channel entirely indepen...

Page 194: ...rom the Servo adjustments menu see page 90 In the software the V tail mixer already mentioned is supplemented by other dual mixers for the two aileron servos at receiver outputs 2 and 5 and for the fl...

Page 195: ...8 on the Control adjust menu Finally move to the Offset column and adjust the offset value until both rudders return to the neutral position You may also need to play a little with the offset and tra...

Page 196: ...directions are set up by default as can be seen above The preset is 61 in each case but the value can be varied from 100 to 100 if required by briefly tapping the center SET key on the right touch pad...

Page 197: ...5 6 STO FAIL SAFE Pos hold DELAY 0 25s Following this use the arrow keys on the left or right touch pad to select the DELAY option shown at the bottom of the display 7 8 9 10 11 12 STO FAIL SAFE Pos...

Page 198: ...transmitter controls from 1 to 12 to transfer to the pupil and then briefly tap the center SET key on the right touch pad in each case so as to switch between Teach Teacher and Pupil 2 3 4 5 BIND SW 1...

Page 199: ...els i e the receiver outputs without intermediary mixers If you are using an mc or mx series transmitter it is best to activate a free model memory with the required model type Fixed wing or Heli Assi...

Page 200: ...upil transmitter not ready Interface in pupil transmitter not correctly connected in place of the RF module Cables connected wrongly see right for cable connections Pupil transmitter not switched over...

Page 201: ...mitter mx 20 HoTT mx 12 HoTT mx 16 HoTT mx 20 HoTT mc 19 s iFS HoTT up to mc 24 mx 22 iFS mx 24s Pupil transmitter with DSC socket Pupil transmitter with pupil module order no 3290 3 3290 10 3290 33 T...

Page 202: ...ventions must be observed Channel Function 1 Motor throttle collective pitch 2 Aileron roll 3 Elevator pitch axis 4 Rudder tail rotor If you wish to transfer other control functions to the pupil trans...

Page 203: ...8 9 10 BIND SW 7 9 11 12 TRAINER Pupil Pupil Teach n a No pupil signal Since at this stage of programming the wireless trainer system no connection yet exists to a pupil transmitter the transmitter r...

Page 204: ...V HoTT RF Pupil If however the connection between the teacher and pupil transmitters should be lost during the training session then the teacher transmitter will automatically assume control of the mo...

Page 205: ...on the left or right touch pad to select ACT Please selcet trainer link ACT INH and confirm this selection by tapping the center SET key on the right touch pad then the existing teacher connection is...

Page 206: ...ght touch pad You can now use the right arrow keys to assign your selected control channel to the desired output confirming this with the SET key 2 3 4 1 2 3 4 SEL 6 Tx Ch Tx Ch Tx Ch Tx Ch Output Out...

Page 207: ...207 Detail program description Control adjust...

Page 208: ...ty connection for the return channel and malfunction as a result Since the telemetric data between transmitter and receiver is only exchanged after the fourth data package the data transmission requir...

Page 209: ...which you cannot jump to cannot be changed In order to change a parameter briefly press the central SET key of the right touch pad the parameter is represented inversely change the value within the p...

Page 210: ...ion power than the receiver the model can still be safely operated For the sake of safety the distance to the model should be reduced until the warning tone goes silent again Receiver temperature R TE...

Page 211: ...ck and or trim lever to the desired position and save the current control position by pressing the SET key again This position is saved as the new neutral position TRIM trim position In the TRIM line...

Page 212: ...ed to multiple receivers if necessary or even assigned to multiple receiver outputs with the same control function For example this might be used in order to be able to control two servers for each ai...

Page 213: ...n while the transmitter is switched off In normal model mode on the other hand the corresponding servo behaves in accordance with the set MODE in the event of a failure DELAY fail safe reaction time o...

Page 214: ...rding to the fail safe settings of CH 01 The reaction or delay time set in the DELAY line on the other hand always applies uniformly for all channels set to FAI L SAFE RX FREE MIXER RX FREE MIXER MAST...

Page 215: ...ect at the outputs 2 and 3 assume the aileron and elevator function The servos are normally connected to the receiver as follows OUTPUT CH 2 Left horizontal vertical OUTPUT CH 3 Right horizontal verti...

Page 216: ...ide for all servo outputs for the servo test 1500 1000 s TEST Test procedure START STOP ALARM VOLT Alarm threshold of the receiver undervoltage warning 3 0 6 0 V factory setting 3 8 V ALARM TEMP Alarm...

Page 217: ...tion the parameter R TEM is shown inversely on the RX DATAVIEW display page Make sure that your receiver remains within the permissible temperature range during all flight conditions ideally between 1...

Page 218: ...three wire connecting cable Order No 33700 1 300 mm or 33700 2 100 mm at receiver type specific servo connections Receivers of the type GR 16 and GR 24 for example are to be connected with one anothe...

Page 219: ...ly line from the common voltage supply With receivers with a high current load it may even be beneficial to connect them with two supply lines to the same current supply On the other hand if each of t...

Page 220: ...MODUL ELECTRIC AIR MOD GPS Here after selection of the desired line with the arrow keys of the left of right touch pad and then pressing the central SET key of the right touch pad activate or deactiv...

Page 221: ...he reception power is measured and represented in dBm the reception power is increasingly worse the higher the bar is and vice versa for this purpose see also Reception power S dBm on page 224 Mark th...

Page 222: ...e preferably one of the two pushbuttons SW 1 or SW 9 switch to the next voice output in the rotation selected in the options TRANSMITTER RECEIVER and SENSOR as described in the following 1 3 VOICE TRI...

Page 223: ...the central SET key of the right touch pad activate or deactivate the selected voice trigger SENSOR This line only appears if a sensor was first activated in the SENSOR SELECT submenu 1 3 SENSOR 8 VO...

Page 224: ...tral SET key of the right touch pad In the inverse value field you can now change the respective specified value with the arrow keys of the right touch pad and complete your entry by pressing the cent...

Page 225: ...f the three available modulation types should be provided for the DSC socket separately for each model memory This selection primarily influences the number of maximum control channels available at th...

Page 226: ...determine how long the backlight of the display should remain switched on after switching on the transmitter or the last key actuation The available options are unlim ited 30 s 60 s and 120 s Simultan...

Page 227: ...ie warning Touch Sense BASIC SETTINGS Power on warn unlim In this line you can select the touch sensitivity of the touch pads in a range from 1 to 10 Simultaneously pressing the arrow keys or of the r...

Page 228: ...228 Detail program description Control adjust...

Page 229: ...229 Detail program description Control adjust...

Page 230: ...play takes place according to the following scheme Bar 1 Throttle brake servo Bar 2 Aileron or left aileron Bar 3 Elevator Bar 4 Rudder Bar 5 Right aileron Bar 6 Camber changing flap left free channel...

Page 231: ...the movement cycle can be changed in 0 5 s increments between 0 5 s and 3 0 s using the arrow keys of the left or right touch pad Briefly pressing the central ESC of the left touch pad or the central...

Page 232: ...touch pad on the other hand you confirm the active CLR field in the bottom right in the display and thereby delete the number you entered Make note of the secret code and keep it safe Otherwise the tr...

Page 233: ...the display appears as follows 1 234 2048MB 2011 02 01 Mo 11 22 33s 1234MB firmware ver date time SD Card available Press the central SET key of the right touch pad once The following display appears...

Page 234: ...itter Firmware Version 1 234 0MB ABCDEF12 2011 08 01 Mo 11 22 33s RFID firmware ver date time SD Card The current version number of the transmitter software is shown in this line Through a comparison...

Page 235: ...e by a buffer battery for situations like a battery change see page 15 SD card 1 234 2048MB ABCDEF12 2011 08 01 Mo 11 22 33s RFID firmware ver date time SD Card In this line the memory capacity of a m...

Page 236: ...l position should be tilted forward one lobe pointing toward the nose set to the respective servo The mechanical differentiation achieved through this asymmetric assembly contributes to the fact that...

Page 237: ...is only occasionally different In this regard one must ask how the drive and brake system are actuated Certain solutions have shown to be practical and others have shown to be less practical For examp...

Page 238: ...ke sure that you do not enter a value which is too low so that you do not have sufficient time to safely land your model in the event of a battery warning In the Power on warning line you can determin...

Page 239: ...me GRAUB FGHIJKLMNOPQRSTUVWX YZ _ abcdefghijk A B CDE If applicable the defaults adopted from the General settings menu for Stick mode and DSC output are also checked and changed as necessary In the m...

Page 240: ...mechanical and electrical reasons For example if the the sum of the values of the columns Center and Servo travel exceed this limit the respective servo can no longer follow the control commands star...

Page 241: ...rmal normal off If this display appears you model is equipped with a motor contrary to the assumption of this section and therefore you have selected front rear instead of none in the line Motor to C1...

Page 242: ...bt ask the advice of an experienced model pilot If you should find during the testing that one or multiple settings must be made for the adjustment of the rudder effects to your control habits the con...

Page 243: ...re without causing significant damage However if something like this happens in the wrong place at the wrong time the model may become uncontrollable and tear across the flight field completely out of...

Page 244: ...ht should also be mentioned at the beginning of this section If it becomes apparent after the initial power flights that the model must be continuously corrected with the elevator while the motor is s...

Page 245: ...the right from the Offset column to the Travel column typ fr to M1 M2 M3 8 EL M4 M5 If you now switch to the Servo display by simultaneously pressing the keys of the left touch pad and then actuate t...

Page 246: ...Input 7 Input 8 GL GL GL GL typ Like with example 1 you also switch to the line of a free input activate the Control and switch assignment in the third column and then move the selected control in th...

Page 247: ...idle path ensures that all brake settings remain at neutral even with minor deviations from the limit of the brake flap control At the same time the effective control path is automatically spread to...

Page 248: ...g approach for example without having to release a joystick The assignment of the selected switch takes place in the menu Phase assignment page 134 Select the switch symbol under C with one of the arr...

Page 249: ...risk among other things that the model plunges when the brake system is retracted e g for the extension of a landing approach which is too short If everything is correctly set so far only the motor i...

Page 250: ...nverse value field of Input 8 until your spoilers are retracted again Input 5 offset 0 0 0 Input 6 Input 7 Input 8 Normal 100 Confirm this setting by briefly pressing the central ESC key of the left k...

Page 251: ...251 Detail program description Control adjust...

Page 252: ...ntrol assignment by briefly pressing the central SET key of the right touch pad the following window appears SEL 75 0 0 G1 G2 C3 C4 CONTROL SWITCH Gb1 Gb1 75 STO Move desired control adj Now simply mo...

Page 253: ...Mitte Flug Alarm 0 34h 1 23h 0s 0s Stopp SEL Control fix sw C1 C2 C3 C4 FX FXi C1i C2i C3i C4i Now select the previously programmed control switch Ct1 and then press the central SET key of the right...

Page 254: ...for this purpose by standard and the second to an arbitrary free receiver connection 5 12 such as Output 8 Now switch to the menu Control adjust page 96 and using the arrow keys assign the Control 1 i...

Page 255: ...0 0 0 Input 6 Input 7 Input 8 GL GL GL GL typ normal that Input 8 is set to free so that the control function is separate from the control channel Alternatively You can set Input 8 in the Only mix cha...

Page 256: ...hes CTRL 9 or 10 The motor control is connected to receiver Output 9 according to the description beginning on page 244 and Examples 1 and two which serve as the basis of this continuation In the Mode...

Page 257: ...the switching on of the motor A B C D E F 1 Normal 2 6 7 PHASE ASSIGNMENT prior combi Then the respective switch positions must be assigned corresponding flight phases names Although you have already...

Page 258: ...to the desired flight phase beforehand whose name is shown at the bottom in the display appropriate to the switch position Both positive and negative throw changes are possible These settings are to...

Page 259: ...reviously set in the aileron differentiation line in order to suppress it again while breaking In the Elevat curve submenu enter a correction value for the elevator see page 162 Notice The Brake setti...

Page 260: ...d be activated later with the corresponding C1 joystick as the control Tail type Motor at C1 Normal None Aile flaps 2AIL2FL M O D E L T Y P E Brake Off In 1 90 SEL STO The setting in the Brake offset...

Page 261: ...erentiation of the aileron control on the AI and FL flaps For the significance of the differentiation see page 148 The adjustment range from 100 150 enables the correct differentiation direction adjus...

Page 262: ...ttings are completed Two additional flight phases should be set up in the following each of which requires a somewhat different flap position Therefore switch to the menu Phase setting page 128 and ac...

Page 263: ...flight phase For this purpose open the menu Copy Erase page 64 and switch to the Copy flight phase line Copy flight phase Erase model Copy model model Export to SD Import from SD The maximum seven fli...

Page 264: ...light phase FL pos Here you position the AIL and FL in the Thermal flight phase in case the assigned control proportional rotary control or three stage switch is in its neutral or center position in t...

Page 265: ...ermal In the two limit positions of the three stage switch the elevator is moved symmetrically in this example with 5 true to side If on the other hand you use a proportional rotary control the elevat...

Page 266: ...el page 193 of the selected control channel 9 in this case is set to Only MIX MIX ONLY CHANNEL only normal 7 8 9 10 11 12 It is mandatory that this is set to Only MIX because the control curves of the...

Page 267: ...he control channel used instead of the selected proportional rotary control in in these examples CTRL 8 to channel 9 and the desired symmetric or asymmetric time span is set in the Time column for the...

Page 268: ...d select 4AIL 4FL in the Ailerons flaps line Tail type Motor at C1 Normal None Aile flaps 4AIL4FL M O D E L T Y P E Brake Off In 1 100 SEL In order to also be able to actuate the camber changing flap...

Page 269: ...AP 0 77 77 FL fl pos EL FL Thermal Diff Ail tr AI 12 100 0 0 100 FLAP2 0 55 55 FL fl pos EL FL Thermal Diff Ail tr AI Notice Whether positive or negative values must be set in the FL pos line depends...

Page 270: ...ng flap movement on elevator actuation normally only used in High gear to increase the agility over the transverse axis is also carried out in the Multi flap menu of the Wing mixers menu beginning on...

Page 271: ...ow this point the mixer remains inactive whereas the selection of dead travel is possible If the model has additional brake flaps or spoilers and your receiver has another free Output 1 you can also c...

Page 272: ...levator Free or right flap elevator Free or aux function or left flap 2 elevato Free or aux function or right flap 2 elevat Free or rudder According to the assignment of the receiver outputs in the me...

Page 273: ...tion of the two exterior aileron servos will function correctly immediately but not the elevator function of the two aileron servos and if applicable the interior camber changing flaps This is achieve...

Page 274: ...ach at 0 as well as the left edge point at 60 and the right edge point at 65 Then the curve was rounded by pressing the central SET key of the right touch pad In this case Regardless of which type of...

Page 275: ...ogram description Control adjust Only mix channel page 193 for safety s sake Corresponding with the above example therefore the control channel 5 should be set to only MIX MIX ONLY CHANNEL only normal...

Page 276: ...ceiver power supply Free or aux function Free or aux function Rudder Aileron or left aileron Elevator or 1st elevator Free or 2nd elevator or aux function Receiver power supply Airbrake or throttle se...

Page 277: ...movements of the throttle joystick through the menu Channel 1 curve page 116 a bowed or in other words non linear throttle curve can be set Four cycle motors with Roots pumps in particular such as OS...

Page 278: ...M2 M3 C1 5 C1 EL M4 M5 8 8 Then switch to the second respective display screen in order to adjust the respective mixing degrees In both cases the mixer neutral point is at the C1 control center Enter...

Page 279: ...f the ailerons landing flaps The mixer must be switched on and off with the same switch with which you can switch the aileron landing flap function on and off see previous page Therefore it only works...

Page 280: ...elected to demonstrate that a helicopter which flies really well can also be attained with relatively little programming effort However we do not want to dispense entirely with the enhancement possibi...

Page 281: ...free 02 01 06 R12 free free free free and open this by briefly pressing the central SET key of the right touch pad In the subsequently opening display with the key of the left or right touch pad sele...

Page 282: ...YZ _ abcdefghijk ABCDE After entering the Model name the specifications for the Stick mode and DSC output adopted from the General settings are checked again for which you can change the storage loca...

Page 283: ...ich function the trim slider on the pitch joystick should have For this purpose the setting TL is selected or left in the Throttle line In doing so the trim lever corresponds to the accustomed idle tr...

Page 284: ...Throttle Tail Swash rotation Swash limiter 0 0 0 0 OFF Normal Gyro suppress 0 The Pitch function appears right in the first line By pressing the central SET key of the right touch pad you switch to t...

Page 285: ...approximately 2 In doing so you will have somewhat more of an angle to catch the model later on 1 After setting the pitch curve move the autorotation switch back and return to the helicopter mixer me...

Page 286: ...mal Curve off Now for testing purposes switch back to the autorotation phase Here the setting is also deactivated the tail servo no longer reacts to pitch movements no torque usually arises when the m...

Page 287: ...following meanings No phase switch available Phase switch available Currently active phase Pha1 Pha2 Pha3 Name ph Tim Pha4 Autorot Auto However you should consider beforehand whether you want to activ...

Page 288: ...position and define the name for this switch position such as 3 Speed A B C D E F 2 4 5 3 Speed PHASE ASSIGNMENT prior combi The switch center then receives the name 1 Normal as shown above to the le...

Page 289: ...mx 20 HoTT also enables further possibilities for the realization of different speeds in the individual phases For a practical recommendation with maintenance of the throttle limiter function see the...

Page 290: ...e or two receiver batteries Simultaneous discharge with the operation of two batteries Suitable for five or six cell NiMH or two cell LiPo or LiFe batteries Graupner JR G3 5 G2 and BEC plug systems Th...

Page 291: ...ing thresholds for min voltage Voltage current and capacity measurement with warning thresholds for min and max voltage max capacity and max current Rotational speed measurement with rotational speed...

Page 292: ...h adjustable warning threshold Region setting Range test Signal quality Receiver temperature Receiver voltage Servo reversal Servo neutral position Servo travel Cycle time Channel switching Fail Safe...

Page 293: ...quency energy and if not installed and used in accordance with the instructions may cause harmful interference to radio communications However there is no guarantee that interference will not occur in...

Page 294: ...ive Angewendete harmonisierte Normen Harmonised standards applied EN 60950 2006 EN 301 489 1 V1 7 1 EN 301 489 3 V1 4 1 EN 300 328 V1 7 1 Health and safety requirements pursuant to 3 1 1 Article 3 1 a...

Page 295: ...stunsanspr che des Verbrauchers werden durch diese Garantie nicht ber hrt Bitte berpr fen Sie vor einer Reklamation oder R cksendung das Produkt genau auf M ngel da wir Ihnen bei M ngelfreiheit die en...

Page 296: ...ps A directory of suppliers will be provided No liability is accepted for print errors Printed in Germany PN PK 01 Although the information provided in these instructions has been carefully scrutinize...

Reviews: