14
Operating notices
Operating notices
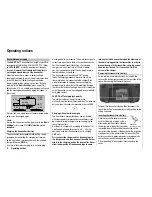
Transmitter power supply
The
mx-20
HoTT transmitter has a highly capacitive,
rechargeable NiMH battery, 4NH-2000 RX RTU (Order
no.
2498.4FBEC
), as standard equipment. (changes
reserved)
However, the standard built-in battery is
not charged upon delivery of the transmitter.
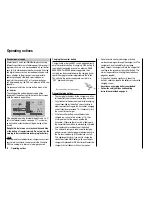
When the transmitter is used, its battery voltage
should be monitored by way of the indicators provided
in the LCD display. If battery voltage drops below
the adjustable voltage setting (set via item "Batterie
warning" in the "
Basic Settings
" menu, page 226,),
default value 4.7 V, an audible warning signal will sound
and the message window shown below will appear in
the screen
GRAUBELE
#01
0:22h
Stop
Flug
«normal »
K78
0:00
0:00
0.0V
10%
4.6V
M
x
x
HoTT
batter y
needs
charging
No later than now, operation must be terminated so the
battery can be charged again.
Notice:
Be sure that the correct battery type is set in the "
Basic
Settings
" menu, page 224!
NiMH must be set as
standard.
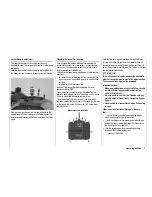
Charging the transmitter's battery
The transmitter's rechargeable NiMH battery can be
recharged by connecting the charging jack located,
on the right side of the transmitter, with the included
charger (order no.
33116.2
).
As a rule of thumb for charging time, an
completely
discharged
battery will require 12 hours to recharge at a
current rate equal to one tenth of its specifi ed capacity.
For the standard transmitter battery and included
charger, this is a current rate of 200 mA. However,
you must yourself ensure that the charging process is
terminated when it should be …
The transmitter must be switched "OFF" during
the entire charging procedure. Never switch on the
transmitter when it is connected to the charger. Even
a brief interruption to charging can cause charging
voltage to rise to a level that will immediately damage
the transmitter with over-voltage. Also for this reason, be
sure all connectors are always plugged in securely and
have good contact.
mx-20
HoTT charging jack polarity
The charger cables on the market from other
manufacturers often have different polarities. Therefore use
only an original
Graupner
charger cable, order no.
3022
.
Charging with automatic chargers
The transmitter's charger jack does come standard
with reverse polarity protection but nevertheless it can
be used with suitable chargers for quick charging the
transmitter's battery.
Set the quick charger unit, according to its manual, for
a delta peak voltage difference of 5 mV … 20 mV or
equivalent such that it is adapted for quick charging
NiMH cells
First connect the charger cable's banana plugs to
the charger and only then connect the cable's other
end into the charging jack on the transmitter. Never
allow the bare ends of the banana plugs to come
into contact with one another when the other end of
the cable is plugged into the transmitter.
In order to
prevent damage to the transmitter, charging current
should never exceed 1 A. If necessary, limit the
current at the charger.
Removing the transmitter's battery
To remove the transmitter's battery, fi rst unlatch the
cover of the battery compartment on the rear side of the
transmitter housing then remove the cover.
Take out the transmitter's battery then disconnect the
transmitter battery's connector by carefully pulling on the
supply line cable.
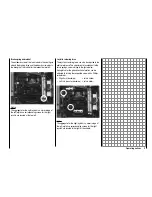
Inserting the transmitter's battery
Hold the transmitter battery connector
such that the black or brown cable is
oriented toward the antenna side and
the empty jack of the battery connector
is oriented toward the fl oor side then push the battery
connector in the direction of the board onto the three pins
sticking out out of the board inside the transmitter. (The
battery connector is protected against a reverse polarity
connection by two slanted edges, see illustration.)
Place the battery into its compartment and close the
cover.
Transmitter
connector polarity
Summary of Contents for mx-20 Hott
Page 41: ...41 Your notes...
Page 49: ...49 Your notes...
Page 55: ...55 Your notes...
Page 81: ...81 Your notes...
Page 85: ...85 Your notes...
Page 89: ...89 Your notes...
Page 99: ...99 Detail program description Control adjust...
Page 127: ...127 Detail program description Control adjust...
Page 131: ...131 Detail program description Control adjust...
Page 163: ...163 Detail program description Control adjust...
Page 191: ...191 Detail program description Control adjust...
Page 207: ...207 Detail program description Control adjust...
Page 228: ...228 Detail program description Control adjust...
Page 229: ...229 Detail program description Control adjust...
Page 251: ...251 Detail program description Control adjust...


