60
Detail program description - Loading a new memory location
Anyone who has worked through to this part of
the manual has certainly already tried out a bit of
programming. Nevertheless a detailed description of
every menu should not be left out.
This section begins with the loading of a "free" memory
location, a procedure which would be performed if a new
model was being "programmed".
GRAUBELE
#01
0:00h
Stop
Flt
K78
0:00
0:00
0.0V
5.9V
M
HoTT
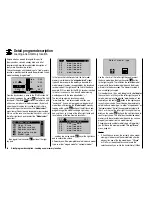
From the base screen, a jump to the "Multi-function list"
is made by tapping on the center
SET
button of the right
touch pad. (The center
ESC
button of the left touch pad
will cause a jump back to the base screen.) By default,
when the multi-function list is called for the fi rst time
after switching on the transmitter, the "
Model select
"
menu item will be active and displayed in reverse video.
If this is not the case, use the arrow keys (
,
) of
the left or right touch pad to select the
"Model select"
menu item …
Copy / Erase
Suppress menus
Suppress models
Model select
Base setup model
Model type
… then (again) tap the center
SET
button of the right
key pad.
Detail program description
Loading a new memory location
03
04
05
free
02
01
06
R12
free
free
free
free
In the transmitter's delivered state, the fi rst model
memory is initialized to the "
winged aircraft
" model
type and the receiver in the delivery is bound to this
model memory location, recognizable by the displayed
receiver code at the right end of the line. In the above
example, R12 is a code for the GR-24 receiver included
in the set. In contrast, a "non-bound" model memory
would appear with the code placeholder "---".
The remaining memory locations, marked
"
free
", are not occupied and thus also
"non-bound". If you wish to program a winged aircraft
model then, after leaving the "
Model select
" menu by
tapping on the center
ESC
button of the left touch pad,
programming of the model can begin right away … or
now use the
or
keys of the left or right touch pad
to select one of the free memory locations …
03
04
05
free
02
01
06
R12
free
free
free
free
… and then tap on the center
SET
key of the right touch
pad to confi rm the choice.
Afterward you will be prompted to select the basic model
type, i.e. either "winged model" or "helicopter model".
Select model type
Use the
or
of the left or right key pad to select
the basic model type then tap the center
SET
button
in the right key pad. This initializes the selected model
memory with the selected model type and the display
will return to the base screen. The memory location is
now accordingly occupied.
On the other hand, if you wish to begin with a
helicopter
then use the
or
keys of the left or right key pad to
select a memory location labeled "
free
" and
tap briefl y on the center
SET
button in the right key pad
to confi rm your choice. You will be now be prompted to
select the basic model type, i.e. either "winged model" or
"helicopter model". Select the appropriate symbol with
the
or
keys of the left or right touch pad then tap
briefl y on the center
SET
button in the right touch pad to
confi rm your choice. This initializes the selected model
memory with the selected model type and you can now
program your model into this model memory.
Changing over to another model type is still possible if
you fi rst erase this memory location (
"Copy / Erase"
menu, page 64).
Notice:
If, from the base screen, the currently active model
•
memory is to be erased then immediately after the
erase action one of the two model types, "Winged"
or "Heli" must be defi ned. You cannot avoid this
selection even if you switch the transmitter off. When
Summary of Contents for mx-20 Hott
Page 41: ...41 Your notes...
Page 49: ...49 Your notes...
Page 55: ...55 Your notes...
Page 81: ...81 Your notes...
Page 85: ...85 Your notes...
Page 89: ...89 Your notes...
Page 99: ...99 Detail program description Control adjust...
Page 127: ...127 Detail program description Control adjust...
Page 131: ...131 Detail program description Control adjust...
Page 163: ...163 Detail program description Control adjust...
Page 191: ...191 Detail program description Control adjust...
Page 207: ...207 Detail program description Control adjust...
Page 228: ...228 Detail program description Control adjust...
Page 229: ...229 Detail program description Control adjust...
Page 251: ...251 Detail program description Control adjust...


