103
Detail program description - Control adjust
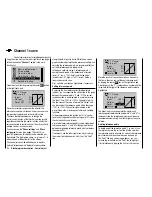
"Throt 6"
Input 5
offset
0%
0%
0%
–––
0%
Throt
Gyro
Input 8
–––
–––
–––
GL
GL
GL
GL
typ
Nor mal
6
7
In the helicopter program, it is also theoretically possible
to assign any transmitter control (rotary proportional
controls and switches) to individual inputs.
However, please note here that some of the inputs
available on this menu are already assigned to
helicopter-specifi c functions, and therefore cannot be
re-assigned in this way.
If we consult the receiver assignment table on page 59,
for example, we see that the throttle servo (or speed
controller of an electrically-powered helicopter) must be
connected to receiver output "6", since control channel
"6" is reserved for motor power control.
Unlike a fi xed-wing model aircraft, however, the throttle
servo or speed controller is
not
directly controlled by
the throttle stick or other transmitter control, but by a
complex mixer system – see the
"Helicopter mixers"
menu (from page 164).
Furthermore, the "Throttle limit
function" described on the next page also infl uences this
mixer system.
Assigning a transmitter control or switch on the
"Throttle" line, or to its supplementary control signal,
would unnecessarily "confuse" this complex mixer
system.
For this reason the "Throttle" input MUST be
left "free".
" Gyro 7"
Input 5
offset
0%
0%
0%
–––
0%
Throt
Gyro
Input 8
–––
–––
–––
GL
GL
GL
GL
typ
Nor mal
6
7
Most of the latest gyro systems not only feature infi nitely
variable proportional gyro gain setting, but also offer
a choice of two separate types of gain mode on the
transmitter.
If the gyro you are using also has this feature, then
this menu option gives you the opportunity to specify
both "normal" gyro gain and, as appropriate, to specify
"heading-lock mode" in the "Offset" column in the
range of ±125%, plus a particular gain type within this
pre-selection, so as to be able to exploit maximum
stabilization for normal, slow fl ight, but to reduce gyro
gain for fast circuits and aerobatics.
To proceed as described above, use fl ight phase
switching to enter different settings on the "Gyro" line.
From the starting-point of these
predefi ned – static – fl ight phase-specifi c settings, you
can then use a transmitter control assigned to the "Gyro
7" line, e. g. one of the rotary potentiometers CTRL 7
or 8, to vary the gyro gain around the respective "offset
point": The center point of the control corresponds to
the setting specifi ed by the offset. If the transmitter
control is moved from this center point in the direction
of full travel, gyro gain increases proportionally; it
diminishes when moved in the opposite direction. This
provides a fast and straightforward method of adjusting
gyro gain even in flight – e. g. to suit changing weather
conditions – or to test-fl y optimum settings. In software
terms you can even limit the gyro gain range in both
directions by adjusting transmitter control travel.
In this context, ensure that you comply with the
instructions on adjusting your gyro: if not, you
risk making adjustments that render your heli
impossible to fl y.
Adjusting the gyro sensor
To achieve the maximum possible level of stabilization
for the helicopter with the gyro along the vertical axis,
observe the following:
The controls should have as little friction and "play"
•
as possible.
There should be no "spring" in the control linkage.
•
Use a strong and – in particular – a fast servo.
•
When the gyro sensor detects a model rotation, the
faster its response – a corresponding corrective change
to tail rotor thrust – takes effect, the further the gyro
gain adjustor can be moved without causing the tail of
the model to start oscillating, and the better the model's
stability about its vertical axis. If the response is slower,
there is a risk that the model's tail will start to oscillate
even at low gyro gain settings. Here, further reductions
to gyro gain will need to be made – either by using the
default value under "Gyro" or the associated transmitter
control – to eliminate the oscillation.
If the model is fl ying forward at high speed or hovering
in a powerful headwind, the net result of the stabilizing
effect of the vertical fi n combined with the gyro may
also lead to an overreaction that once again manifests
itself through tail oscillation. To achieve optimum gyro
stabilization under all conditions, you should make use
of the option to adjust gyro gain from the transmitter
Summary of Contents for mx-20 Hott
Page 41: ...41 Your notes...
Page 49: ...49 Your notes...
Page 55: ...55 Your notes...
Page 81: ...81 Your notes...
Page 85: ...85 Your notes...
Page 89: ...89 Your notes...
Page 99: ...99 Detail program description Control adjust...
Page 127: ...127 Detail program description Control adjust...
Page 131: ...131 Detail program description Control adjust...
Page 163: ...163 Detail program description Control adjust...
Page 191: ...191 Detail program description Control adjust...
Page 207: ...207 Detail program description Control adjust...
Page 228: ...228 Detail program description Control adjust...
Page 229: ...229 Detail program description Control adjust...
Page 251: ...251 Detail program description Control adjust...


