237
Detail program description - Control adjust
whatever the case may be, you should consider a logical
assignment of the control mechanisms before you begin
with the model programming.
For models in which the emphasis is on the "motor",
regardless of whether it is powered by an electric
or combustion motor, there should be no problem
in this respect, because the assignment of the two
joystick units essentially lies in the four basic functions
"Power regulation (= throttle)", "Side", "Altitude" and
"Transverse"! However, in the menu …
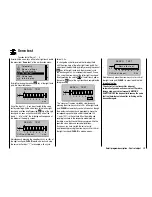
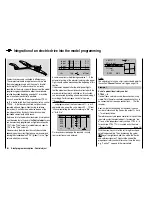
"Model type"
(beginning 82)
Tail type
Motor at C1
Nor mal
None
Aile/flaps
1AIL
M O D E L T Y P E
Brake Off
In 1
+100%
SEL
… you should determine whether you would like
the minimum throttle position in the "front" or "rear",
because "none (motor)" is entered by the program in the
creation of a model memory as a basic principle.
The difference between "no" and "idle front/rear" is
not only in the effect of the C1 trimming, which is over
the entire joystick path with "none" and with "idle front/
rear" only effects the idle direction. In the process,
the "effective direction" of the C1 joystick is adapted
accordingly, so that with a change from "front" to "rear"
or vice versa, the rotational direction of the throttle servo
or brake system do not have to be adapted as well.
In addition, with an "idle front/rear" setting, a warning
indication appears in the display for safety reasons and
issues a warning beep, if the throttle joystick is too far in
the full-throttle direction:
GRAUBELE
#01
2:22h
Stop
Flug
K78
0:00
0:00
0.0V
50%
5.2V
M
HoTT
Throttle
too
high!
In any case, you will also have to consider "special
functions".
With electro gliders, on the other hand, it is only
occasionally different. In this regard, one must ask
how the drive and brake system are actuated. Certain
solutions have shown to be practical and others have
shown to be less practical.
For example, it is certainly less practical, if you have to
release a joystick for the approach of a glider model in
order to be able to appropriately control the spoilers or a
crow position using one of the other controls. It may be
more advantageous to either design the function of the
C1 joystick to be switchable (see Example 4, beginning
on page 247) or to leave the control of the brake system
at the joystick and to control the motor through one of
the other controls or even with a switch! Since this type
of model does not normally have a motor, and just a
"start assistance" function to either "lift" the model in
the sky with full force or, in any case, to "tow" it with
"half" force by a wind fi eld, Therefore, the motor can be
switched on and off without having to release one of the
joysticks – even in the approach. The selection is not
diffi cult with the
mx-20
HoTT transmitter.
For the control of the motor you use a two-stage switch
SW 3 or 8 or, even better, one of the two three-stage
switches CTRL 9 or 10. In any case, select a switch
which you can reach easily in order to perform this
option without having to release the joystick. In addition,
this procedure should take place on the transmitter side,
which is modifi ed for a holding hand with a manual start
of the model. In other words: If the model is started from
the right hand, the motor switch should be assigned to
one of the switches available on the left side and vice
versa.
The idea is the same for the control of fl aps, regardless
of whether only ailerons or fl aps covering the entire
wingspan (combinations) are raised or lowered.
If everything is now in order, you can begin with the
programming.
Summary of Contents for mx-20 Hott
Page 41: ...41 Your notes...
Page 49: ...49 Your notes...
Page 55: ...55 Your notes...
Page 81: ...81 Your notes...
Page 85: ...85 Your notes...
Page 89: ...89 Your notes...
Page 99: ...99 Detail program description Control adjust...
Page 127: ...127 Detail program description Control adjust...
Page 131: ...131 Detail program description Control adjust...
Page 163: ...163 Detail program description Control adjust...
Page 191: ...191 Detail program description Control adjust...
Page 207: ...207 Detail program description Control adjust...
Page 228: ...228 Detail program description Control adjust...
Page 229: ...229 Detail program description Control adjust...
Page 251: ...251 Detail program description Control adjust...


