03/06
7
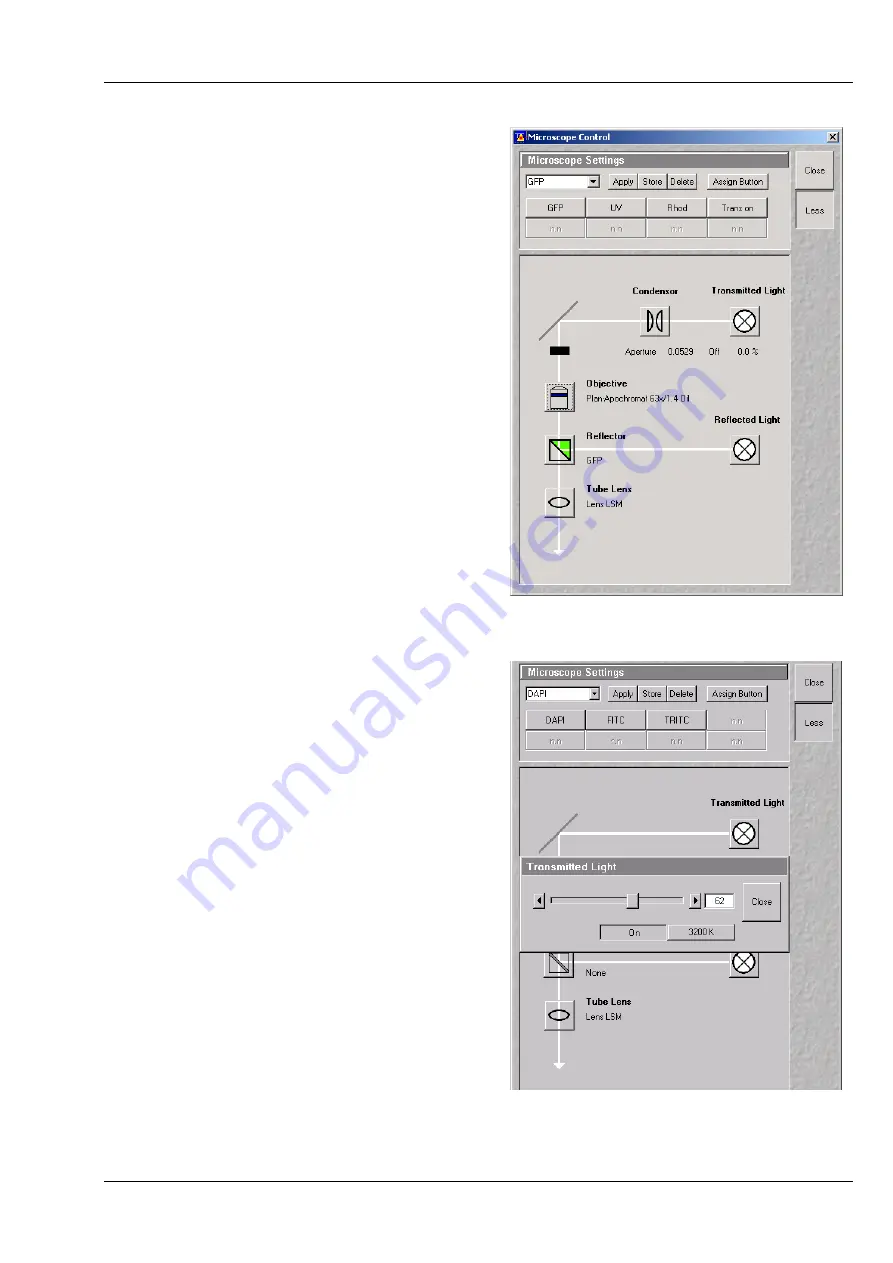
Selecting an objective
•
Open the graphical pop-up menu by clicking on
the
Objective
button (Fig. 10).
•
Click on the objective you want to select. The
selected objective will automatically move into
the beam path.
Focussing the microscope for transmitted light
•
Open the graphical pop-up menu by clicking on
the
Transmitted Light
button (Fig. 11).
•
Click on the
On
button. Set the intensity of the
Halogen illuminator using the slider.
•
Click on
Close
to close the pop-up menu.
•
Place specimen on microscope stage. The cover
slip must be facing up.
•
Use the focusing drive of the microscope to
focus the required object plane.
•
Select specimen detail by moving the stage in X
and Y using the XY stage fine motion control.
Setting the microscope for reflected light
•
Click on the
Reflected Light
button to open
the shutter of the HBO 100 mercury lamp.
•
Click on the
Reflector
button and select the
desired filter set by clicking on it.
Storing the microscope settings
Microscope settings can be stored and up to 8
buttons assigned for fast retrieval and adjustment
using the
Microscope Settings
panel.
The
Store
button permits existing microscope
configurations to be stored under any name.
The
Apply
button permits existing stored
microscope configurations to be loaded.
The
Delete
button permits existing microscope
configurations to be deleted.
The
Assign
button permits the assignment of a
microscope configuration to a button.
Note:
Depending on the microscope
configuration, settings must be done manually if
necessary.
Fig. 10
Microscope Control window,
e.g.: Axiovert 200 M
Fig. 11
Microscope Control window with
Transmitted Light pop-up menu


