Probes and Biopsy 13-17
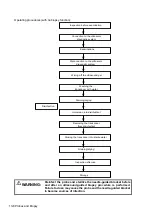
Disinfect the probe and sterilize the needle-guided bracket
before and after each ultrasound-guided biopsy procedure
is performed. Failure to do so may cause the probe and the
needle-guided bracket to become sources of infection.
The needle mark displayed on the ultrasound image does
not indicate the actual position of the biopsy needle.
Therefore, it should only be used as a reference. Always
monitor the relative positions of the biopsy needle during
procedures.
Adjust the needle mark before the biopsy procedure is
performed.
When performing biopsy procedures, only use sterile
ultrasound gel that is certified as safe and manage the
ultrasound gel properly to ensure that it does not become a
source of infection.
When performing an operation involving biopsy, wear sterile
gloves.
Image of the biopsy target and the actual position of the
biopsy needle:
Diagnostic
ultrasound
systems
produce
tomographic plane images with information about
particular thicknesses in the thickness direction of
the probe. (That is to say, the information shown in
the images consists of all the information scanned in
the thickness direction of the probe.) Therefore, even
though the biopsy needle appears to have penetrated
the target object in the image, it may not actually
have done so. When the biopsy target is small,
dispersion of the ultrasound beam may lead to the
image deviating from the actual position. Be aware of
this.
The target object and biopsy needle appear in the image as
shown in the figures below (for reference only):
The biopsy needle appears to reach the target object in the
image
Biopsy
Target
Summary of Contents for TE5
Page 1: ...TE7 TE5 Diagnostic Ultrasound System Operator s Manual Basic Volume ...
Page 2: ......
Page 6: ......
Page 12: ......
Page 24: ......
Page 36: ......
Page 54: ......
Page 110: ......
Page 115: ...Display Cine Review 6 5 6 Tap Return on the screen or tap Freeze to exit image compare ...
Page 120: ......
Page 124: ......
Page 156: ......
Page 174: ......
Page 192: ...12 18 Setup Select Advanced and do as follows Select MAPS and do as follows ...
Page 202: ...13 2 Probes and Biopsy C5 2s L12 4s L7 3s P4 2s L14 6s C11 3s L14 6Ns V11 3Ws P7 3Ts 7LT4s ...
Page 226: ...13 26 Probes and Biopsy NGB 034 NGB 035 ...
Page 250: ......
Page 272: ......
Page 276: ...A 4 Wireless LAN Tap Add Manually create a network profile to set ...
Page 282: ......
Page 318: ......
Page 322: ......
Page 323: ...P N 046 006959 07 1 0 ...


