Image Optimization 5-33
5.8
Anatomical M Mode
CAUTION:
Anatomical M images are provided for reference only, not for
confirming a diagnosis. Please compare the image with that of other
machines, or make diagnosis using none-ultrasound methods.
5.8.1 Free Xros M Mode
For an image in the traditional M mode, the M-mark line goes along the beams transmitted from
the probe. Thus it is difficult to obtain a good plane for difficult-to-image patients that cannot be
moved easily. However, in the anatomical M mode, you can manipulate the M-mark line to move to
any position at desired angles. The system supports anatomical M scanning in 2D imaging modes
(B, Color, Power and TVI mode).
5.8.1.1 Imaging
Real-time Imaging
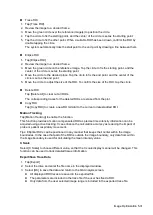
1. In real-time B mode or M mode, adjust the probe and image to obtain the desired plane.
2. Tap [Free Xros M] on the right side of the operating panel to enter Free Xros M mode.
3. Adjust the M-mark line to obtain optimized images and necessary information.
Imaging in Freeze Mode
1. Open Free Xros M imaging of images in cine memory, tap [Free Xros M].
2. Adjust the M-mark line and image parameters to obtain optimized images and necessary
information.
5.8.1.2 Free Xros M Image Parameters
In Free Xros M mode imaging, the image parameter area in the upper left corner of the screen
displays the real-time parameter values as follows:
Display
V
Parameter Free Xros M Speed
During Free Xros M mode imaging, menus for B mode, Free Xros M mode and other modes
are displayed at the same time, tap mode tabs to switch the menus.
Parameters consistent with those in M mode are not to be introduced, please refer to relevant
section of the M mode, while special items of the Free Xros M mode will be introduced in the
following.
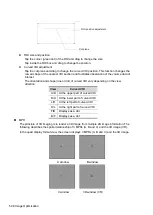
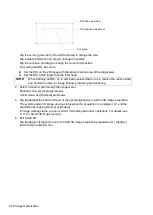
Adjustment of the M-mark Line
Description
To adjust the position and angle of the M-mark line.
Operation
Position Adjustment
When the M-mark line is activated, tap the dotted circle and drag the sampling
line to change the position. The direction is recognized by the arrow at the end of
the line.
Angle Adjustment
When the M-mark line is activated, tap the dotted circle and drag along the
sampling line to adjust the fulcrum of the line, and adjust the angle by rotating the
sampling line.
The adjusting angle range is 0-360 in increments of 1.
Summary of Contents for TE5
Page 1: ...TE7 TE5 Diagnostic Ultrasound System Operator s Manual Basic Volume ...
Page 2: ......
Page 6: ......
Page 12: ......
Page 24: ......
Page 36: ......
Page 54: ......
Page 110: ......
Page 115: ...Display Cine Review 6 5 6 Tap Return on the screen or tap Freeze to exit image compare ...
Page 120: ......
Page 124: ......
Page 156: ......
Page 174: ......
Page 192: ...12 18 Setup Select Advanced and do as follows Select MAPS and do as follows ...
Page 202: ...13 2 Probes and Biopsy C5 2s L12 4s L7 3s P4 2s L14 6s C11 3s L14 6Ns V11 3Ws P7 3Ts 7LT4s ...
Page 226: ...13 26 Probes and Biopsy NGB 034 NGB 035 ...
Page 250: ......
Page 272: ......
Page 276: ...A 4 Wireless LAN Tap Add Manually create a network profile to set ...
Page 282: ......
Page 318: ......
Page 322: ......
Page 323: ...P N 046 006959 07 1 0 ...


