iScanHelper E-1
Appendix F iScanHelper
By providing the referential information, such as, the ultrasonic image, the anatomic graphic,
scanning pictures/other scanning tips or diagnosis comments, the system helps the doctors to
operate the scanning by iScanHelper. Furthermore, it is a good platform for the self-learning
and training of ultrasound scanning technique for doctors. The system also plays a role in the
assistant software system in fulfilling training and education.
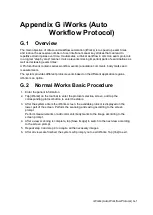
Tips: iScanHelper feature is available under abdominal, gynecological, urological, obstetrical,
small parts and nerve block area.
NOTE:
THIS “iScanHelper” IS FOR REFERENCE OR TUTORIAL PURPOSES ONLY,
AND THE MANUFACTURER WILL NOT BE LIABLE FOR DAMAGES AND/OR
OTHER UNDESIRABLE CONSEQUENCE IN ANY KIND THAT MAY OCCUR
TO THE PATIENT OR THE USERS BY USING THE SOFTWARE.
F.1 Use iScanHelper for Reference
1. Perform ordinary scanning procedure.
2. Tap
in the top-right corner of the screen and select
to enter iScanHelper status.
3. Select the target view name in the menu and tap to see the details.
4. Swipe the menu to select the view.
5. Perform scanning according to information displayed on the help information area.
You can zoom in a single window in the help information area to see the window more
clearly. For details, please refer to “F.3.3 Single/quad-window Display”.
6. Tap [Exit] or
on the operating panel to exit.
F.2 Use iScanHelper for Learning or
Training
1. Switch to the exam modes that support iScanHelper.
2. Tap
in the top-right corner of the screen and select
to enter iScanHelper status.
3. Learn and practise views by system defaulted sequence according to the information
displayed on help information area; or select unfamiliar views to practise.
You can zoom in a single window in the help information area to see the information. For
details, please refer to “F.3.3 Single/quad-window Display”.
4. Tap [Exit] or
on the operating panel to exit iScanHelper.
F.3 iScanhelper Menu
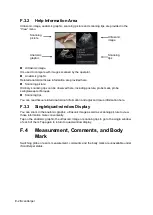
iScanHelper information area is displayed on the menu.
F.3.1 View Selecting Area
Swipe the menu to select target view.
Summary of Contents for TE5
Page 1: ...TE7 TE5 Diagnostic Ultrasound System Operator s Manual Basic Volume ...
Page 2: ......
Page 6: ......
Page 12: ......
Page 24: ......
Page 36: ......
Page 54: ......
Page 110: ......
Page 115: ...Display Cine Review 6 5 6 Tap Return on the screen or tap Freeze to exit image compare ...
Page 120: ......
Page 124: ......
Page 156: ......
Page 174: ......
Page 192: ...12 18 Setup Select Advanced and do as follows Select MAPS and do as follows ...
Page 202: ...13 2 Probes and Biopsy C5 2s L12 4s L7 3s P4 2s L14 6s C11 3s L14 6Ns V11 3Ws P7 3Ts 7LT4s ...
Page 226: ...13 26 Probes and Biopsy NGB 034 NGB 035 ...
Page 250: ......
Page 272: ......
Page 276: ...A 4 Wireless LAN Tap Add Manually create a network profile to set ...
Page 282: ......
Page 318: ......
Page 322: ......
Page 323: ...P N 046 006959 07 1 0 ...


