4-8 Exam Preparation
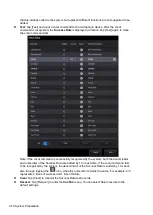
Tap [Exit] to cancel the selection and exit the screen.
Tap and hold any exam mode until it floats, and then drag to change the exam mode list
sequence.
Tap [A-Z Sort] to sort exam modes by alphabetical order for each probe.
4.3
Select the Imaging Mode
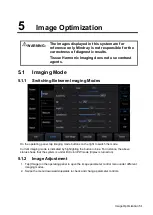
Enter the imaging mode by tapping imaging buttons at the right part of the operating panel. Swipe
the area to see the hidden imaging modes.
For detailed operations in each imaging mode, see chapter “5 Image Optimization.”
4.4
End an Exam
Be sure to avoid mixing data between patients.
Before examining a new patient, tap [End] in the bottom-left corner of the operating panel to end
the exam of the previous patient.
4.5
Activate an Exam
On the iStation screen, select an exam record which was completed within 24 hours and select
[Options] -> [Activate Exam].
Tips:
The system can automatically load the patient information and exam data to continue the
exam.
For an activated exam, you can modify the patient ID if there are no other recorded exams
of this patient (including the recycle bin) in the system.
Summary of Contents for TE5
Page 1: ...TE7 TE5 Diagnostic Ultrasound System Operator s Manual Basic Volume ...
Page 2: ......
Page 6: ......
Page 12: ......
Page 24: ......
Page 36: ......
Page 54: ......
Page 110: ......
Page 115: ...Display Cine Review 6 5 6 Tap Return on the screen or tap Freeze to exit image compare ...
Page 120: ......
Page 124: ......
Page 156: ......
Page 174: ......
Page 192: ...12 18 Setup Select Advanced and do as follows Select MAPS and do as follows ...
Page 202: ...13 2 Probes and Biopsy C5 2s L12 4s L7 3s P4 2s L14 6s C11 3s L14 6Ns V11 3Ws P7 3Ts 7LT4s ...
Page 226: ...13 26 Probes and Biopsy NGB 034 NGB 035 ...
Page 250: ......
Page 272: ......
Page 276: ...A 4 Wireless LAN Tap Add Manually create a network profile to set ...
Page 282: ......
Page 318: ......
Page 322: ......
Page 323: ...P N 046 006959 07 1 0 ...


