11-4 DICOM/HL7
Name
Description
DICOM
Local
AE Title
Application Entity title.
Port
DICOM communication port.
PDU
Maximum PDU data package size, ranging from 16384 to 65536. If the
value is less than 16384 or greater than 65536, the system
automatically sets it to the value 32768.
TLS/SSL
Version
Select an appropriate TLS/SSL version. SSLv23 is set by default.
Verify
Certificate
After importing TLS certificates, and selecting this check box, the
system verifies the effectiveness of the TLS function in the DICOM
storage, print, and worklist services.
Import TLS
Certificates
Import trusted certificates.
Clear TLS
Certificates
Clear all certificates
Server
Setting
Device
Name of the device supporting DICOM services.
IP Address
IP address of the server.
Ping
You can ping other machines after entering the correct IP address.
You can also select a server in the device list below to ping it.
Add
Select to add servers to the device list.
Delete
Select to delete selected servers from the device list.
Log Level
Select the log display level: No Log, Service Result Log, Service
Process Log, All Log.
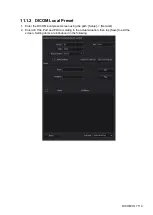
Server setting procedure:
1. Enter the server device name and IP address. Tap [Ping] to check the connection.
2. Tap [Add] to add the server to the device list. Its name and address are displayed in the list.
Tip:
The AE Title should be the same as the SCU AE Title preset in the server (PACS/RIS/HIS). For
example, if the AE Title of the server preset in the storage server is Storage, and the AE Title of the
accepted SCU is preset as Machine, then in the figure above, the AE Title of Local should be
Machine, and the AE Title of the storage server should be Storage.
Summary of Contents for TE5
Page 1: ...TE7 TE5 Diagnostic Ultrasound System Operator s Manual Basic Volume ...
Page 2: ......
Page 6: ......
Page 12: ......
Page 24: ......
Page 36: ......
Page 54: ......
Page 110: ......
Page 115: ...Display Cine Review 6 5 6 Tap Return on the screen or tap Freeze to exit image compare ...
Page 120: ......
Page 124: ......
Page 156: ......
Page 174: ......
Page 192: ...12 18 Setup Select Advanced and do as follows Select MAPS and do as follows ...
Page 202: ...13 2 Probes and Biopsy C5 2s L12 4s L7 3s P4 2s L14 6s C11 3s L14 6Ns V11 3Ws P7 3Ts 7LT4s ...
Page 226: ...13 26 Probes and Biopsy NGB 034 NGB 035 ...
Page 250: ......
Page 272: ......
Page 276: ...A 4 Wireless LAN Tap Add Manually create a network profile to set ...
Page 282: ......
Page 318: ......
Page 322: ......
Page 323: ...P N 046 006959 07 1 0 ...

