Exam Preparation 4-7
3. Enter the search condition:
Set query criteria from Patient ID, Patient Name, MRN, Scheduled Station AE Title,
Worklist Server, Modality Type or Exam Date. Or select the search key, enter the
keywords, then tap [Query] to search.
To reset the criteria, tap [Clear].
4. Select the desired patient record in the displayed patient list.
5. Select the desired patient and tap [Done]. The patient information is imported into the system
and then an exam is started.
4.2
Select Exam Mode and Probe
CAUTION:
If the exam mode is changed during a measurement, all measurement
calipers on the image will be cleared. The general measurement data will
be lost, but application measurement data will be stored in the reports.
Selecting exam mode
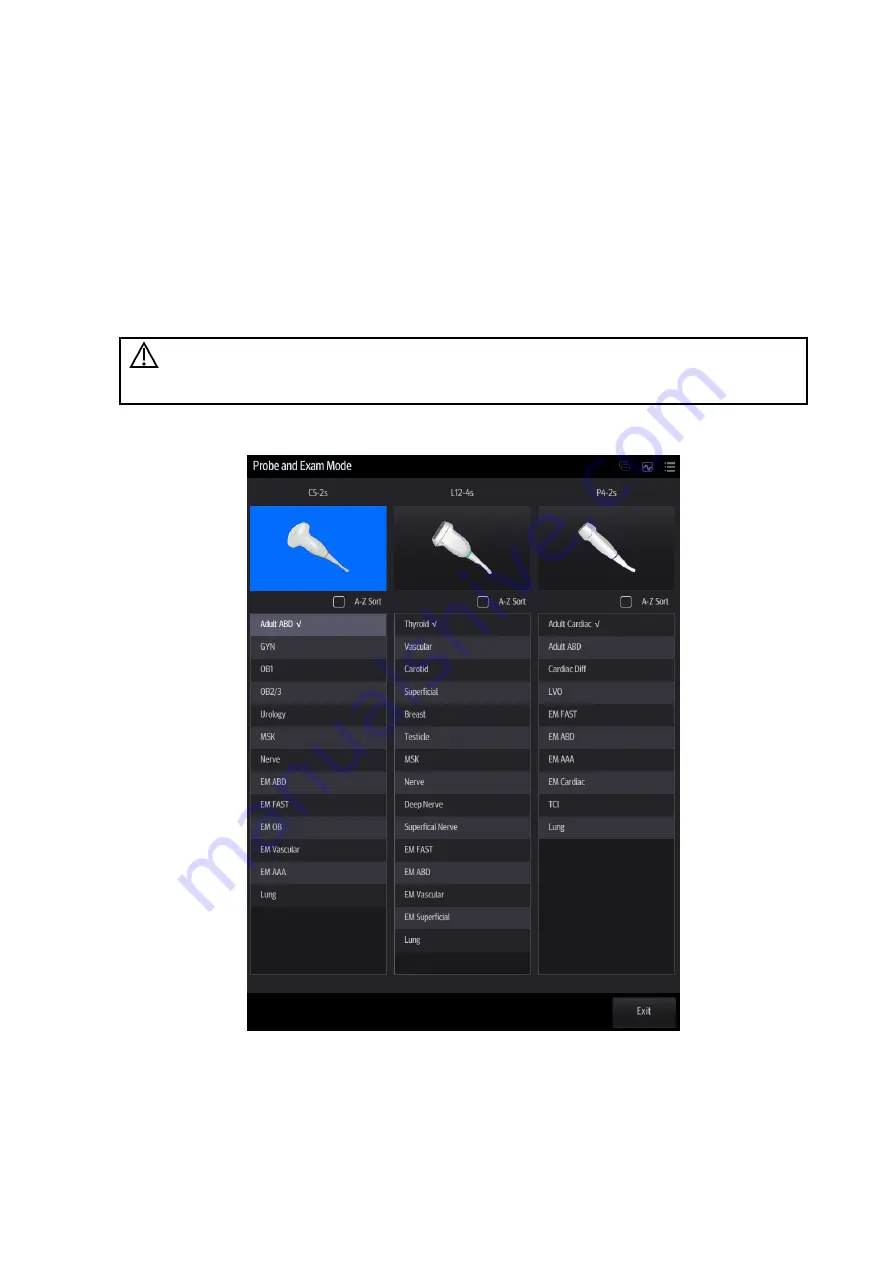
1. Tap [Probe] on the left side of the operating panel. The screen displays the following dialog box:
2. Tap to select the probe model and exam mode. The system exits the dialog box and enters the
selected exam mode and probe.
Summary of Contents for TE5
Page 1: ...TE7 TE5 Diagnostic Ultrasound System Operator s Manual Basic Volume ...
Page 2: ......
Page 6: ......
Page 12: ......
Page 24: ......
Page 36: ......
Page 54: ......
Page 110: ......
Page 115: ...Display Cine Review 6 5 6 Tap Return on the screen or tap Freeze to exit image compare ...
Page 120: ......
Page 124: ......
Page 156: ......
Page 174: ......
Page 192: ...12 18 Setup Select Advanced and do as follows Select MAPS and do as follows ...
Page 202: ...13 2 Probes and Biopsy C5 2s L12 4s L7 3s P4 2s L14 6s C11 3s L14 6Ns V11 3Ws P7 3Ts 7LT4s ...
Page 226: ...13 26 Probes and Biopsy NGB 034 NGB 035 ...
Page 250: ......
Page 272: ......
Page 276: ...A 4 Wireless LAN Tap Add Manually create a network profile to set ...
Page 282: ......
Page 318: ......
Page 322: ......
Page 323: ...P N 046 006959 07 1 0 ...


