Chapter 3: Getting Around MaxAdministrator
36
MAXCS ACC 6.7 Administration Manual
Click on any column head to sort by that column. Click again to reverse the sort order.
Double-click any extension number to open the Extension Configuration window for the
selected extension.
The radio button to the left of each extension number is green when the extension is
idle, and red when the extension is
not ready
or
in use.
The
Location
number (for
example, 01:0005) identifies the card logical ID and port (channel) number on the
board. For example, in location 01:0005, the card logical ID is 1 and the port number is
005. If an IP Extension is logged on, the location will also show the IP address.
The
Reset
button resets the selected extension to the idle status. You’ll be asked to
confirm the reset.
You can click the
Reset
button without selecting an extension, and then type in the
extension number for the extension to reset.
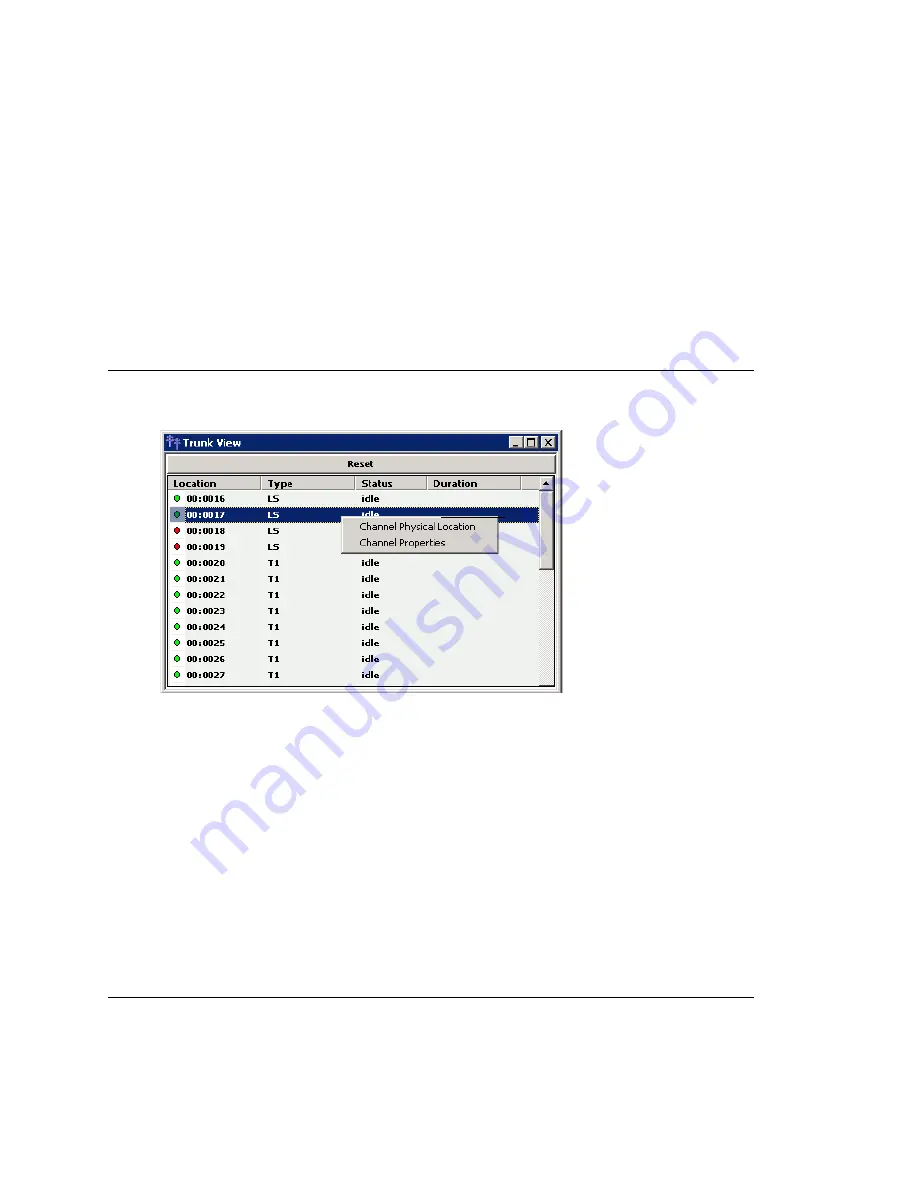
Trunk View Window
The
Trunk View
window displays the status of all assigned trunks.
Figure 5. Trunk View window
The radio button to the left of each trunk location is green when the trunk is idle, and
red when the extension is
not ready
or
in use.
The location format is
logical board
ID:channel
—for example, channel 3 on the board in logical board ID 9 is location 09:03.
The
Type
,
Status
and
Duration
of trunk use is also displayed.
Note:
The
Duration
field displays the duration of the trunk only if the call is connected
after MaxAdmin is started. The field will be empty if the trunk is idle, not ready,
out of service, or the call was connected prior to MaxAdmin being launched.
You can double-click any trunk location to open the Trunk Configuration window for the
selected trunk.
The
Reset
button resets the selected trunk(s) to the idle status if the trunk is connected
to a carrier. You’ll be asked to confirm the reset, and a status message will tell you if
the reset was successful.
Call Log View Window
The
Call Log View
window displays the line and trunk traffic history.
Right-click a trunk to
display its physical
location or to open a
trunk line properties
window specific to the
selected trunk.
Summary of Contents for ACC 6.7
Page 16: ...2 MAXCS ACC 6 7 Administration Manual ...
Page 44: ...Chapter 2 System Requirements and Installation 30 MAXCS ACC 6 7 Administration Manual ...
Page 56: ...Chapter 3 Getting Around MaxAdministrator 42 MAXCS ACC 6 7 Administration Manual ...
Page 98: ...Chapter 6 Voice Mail Configuration 84 MAXCS ACC 6 7 Administration Manual ...
Page 108: ...Chapter 7 Auto Attendant Configuration 94 MAXCS ACC 6 7 Administration Manual ...
Page 124: ...Chapter 9 Call Recording Configuration 110 MAXCS ACC 6 7 Administration Manual ...
Page 128: ...Chapter 10 Application Extension Configuration 114 MAXCS ACC 6 7 Administration Manual ...
Page 180: ...Chapter 12 Trunk Configuration 166 MAXCS ACC 6 7 Administration Manual ...
Page 186: ...Chapter 13 In Call Routing Configuration 172 MAXCS ACC 6 7 Administration Manual ...
Page 234: ...Chapter 16 Setting Up IP Extensions 220 MAXCS ACC 6 7 Administration Manual ...
Page 246: ...Chapter 17 AltiGen IP Phone Configuration 232 MAXCS ACC 6 7 Administration Manual ...
Page 256: ...Chapter 18 Mobile Extension Configuration 242 MAXCS ACC 6 7 Administration Manual ...
Page 270: ...Chapter 19 Hunt Group Configuration 256 MAXCS ACC 6 7 Administration Manual ...
Page 274: ...Chapter 20 Paging Group Configuration 260 MAXCS ACC 6 7 Administration Manual ...
Page 370: ...Chapter 26 Redundancy Configuration 356 MAXCS ACC 6 7 Administration Manual ...
Page 404: ...Chapter 29 TAPI Integration 390 MAXCS ACC 6 7 Administration Manual ...
Page 426: ...Chapter 30 Tools and Applications 412 MAXCS ACC 6 7 Administration Manual ...
Page 448: ...434 MAXCS ACC 6 7 Administration Manual ...


