


Print separations from Photoshop
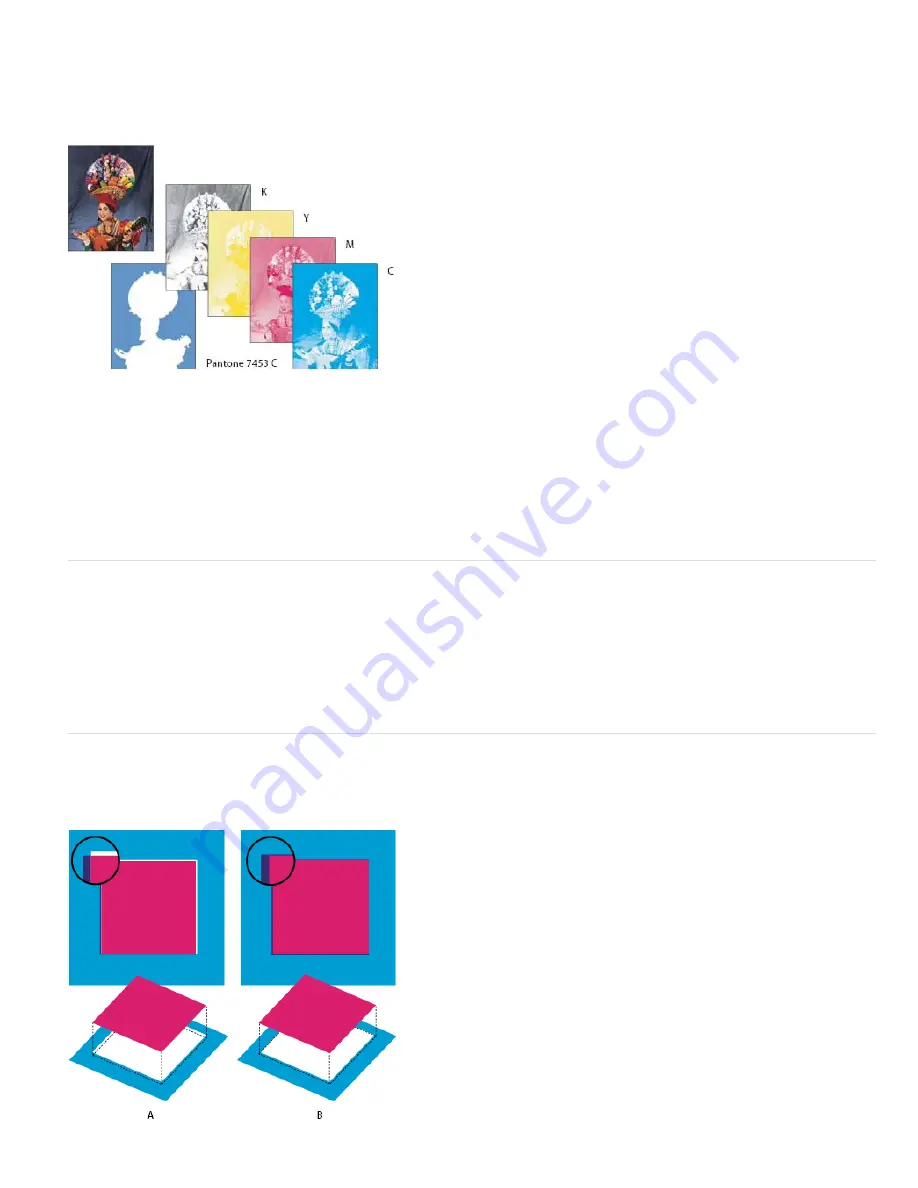
When preparing your image for prepress and working with CMYK images or images with spot colors, you can print each color channel as a
separate page.
Note: Separations from CMYK, Duotone, or multi-channel documents printed on non-PostScript printers may not be identical to those printed on
PostScript printers.
Each color channel printed as a separate page.
Note: If you are printing an image from another application and want to print spot channels to spot color plates, you must first save the file in DCS
2.0 format. DCS 2.0 preserves spot channels. This format is supported by applications such as Adobe InDesign and QuarkXPress.
1. Make sure that your document is in CMYK Color, Multichannel, or Duotone mode, and then choose File > Print.
2. Choose Separations from the Color Handling drop-down menu.
Note: Depending on the designated printer and printer drivers on your computer, these options may also appear in the Print Settings dialog
box. In Windows, click the Properties button to access the printer driver options; in Mac OS, use the pop-up menu in the Print Settings
dialog box that appears.
3. Click Print. Separations are printed for each of the colors in the image.
Prepare an image with spot channels for printing from another application
1. If the image is a duotone, convert it to Multichannel color mode.
2. Save the image in DCS 2.0 format.
3. In the DCS 2.0 Format dialog box, deselect the Include Halftone Screen and the Include Transfer Function options.
4. Open or import the image in Photoshop, and set your screen angles. Make sure that you’ve communicated to the printer the spot color you
want for each of the color plates.
Note: You can place a PSD file containing spot colors directly in Illustrator or InDesign without special preparation.
Create a color trap
A trap is an overlap that prevents tiny gaps in the printed image caused by a slight misregistration on press. Contact your service provider before
you do any trapping. In most cases, your print shop determines whether trapping is needed. If so, the print shop staff will tell you what values to
enter in the Trap dialog box.
Summary of Contents for Photoshop CS6
Page 1: ...ADOBE PHOTOSHOP Help and tutorials...
Page 65: ...Legal Notices Online Privacy Policy...
Page 100: ...Image and color basics...
Page 108: ...Legal Notices Online Privacy Policy...
Page 176: ...Legal Notices Online Privacy Policy...
Page 182: ...Legal Notices Online Privacy Policy...
Page 193: ...applied to the original Smart Object More Help topics Legal Notices Online Privacy Policy...
Page 236: ...Legal Notices Online Privacy Policy...
Page 286: ...More Help topics Adjusting image color and tone in CS6 Legal Notices Online Privacy Policy...
Page 376: ...Legal Notices Online Privacy Policy...
Page 457: ...Text...
Page 461: ...Legal Notices Online Privacy Policy...
Page 548: ...Legal Notices Online Privacy Policy...
Page 570: ...Saving and exporting...
Page 598: ...Printing...
Page 627: ...Legal Notices Online Privacy Policy...
Page 646: ...Web graphics...
Page 662: ...Legal Notices Online Privacy Policy...
Page 722: ...Legal Notices Online Privacy Policy...
Page 730: ...Color Management...
Page 739: ......
Page 748: ......


