


image; however, only the pasted layers are visible in the destination frames (the existing layers are hidden).
Paste Over Selection
Adds the contents of the pasted frames as new layers in the image. When you paste frames into the same image,
using this option doubles the number of layers in the image. In the destination frames, the newly pasted layers are visible, and the original
layers are hidden. In the non-destination frames, the newly pasted layers are hidden.
Paste Before Selection or Paste After Selection
Adds the copied frames before or after the destination frame. When you paste frames
between images, new layers are added to the image; however, only the pasted layers are visible in the new frames (the existing layers are
hidden).
7. (Optional) To link pasted layers in the Layers panel, select Link Added Layers.
This option works only when pasting frames into another document. Select it when you plan to reposition the pasted layers as a unit.
8. Click OK.
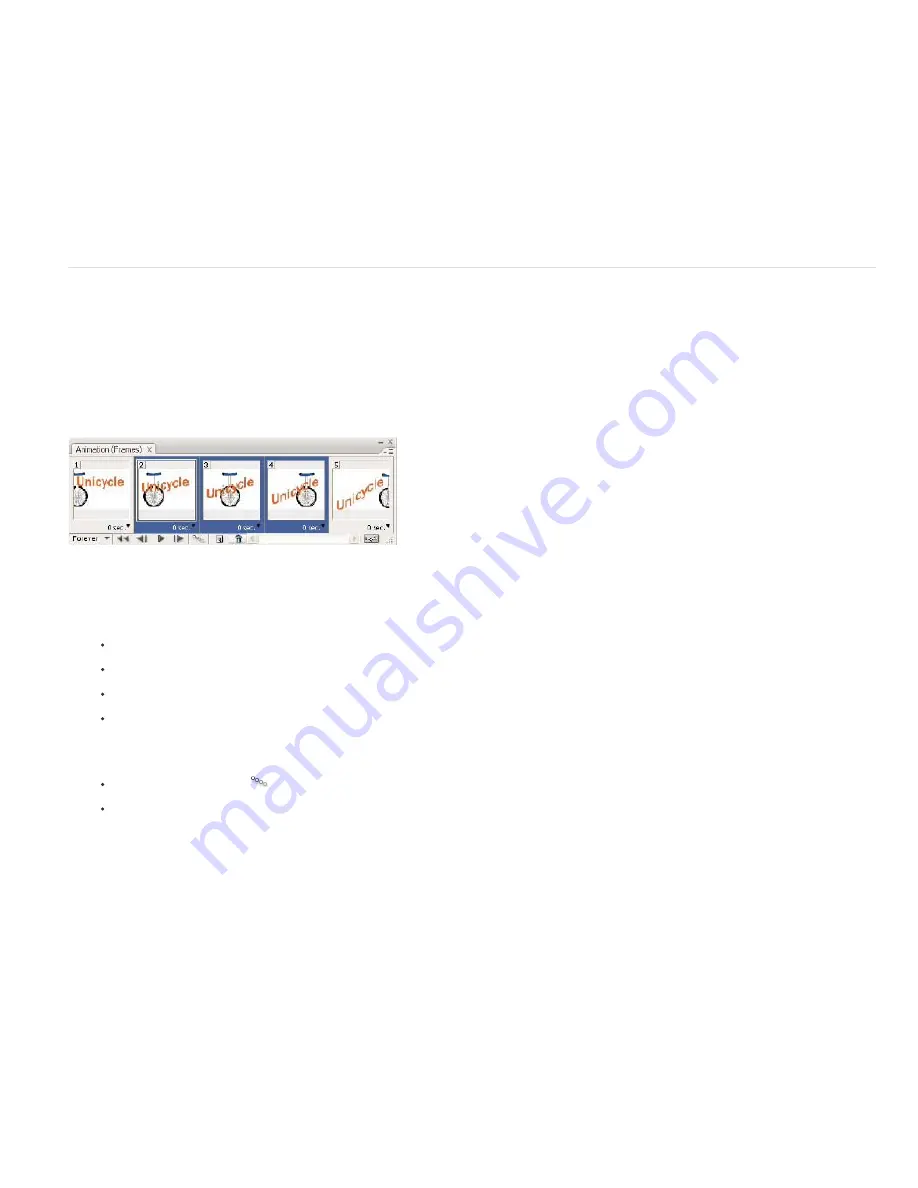
Create frames using tweening
The term
tweening
is derived from “in betweening,” the traditional animation term used to describe this process. Tweening (also called
interpolating
) significantly reduces the time required to create animation effects such as fading in or fading out, or moving an element across a
frame. You can edit tweened frames individually after you create them.
You use the Tween command to automatically add or modify a series of frames between two existing frames—varying the layer properties
(position, opacity, or effect parameters) evenly between the new frames to create the appearance of movement. For example, if you want to fade
out a layer, set the opacity of the layer in the starting frame to 100%; then set the opacity of the same layer in the ending frame to 0%. When you
tween between the two frames, the opacity of the layer is reduced evenly across the new frames.
Using tweening to animate text position
1. (Photoshop Extended) Make sure the Animation panel is in frame animation mode.
2. To apply tweening to a specific layer, select it in the Layers panel.
3. Select a single frame or multiple contiguous frames.
If you select a single frame, you choose whether to tween the frame with the previous frame or the next frame.
If you select two contiguous frames, new frames are added between the frames.
If you select more than two frames, existing frames between the first and last selected frames are altered by the tweening operation.
If you select the first and last frames in an animation, these frames are treated as contiguous, and tweened frames are added after the
last frame. (This tweening method is useful when the animation is set to loop multiple times.)
4. Do one of the following:
Click the Tweens button
in the Animation panel.
Select Tween from the Animation panel menu.
5. Specify the layer or layers to be varied in the added frames:
All Layers
Varies all layers in the selected frame or frames.
Selected Layer
Varies only the currently selected layer in the selected frame or frames.
6. Specify layer properties to be varied:
Position
Varies the position of the layer’s content in the new frames evenly between the beginning and ending frames.
Opacity
Varies the opacity of the new frames evenly between the beginning and ending frames.
Effects
Varies the parameter settings of layer effects evenly between the beginning and ending frames.
7. If you selected a single frame in step 3, choose where to add frames from the Tween With menu:
Next Frame
Adds frames between the selected frame and the following frame. This option is not available when you select the last frame in
the Animation panel.
First Frame
Adds frames between the last frame and first frame. This option is available only if you select the last frame in the Animation
panel.
Previous Frame
Adds frames between the selected frame and the preceding frame. This option is not available when you select the first
frame in the Animation panel.
Summary of Contents for Photoshop CS6
Page 1: ...ADOBE PHOTOSHOP Help and tutorials...
Page 65: ...Legal Notices Online Privacy Policy...
Page 100: ...Image and color basics...
Page 108: ...Legal Notices Online Privacy Policy...
Page 176: ...Legal Notices Online Privacy Policy...
Page 182: ...Legal Notices Online Privacy Policy...
Page 193: ...applied to the original Smart Object More Help topics Legal Notices Online Privacy Policy...
Page 236: ...Legal Notices Online Privacy Policy...
Page 286: ...More Help topics Adjusting image color and tone in CS6 Legal Notices Online Privacy Policy...
Page 376: ...Legal Notices Online Privacy Policy...
Page 457: ...Text...
Page 461: ...Legal Notices Online Privacy Policy...
Page 548: ...Legal Notices Online Privacy Policy...
Page 570: ...Saving and exporting...
Page 598: ...Printing...
Page 627: ...Legal Notices Online Privacy Policy...
Page 646: ...Web graphics...
Page 662: ...Legal Notices Online Privacy Policy...
Page 722: ...Legal Notices Online Privacy Policy...
Page 730: ...Color Management...
Page 739: ......
Page 748: ......


