


2. Alt-drag (Windows) or Option-drag (Mac OS) the selection with the Marquee tool to create a copy of the selection and its image pixels.
The copy becomes a floating selection, which seems to hover above the main image. You can move a floating selection, or you can select
the Transform tool to scale or rotate the floating selection.
3. Do one of the following:
Click outside the floating selection to deselect it. The selection’s content is pasted into the image, replacing the pixels that were below it.
Click in the floating selection with either the Marquee or Transform tool and Alt-drag (Windows) or Option-drag (Mac OS) to make
another copy. Once copied, the original floating selection is deselected and replaces the pixels that were below it.
Pressing Shift+T (Windows) or Shift+T (Mac OS) duplicates your last duplicating move. This is an easy way to
clone content multiple times.
Paste an item into Vanishing Point
You can paste an item from the clipboard in Vanishing Point. The copied item can be from the same document or a different one. Once pasted into
Vanishing Point, the item becomes a floating selection that you can scale, rotate, move or clone. When the floating selection moves into a selected
plane, it conforms to the plane’s perspective.
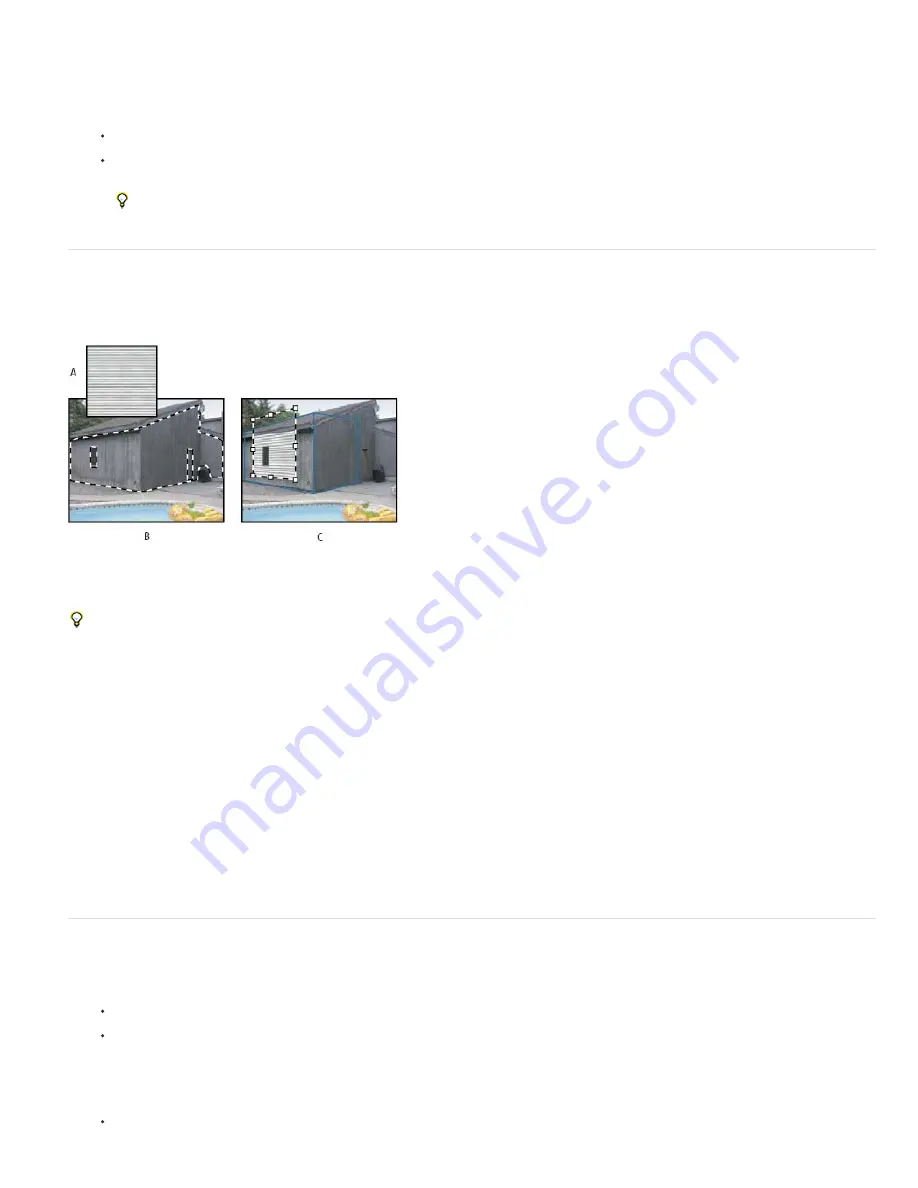
Pasting an item into Vanishing Point
A. Copied pattern from a separate document B. Image with selection (to confine results) created in Photoshop before opening Vanishing
Point C. Pasted pattern in Vanishing Point is moved into the plane and honors the selection
For convenience, it’s recommended that you create perspective planes in a previous Vanishing Point session.
1. Copy an item to the clipboard. The copied item can be from the same or different document. Keep in mind that you can paste only a raster
(not vector) item.
Note: If you’re copying type, you must first rasterize it. Right-click the text layer, and choose Rasterize. Then choose Select > All and copy
to the clipboard.
2. (Optional) Create a new layer.
3. Choose Filter > Vanishing Point.
4. If necessary, create one or more planes in the image.
5. Press Ctrl
-
V (Windows) or Command
-
V (Mac OS) to paste the item.
The pasted item is now a floating selection in the upper left corner of the preview image. By default, the Marquee tool is selected.
6. Use the Marquee tool to drag the pasted image to a plane.
The image conforms to the perspective of the plane.
Important: After pasting the image in Vanishing Point, do not click anywhere in the image with the Marquee tool except to drag the pasted
image to a perspective plane. Clicking anywhere else deselects the floating selection and permanently pastes the pixels into the image.
Paint with a color in Vanishing Point
1. Select the Brush tool.
2. Specify a brush color by doing one of the following:
Select the Eyedropper tool and click a color in the preview image.
Click the Brush Color box to open the Color Picker to select a color.
3. In the tool options area, set the Diameter (brush size), Hardness (edge smoothness), and Opacity (the degree to which painting obscures the
image below).
4. Choose a Healing mode:
To paint without blending with the color, lighting, and shading of the surrounding pixels, choose Off.
Summary of Contents for Photoshop CS6
Page 1: ...ADOBE PHOTOSHOP Help and tutorials...
Page 65: ...Legal Notices Online Privacy Policy...
Page 100: ...Image and color basics...
Page 108: ...Legal Notices Online Privacy Policy...
Page 176: ...Legal Notices Online Privacy Policy...
Page 182: ...Legal Notices Online Privacy Policy...
Page 193: ...applied to the original Smart Object More Help topics Legal Notices Online Privacy Policy...
Page 236: ...Legal Notices Online Privacy Policy...
Page 286: ...More Help topics Adjusting image color and tone in CS6 Legal Notices Online Privacy Policy...
Page 376: ...Legal Notices Online Privacy Policy...
Page 457: ...Text...
Page 461: ...Legal Notices Online Privacy Policy...
Page 548: ...Legal Notices Online Privacy Policy...
Page 570: ...Saving and exporting...
Page 598: ...Printing...
Page 627: ...Legal Notices Online Privacy Policy...
Page 646: ...Web graphics...
Page 662: ...Legal Notices Online Privacy Policy...
Page 722: ...Legal Notices Online Privacy Policy...
Page 730: ...Color Management...
Page 739: ......
Page 748: ......


