


Create related perspective planes
After creating a plane in Vanishing Point, you can create (tear off) additional planes that share the same perspective. Once a second plane is torn
off from the initial perspective plane, you can tear off additional planes from the second plane and so forth. You can tear off as many planes as
you want. Although new planes tear off at 90° angles, you can adjust them to any angle. This is useful for making seamless edits between
surfaces, matching the geometry of a complex scene. For example, corner cabinets in a kitchen can be part of a continuous surface. In addition to
adjusting the angles of a related perspective plane, you can always resize the plane using the Edit Plane tool.
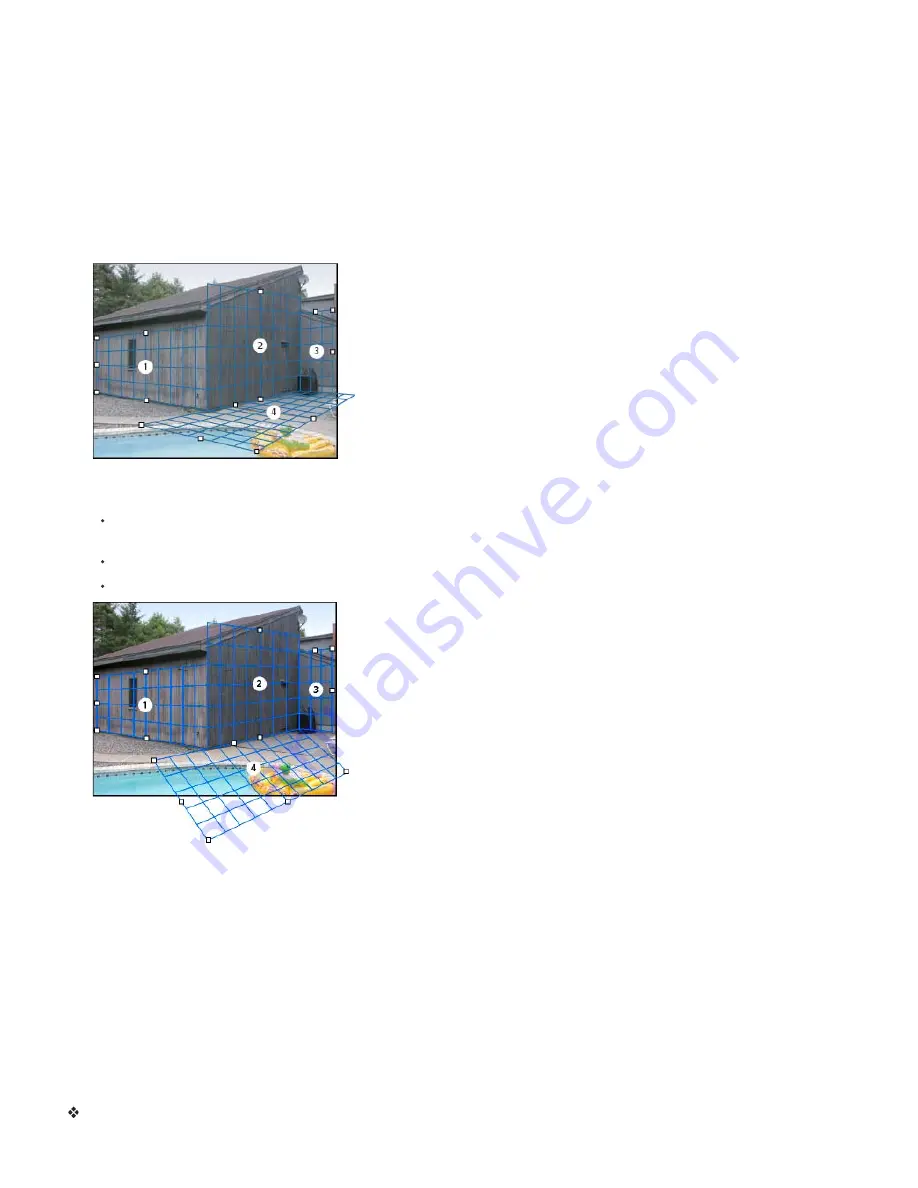
1. Select the Create Plane tool or Edit Plane tool and Ctrl-drag (Windows) or Command-drag (Mac OS) an edge node of an existing plane’s
bounding box (not a corner node).
The new plane is torn off at a 90° angle to the original plane.
Note: If a newly created plane does not properly line up with the image, select the Edit Plane tool and adjust a corner node. When you
adjust one plane, a connected plane is affected. (Corner nodes are unavailable if more than two planes are connected.)
Tearing off multiple planes keeps the planes related to each other so your edits are scaled and oriented in the proper perspective.
2. (Optional) Do one of the following to change the angle of the newly torn off plane:
With either the Edit Plane tool or Create Plane tool selected, Alt-drag (Windows) or Option-drag (Mac OS) the center edge node on the
side that’s opposite from the axis of rotation.
Enter a value in the Angle text box.
Move the Angle slider.
Changed plane angle.
Note: Once you create a new (child) plane from an existing (parent) plane, you can no longer adjust the angle of the parent plane.
Bounding box and grid alerts in Vanishing Point
The bounding box and grid change colors to indicate the plane’s current condition. If your plane is invalid, move a corner node until the bounding
box and grid are blue.
Blue
Indicates a valid plane. Keep in mind that a valid plane doesn’t guarantee results with the proper perspective. You must make sure that the
bounding box and grid accurately line up with geometric elements or a plane area in the image.
Red
Indicates an invalid plane. Vanishing Point cannot calculate the plane’s aspect ratio.
Yellow
Indicates an invalid plane. Some vanishing points of the plane cannot be resolved.
Important: Although it’s possible to edit an invalid red or yellow plane, including tearing off perpendicular planes, the results will not be oriented
properly.
Show or hide the grid, active selections, and perspective plane boundaries
Choose Show Edges from the Vanishing Point menu.
Summary of Contents for Photoshop CS6
Page 1: ...ADOBE PHOTOSHOP Help and tutorials...
Page 65: ...Legal Notices Online Privacy Policy...
Page 100: ...Image and color basics...
Page 108: ...Legal Notices Online Privacy Policy...
Page 176: ...Legal Notices Online Privacy Policy...
Page 182: ...Legal Notices Online Privacy Policy...
Page 193: ...applied to the original Smart Object More Help topics Legal Notices Online Privacy Policy...
Page 236: ...Legal Notices Online Privacy Policy...
Page 286: ...More Help topics Adjusting image color and tone in CS6 Legal Notices Online Privacy Policy...
Page 376: ...Legal Notices Online Privacy Policy...
Page 457: ...Text...
Page 461: ...Legal Notices Online Privacy Policy...
Page 548: ...Legal Notices Online Privacy Policy...
Page 570: ...Saving and exporting...
Page 598: ...Printing...
Page 627: ...Legal Notices Online Privacy Policy...
Page 646: ...Web graphics...
Page 662: ...Legal Notices Online Privacy Policy...
Page 722: ...Legal Notices Online Privacy Policy...
Page 730: ...Color Management...
Page 739: ......
Page 748: ......


