ENGINE
3-18
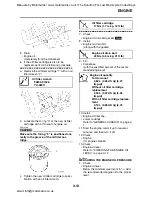
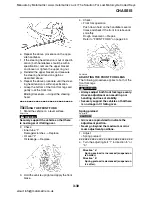
NOTE:
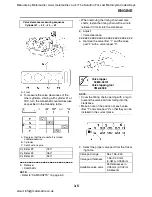
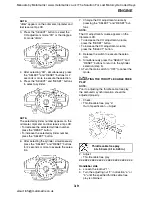
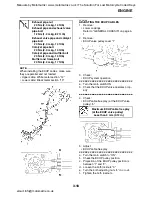
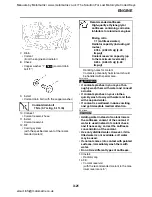
When installing the EXUP cables, make sure
they are parallel and not twisted.
• Upper cable: White metal section “12”
• Lower cable: Black metal section “13”
EAS21100
ADJUSTING THE EXUP CABLES
1. Remove:
• Lower cowlings
Refer to "GENERAL CHASSIS" on page 4-
1.
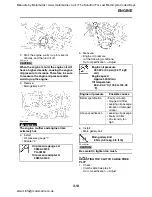
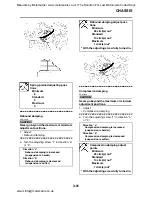
2. Remove:
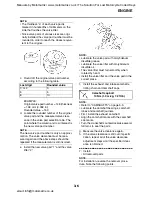
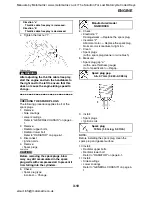
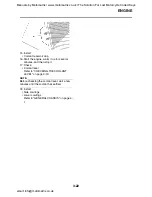
• EXUP valve pulley cover “1”
3. Check:
• EXUP system operation
▼▼▼▼▼▼▼▼▼▼▼▼▼▼▼▼▼▼▼▼▼▼▼▼▼▼▼▼▼▼
a. Turn the main switch ON
b. Check that the EXUP valve operates prop-
erly
▲▲▲▲▲▲▲▲▲▲▲▲▲▲▲▲▲▲▲▲▲▲▲▲▲▲▲▲▲▲
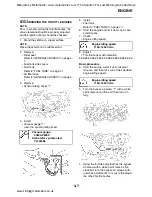
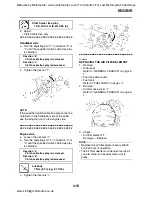
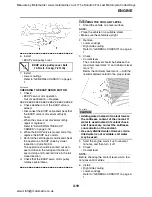
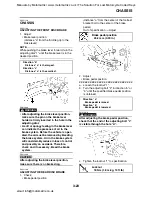
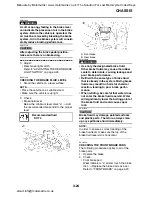
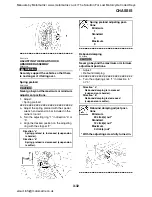
4. Check:
• EXUP cable free play (at the EXUP valve
pulley) “a”
5. Adjust:
• EXUP cable free play
▼▼▼▼▼▼▼▼▼▼▼▼▼▼▼▼▼▼▼▼▼▼▼▼▼▼▼▼▼▼
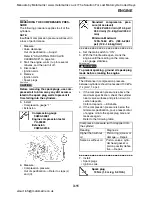
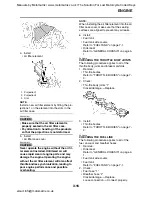
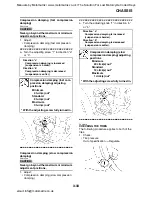
a. Turn the main switch to “ON”.
b. Check the EXUP pulley position.
c. Projection of the EXUP pulley position is
between “1” and “2” .
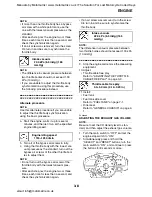
d. Loosen the both locknuts “3”
e. Turn the both adjusting nuts “4” in or out.
f.
Tighten the both locknuts.
Exhaust pipe nut
20 Nm (2.0 m·kg, 14 ft·lb)
Exhaust pipe and exhaust valve
pipe bolt
12 Nm (1.2 m·kg, 8.7 ft·lb)
Exhaust valve pipe and catalyst
pipe bolt
20 Nm (2.0 m·kg, 14 ft·lb)
Catalyst pipe bolt
20 Nm (2.0 m·kg, 14 ft·lb)
Catalyst pipe and muffler bolt
20 Nm (2.0 m·kg, 14 ft·lb)
Muffler and frame bolt
23 Nm (2.3 m·kg, 17 ft·lb)
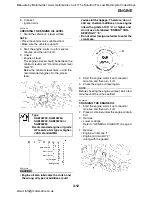
Maximum EXUP cable free play
(at the EXUP valve pulley)
Less than 3 mm (0.12 in)
Manuals by Motomatrix / www.motomatrix.co.uk / The Solution For Lost Motorcycle Coded Keys
email: [email protected]


