Working with Block Instances
91
❚❘❘
5.
Once the insertion point is properly positioned,
click OK.
6.
Right-click the Graphic window and choose Re-
turn to Full Model.
Note:
If you have already inserted instances of a
block into your model, you should be careful about
changing the insertion point of the block defini-
tion because it will cause the relocation of all
instances of that block. Typically, you position the
insertion point when you first create the block. See
“Creating New Blocks” on page 86.
Scaling a Block Definition
To change the size or proportions of a block defini-
tion, scale it along the X, Y, and Z axes. Blocks are
scaled relative to their insertion point.
Note:
You can also scale each instance separately.
See “Scaling Block Instances” on page 95.
To scale a block:
1.
Do one of the following to isolate the block:
•
Double-click a block in the Blocks table
•
Select a block in the Blocks table, right-click the
Blocks table, and choose Isolate.
The block appears alone in the Graphic window.
2.
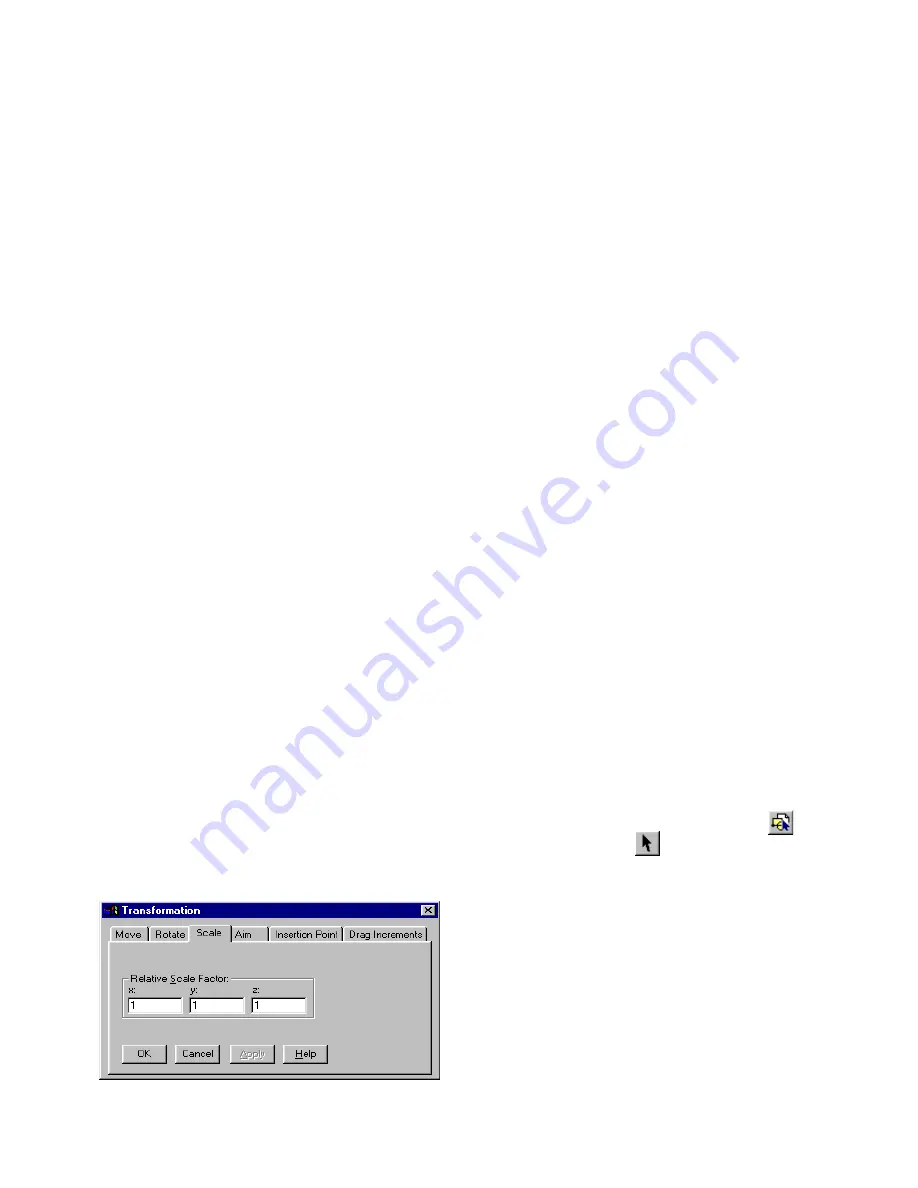
Right-click the Graphic window and choose
Transformation.
The Transformation dialog appears.
3.
Click the Scale tab.
4.
In the Relative Scale Factor X, Y, and Z boxes, en-
ter a multiplier value, and click Apply.
For example, enter a value of 2 in the X box to double
the size of the block in the X direction. Enter a value
of 0.5 to shrink the block to half its size.
5.
Once the block is properly scaled, click OK.
6.
Right-click the Graphic window and choose Re-
turn to Full Model.
All instances of the block are scaled.
Working with Block Instances
You create block instances from the blocks in your
Blocks table. You can select and duplicate block
instances. You can also move, scale, or rotate a block
instance independently of the other instances of the
same definition. However, if you change the geom-
etry or surface properties of a block instance, the
block definition and all instances of that block are
also modified.
Selecting Block Instances
Use the Selection tools to select block instances in
your model. For more information, see “Selecting
Objects” on page 38.
To select a block instance:
1.
On the toolbar, click the Block button
and
then the Select button
.
2.
Click the block instance in the Graphic window.
Adding Block Instances in Your Model
Once a block definition appears in the Blocks table,
you can add an instance of that block in your model.
You can also replace surfaces with block instances.
The new instance is added to the current layer.
Summary of Contents for LIGHTSCAPE
Page 1: ...SULO 4 31 93 36034333308355 LJKWVFDSH...
Page 18: ...NOTES 10...
Page 110: ...NOTES 102...
Page 136: ...NOTES 128...
Page 166: ...NOTES 158...
Page 176: ...NOTES 168...
Page 202: ...NOTES 194...
Page 210: ...NOTES 202...
Page 248: ...NOTES 240...
Page 294: ...NOTES 286...
Page 308: ...NOTES 300...
Page 316: ...NOTES 308...
Page 324: ...NOTES 316...
Page 342: ...Glossary 334 Lightscape...
Page 360: ...Index ix 352 Lightscape...
Page 362: ......


