Rendering
14
216
Lightscape
Soft Shadows From Sun
By default, Lightscape renders shadow boundaries
caused by the sun as sharp edges. Enable this option
to blur the edges to provide a more realistic and
natural shadow boundary.
Note:
This option can significantly increase the
rendering time of an image.
Shadows From Inactive Layers
Use this option to cause objects on layers that are not
on (not visible) to cast shadows. The objects will not
appear in the image, but their shadows will appear.
OpenGL Compatible
Because OpenGL and the Lightscape ray tracer use
different reflection models, images created from the
same Solution model do not look the same rendered
with OpenGL as when rendered with the ray tracer.
The OpenGL Compatible option forces the ray
tracer to generate images that closely match the
OpenGL display rendering. It also adds specular
reflections, but does not render them to as high a
quality as is possible when this option is not enabled.
For more information, see Appendix D, “Reflection
Models.”
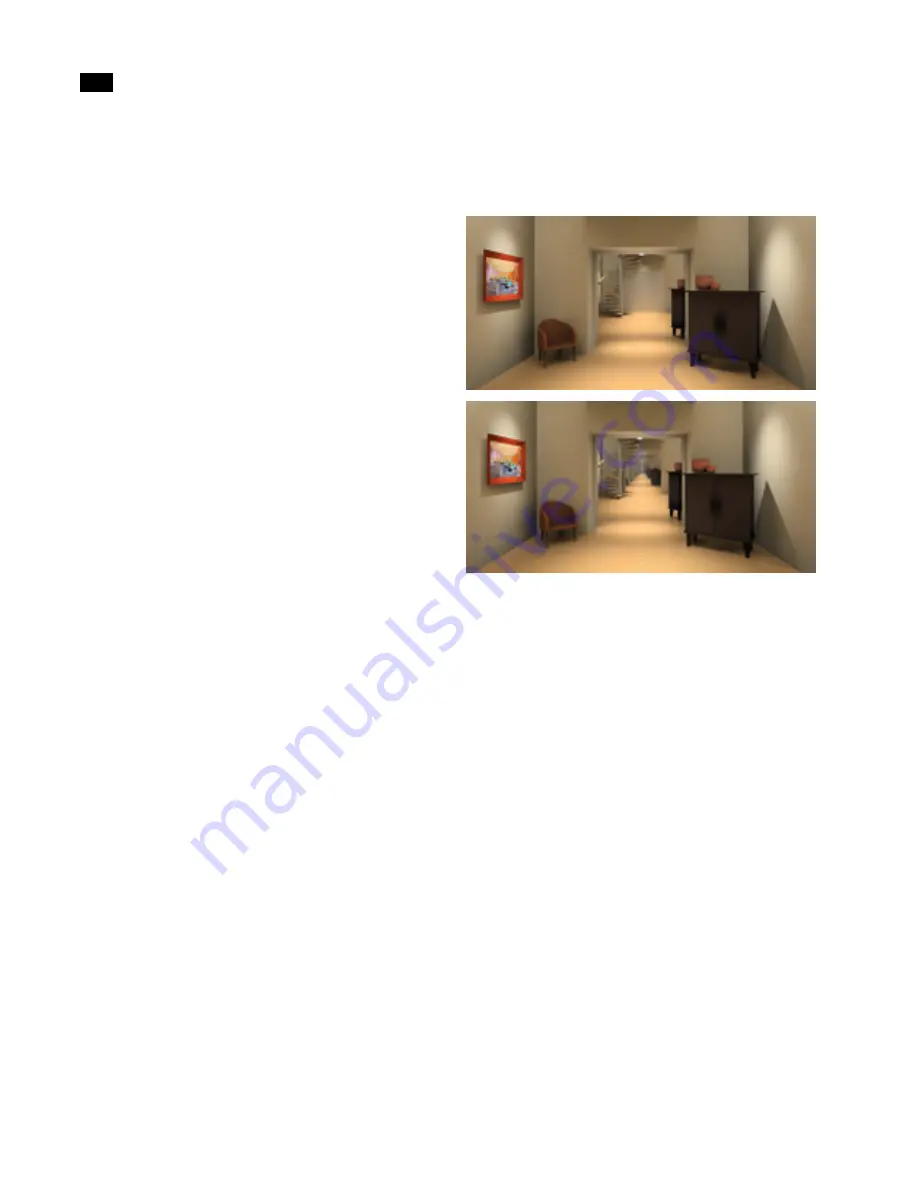
Ray Bounces
To control how many levels of reflection or transmis-
sion are calculated during ray tracing, specify the
number of ray bounces tracked in this box.
For example, if you want to see through two
windows, set this option to at least 2. Keep in mind
that if you actually model the panes of glass with two
surfaces each, you must set the number to 4.
If regions of the image that contain transparent
objects look incorrect, increase the number of ray
bounces.
Note:
If the number of bounces is set to 0, you will
see no specular or transparency effects. The default
value for this parameter is 10.
To ray trace an image:
1.
Choose File | Render.
The Rendering dialog appears.
2.
To enter a path and filename, do one of the fol-
lowing:
•
Enter a path and filename for the rendered image in
the Output File Name box
•
Click Browse and navigate to the location in the
Open dialog, enter a filename, and click Open.
•
Select the output format and pixel depth required.
3.
Select an image resolution from the Resolution
list.
4.
To define a custom resolution, select User De-
fined from the Resolution list and enter the dimen-
sions for the image in the Width and Height boxes.
Top: Two facing mirrors with Ray Bounces set to 1
Bottom: Two facing mirrors with Ray Bounces set to 10
Summary of Contents for LIGHTSCAPE
Page 1: ...SULO 4 31 93 36034333308355 LJKWVFDSH...
Page 18: ...NOTES 10...
Page 110: ...NOTES 102...
Page 136: ...NOTES 128...
Page 166: ...NOTES 158...
Page 176: ...NOTES 168...
Page 202: ...NOTES 194...
Page 210: ...NOTES 202...
Page 248: ...NOTES 240...
Page 294: ...NOTES 286...
Page 308: ...NOTES 300...
Page 316: ...NOTES 308...
Page 324: ...NOTES 316...
Page 342: ...Glossary 334 Lightscape...
Page 360: ...Index ix 352 Lightscape...
Page 362: ......


