Setting System Options
51
❚❘❘
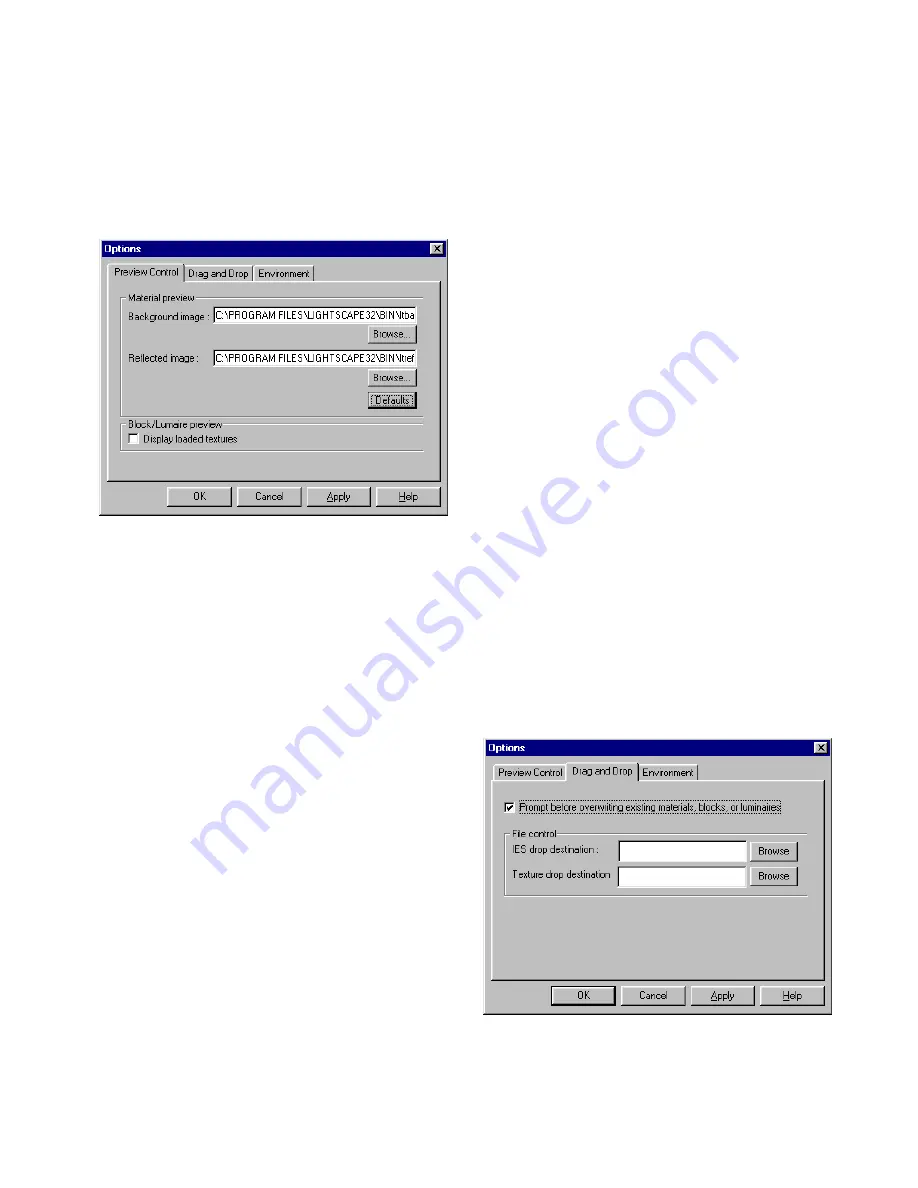
To set the preview options:
1.
Choose Tools | Options.
The Options dialog appears.
2.
Click the Preview Control tab.
3.
To use a custom background or reflection image,
click the appropriate Browse button, select the re-
quired image file in the Open dialog that appears,
and then click Open.
4.
To restore the default background and reflection
images, click the Defaults button.
5.
To display textures in the block and luminaire
previews, enable Display Loaded Textures.
6.
Click OK.
Note:
If the background and reflection images are
not visible in the Materials table, right-click in the
preview and enable Background and Reflection.
For information about using the previews, see
“Customizing Material Previews” on page 20, and
“Customizing Block and Luminaire Previews” on
page 22.
Setting Drag and Drop Options
Use these options to control how Lightscape imports
materials, blocks, and luminaires when using the
drag and drop method.
IES Drop Destination
Use this option to specify the directory to which
Lightscape saves IES files when you drag and drop
them into the Photometric Web Editor.
For more information, see Chapter 8, “Artificial
Lighting.”
Texture Drop Destination
Use this option to specify the directory to which
Lightscape saves texture image files when you drag
and drop them from LVu, for example.
For more information, see Chapter 7, “Using
Materials.”
To set the drag and drop options:
1.
Choose Tools | Options.
The Options dialog appears.
2.
Click the Drag and Drop tab.
Summary of Contents for LIGHTSCAPE
Page 1: ...SULO 4 31 93 36034333308355 LJKWVFDSH...
Page 18: ...NOTES 10...
Page 110: ...NOTES 102...
Page 136: ...NOTES 128...
Page 166: ...NOTES 158...
Page 176: ...NOTES 168...
Page 202: ...NOTES 194...
Page 210: ...NOTES 202...
Page 248: ...NOTES 240...
Page 294: ...NOTES 286...
Page 308: ...NOTES 300...
Page 316: ...NOTES 308...
Page 324: ...NOTES 316...
Page 342: ...Glossary 334 Lightscape...
Page 360: ...Index ix 352 Lightscape...
Page 362: ......


