


Rostock MAX v2 Assembly Guide
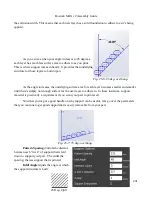
The
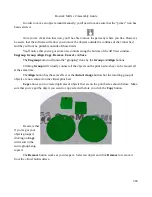
Ratio
field allows you to shrink or grow an entire model by a specific percentage. For
example, if you were to change the
Ratio
from 1 to 1.5, you'd see this:
Become
this:
The scaling operation made the cube 150% larger than the original. The
X
,
Y
, and
Z
fields
allow you to specify exact dimensions. However, as long as the
Lock Ratio
field is checked, any
change made to those fields will adjust the others to maintain the same ratio.
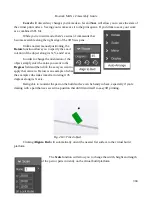
The
Mirror
function will simply allow you to “mirror” the object along
any of the three axes. Note that mirroring the Z axis will flip the part upside
down, so be careful.
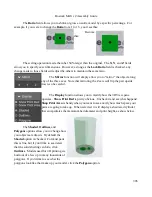
The
Display
function allows you to modify how the 3D View pane
operates.
Show Print Bed
is pretty obvious. Uncheck it and see what happens!
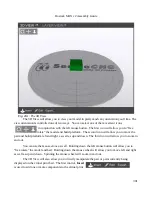
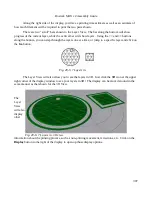
Shop Print Area
is handy when you want to see exactly how much space your
parts are going to take up. When selected, it will display a shadowed cylinder
that encapsulates the maximum bed diameter and print height, as show below.
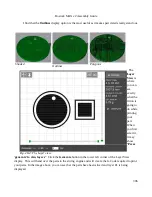
The
Shaded
,
Outlines
, and
Polygons
options allow you to change how
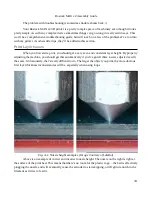
your objects are drawn. By default the
Shaded
option is checked. For most parts
this is fine, but if you'd like to see detail
that the solid shading can hide, click
Outlines
. Models used for 3D printing are
built out of a few up to many thousands of
polygons. If you'd like to see what the
polygons look like that make up your model, click
the
Polygons
option.
305
Содержание Rostock MAX v2
Страница 25: ...Rostock MAX v2 Assembly Guide Melamine Parts Sheet 1 25 ...
Страница 26: ...Rostock MAX v2 Assembly Guide Melamine Parts Sheet 2 Melamine Parts Sheet 3 26 ...
Страница 27: ...Rostock MAX v2 Assembly Guide Melamine Parts Sheet 4 27 ...
Страница 171: ...Rostock MAX v2 Assembly Guide 171 Fig 14 8 Spool holder support installed ...