Rostock MAX v2 Assembly Guide
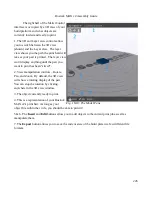
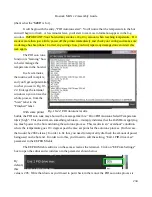
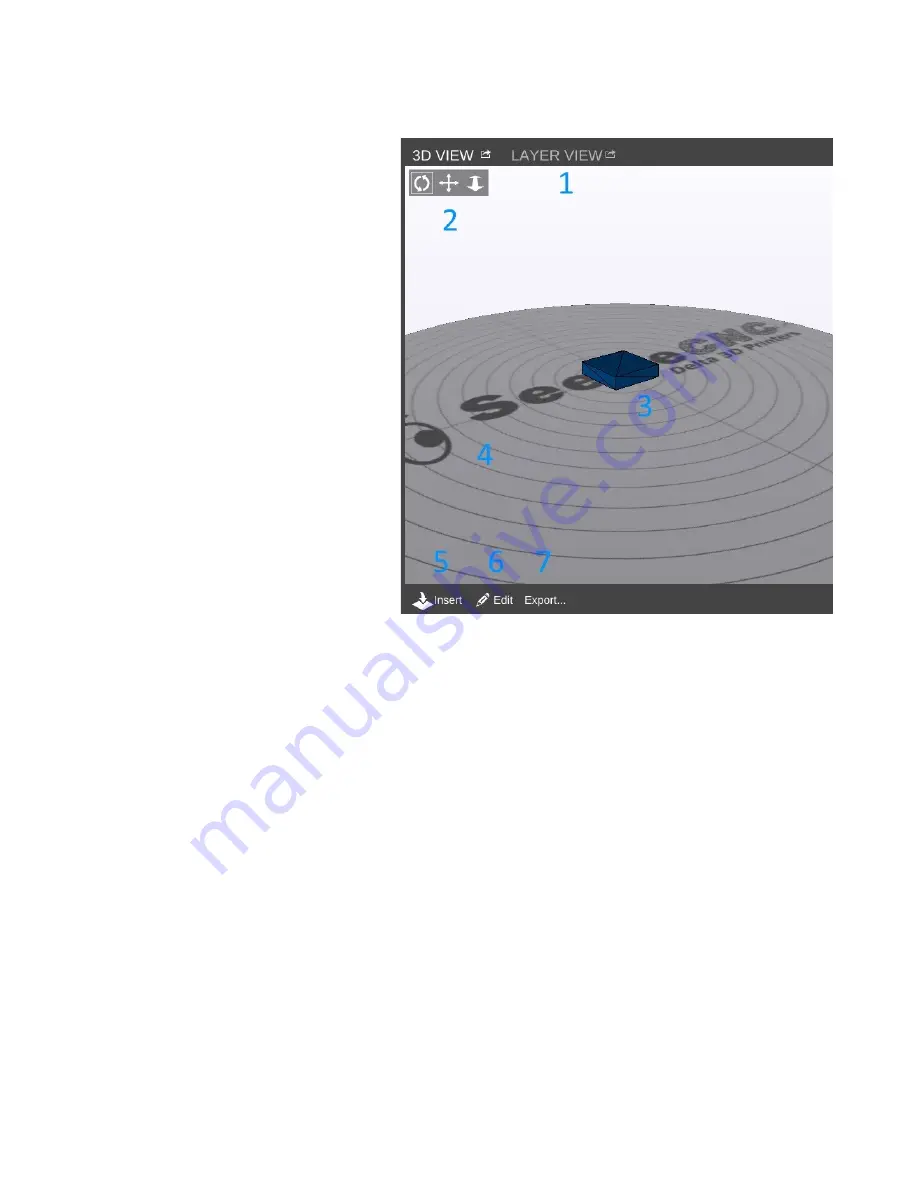
The right half of the MatterControl
interface is occupied by a 3D view of your
build platform and what objects are
currently loaded and ready to print.
1. The 3D and Layer view controls allow
you to switch between the 3D view
(shown) and the Layer view. The layer
view shows you the path the print head will
take as your part is printed. The layer view
won't display anything until the part you
want to print has been “sliced”.
2. View manipulation controls – Rotate,
Pan, and Zoom. By default, the 3D view
will show a rotating display of the part.
You can stop the rotation by clicking
anywhere in the 3D view window.
3. The object currently ready to print.
4. This is a representation of your Rostock
MAX v2's print bed. As long as your
object fits within the circle, you should be able to print it!
5 & 6. The
Insert
and
Edit
buttons allow you to add objects to the current print job as well as
manipulate them.
7. The
Export
button allows you to save the current state of the build plate in a few different file
formats.
226
Fig. 19-10: The Model Pane
Содержание Rostock MAX v2
Страница 25: ...Rostock MAX v2 Assembly Guide Melamine Parts Sheet 1 25 ...
Страница 26: ...Rostock MAX v2 Assembly Guide Melamine Parts Sheet 2 Melamine Parts Sheet 3 26 ...
Страница 27: ...Rostock MAX v2 Assembly Guide Melamine Parts Sheet 4 27 ...
Страница 171: ...Rostock MAX v2 Assembly Guide 171 Fig 14 8 Spool holder support installed ...


