Rostock MAX v2 Assembly Guide
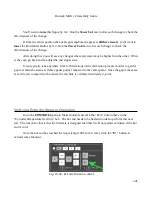
“200” and press
ENTER
or click on the
SET
button that appears when you begin typing in the field.
Once you see the “
Actual
” temperature (“25.0C” above) begin to climb, wait a few seconds
and the click the
OFF
button to turn it off. Perform the same test with the heated bed by setting the
target temperature in the
Bed Temperature Override
to 50. You'll notice that after you turn the
heaters off that the temperature will continue to climb for a short time. This is normal behavior. It' just
like a burner on a stove. When you turn it on for a short time and turn it off again, it'll still continue to
heat for a short time until the surrounding air can cool it down. As the bed heats, you should see the
“
BED HEAT
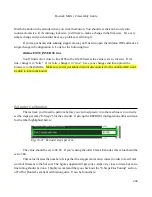
” LED illuminate. If it doesn't and you see the bed heating on the LCD, check the
polarity and wiring of the LED.
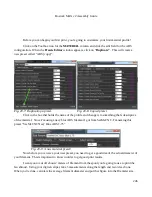
The reason you don't want them to reach the target temperature is because the PID loops need to
be calibrated before they can be used for printing. (See:
http://en.wikipedia.org/wiki/PID_controller
for more information on the system the Repetier firmware uses to control the hot end and heated bed
temperatures.)
Optimizing The Temperature Control Algorithms
Okay, now that you've spent the last 5 minutes (Who am I kidding? You've been poking at it for
at least an hour, giggling like a little kid. Your dignity is the first casualty of having your own 3D
printer. Don't worry, you're in good company.) moving the hot end around and seeing how it works,
now it's time to get it calibrated so you can begin printing your army of squirrels and Yoda heads.
In order for the mechanical calibration to be accurate, we need to do the steps with the Rostock
MAX at operating temperature. This means that both the hot end and heated bed must be at the
temperature they'd normally be at while printing.
It's very important that the temperature controlling algorithm in the RAMBo (the PID loop) be
as accurate as possible. To do this, we need to run what is called the “PID Auto tune” routine. This is a
firmware function that you run in order to determine the best values for the P(roportional), I(ntegral)
and D(erivative) values used by the PID loop.
WARNING: At no time should you allow your hot end
temperature to exceed 245C! The PEEK section of the hot end
will melt at 247C, requiring its replacement!
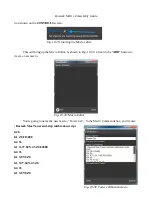
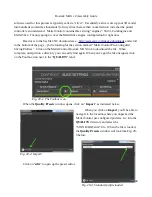
First, let's start the auto tune routine for the hot end. Open the terminal window as you have
before and send the command “
M303 S200”
. This begins the auto tune process and when it starts, it
begins to display information in the terminal window. The target temperature for this process is 200C
233
Содержание Rostock MAX v2
Страница 25: ...Rostock MAX v2 Assembly Guide Melamine Parts Sheet 1 25 ...
Страница 26: ...Rostock MAX v2 Assembly Guide Melamine Parts Sheet 2 Melamine Parts Sheet 3 26 ...
Страница 27: ...Rostock MAX v2 Assembly Guide Melamine Parts Sheet 4 27 ...
Страница 171: ...Rostock MAX v2 Assembly Guide 171 Fig 14 8 Spool holder support installed ...

