Rostock MAX v2 Assembly Guide
Both the top and bottom acrylic panels are covered with a paper protective covering. You'll
need to peel this paper off before installing the panels.
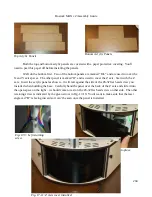
We'll do the bottom first. Two of the bottom panels are marked “R/L” and are used to cover the
X and Y axis spaces. The other panel is marked “B” and is used to cover the Z axis. Start with the Z
axis. Insert the acrylic panel as shown – it will rest against the side of the #6-32 flat head screw you
installed when building the base. Carefully bend the panel over the back of the Z axis and slide it into
the open space on the right – it should come to rest on the #6-32 flat head screw on that side. The other
retaining screw is indicated by the green arrow in Fig. 17-10. You'll want to make sure that the laser
engraved “B” is facing inward so it can't be seen once the panel is installed.
204
Top Acrylic Panels
Bottom Acrylic Panels
Fig. 17-9: Left retaining
screw.
Fig. 17-10: Setting the Z axis cover into place.
Fig. 17-11: Z Axis cover installed.
Содержание Rostock MAX v2
Страница 25: ...Rostock MAX v2 Assembly Guide Melamine Parts Sheet 1 25 ...
Страница 26: ...Rostock MAX v2 Assembly Guide Melamine Parts Sheet 2 Melamine Parts Sheet 3 26 ...
Страница 27: ...Rostock MAX v2 Assembly Guide Melamine Parts Sheet 4 27 ...
Страница 171: ...Rostock MAX v2 Assembly Guide 171 Fig 14 8 Spool holder support installed ...

