


Rostock MAX v2 Assembly Guide
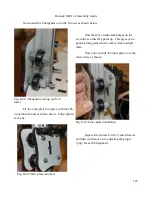
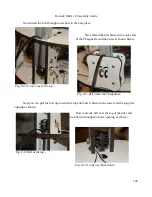
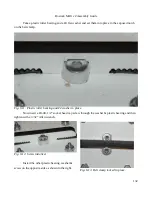
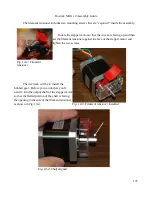
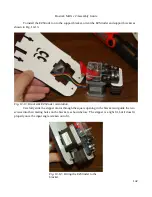
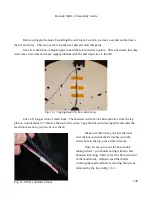
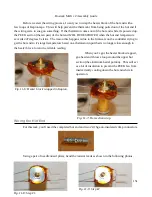
The filament tensioner includes two mounting screws that are “captured” inside the assembly.
Rotate the stepper motor so that the wires are facing up and then
set the filament tensioner against the face of the stepper motor and
tighten the two screws.
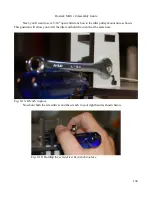
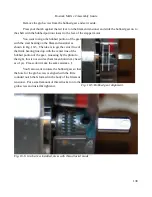
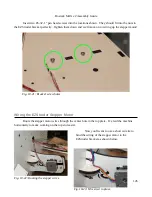
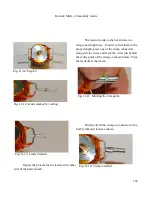
The next task will be to install the
hobbed gear. Before you can do that, you'll
need to turn the output shaft of the stepper motor
so that the flatted portion of the shaft is facing
the opening in the side of the filament tensioner
as shown in Fig. 10-4.
137
Fig. 10-2: Filament
tensioner.
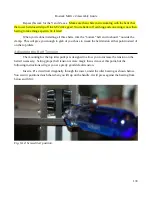
Fig. 10-3: Filament tensioner installed.
Fig. 10-4: Shaft aligned.
Содержание Rostock MAX v2
Страница 25: ...Rostock MAX v2 Assembly Guide Melamine Parts Sheet 1 25 ...
Страница 26: ...Rostock MAX v2 Assembly Guide Melamine Parts Sheet 2 Melamine Parts Sheet 3 26 ...
Страница 27: ...Rostock MAX v2 Assembly Guide Melamine Parts Sheet 4 27 ...
Страница 171: ...Rostock MAX v2 Assembly Guide 171 Fig 14 8 Spool holder support installed ...