Rostock MAX v2 Assembly Guide
will automatically turn off when the hot end temperature falls below 50C. At some point in the future,
you may want to install a second hot end. If you do this, you'll need to modify the firmware so you can
use the
Heat 1
output for a hot end and the
Fan 1
output for one or more PEEK fans.
The last terminal connection you're going to make is for the Onyx heated bed. Like you did
with the other wiring, strip 1/4” off the wires. Insert the heated bed wires into the terminal block at the
position marked “
Heat2-Bed
” as shown below in Fig. 16-29.
Plugging cabling into the RAMBo
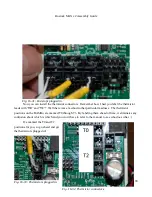
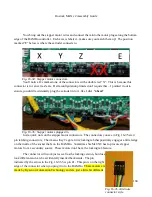
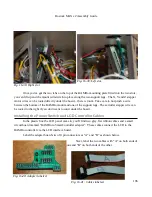
Now we're going to plug in the end-stop connectors, the stepper motors, the thermistors and
finally the main power connector. I'll keep the photos big so detail is easy to see.
First, let's get the end stop wires plugged in.
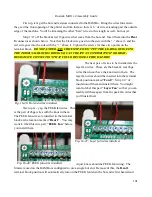
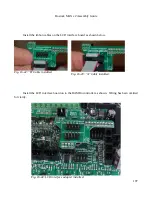
Insert each of the three end-stop connectors into the sockets shown below. I've labeled each
position in Fig. 16-30 as the board silk screen can be difficult to read due to its small size.
192
Fig. 16-29: Heated bed wires installed.
Fig. 16-30: End stop connector plugs.
Содержание Rostock MAX v2
Страница 25: ...Rostock MAX v2 Assembly Guide Melamine Parts Sheet 1 25 ...
Страница 26: ...Rostock MAX v2 Assembly Guide Melamine Parts Sheet 2 Melamine Parts Sheet 3 26 ...
Страница 27: ...Rostock MAX v2 Assembly Guide Melamine Parts Sheet 4 27 ...
Страница 171: ...Rostock MAX v2 Assembly Guide 171 Fig 14 8 Spool holder support installed ...

