4.
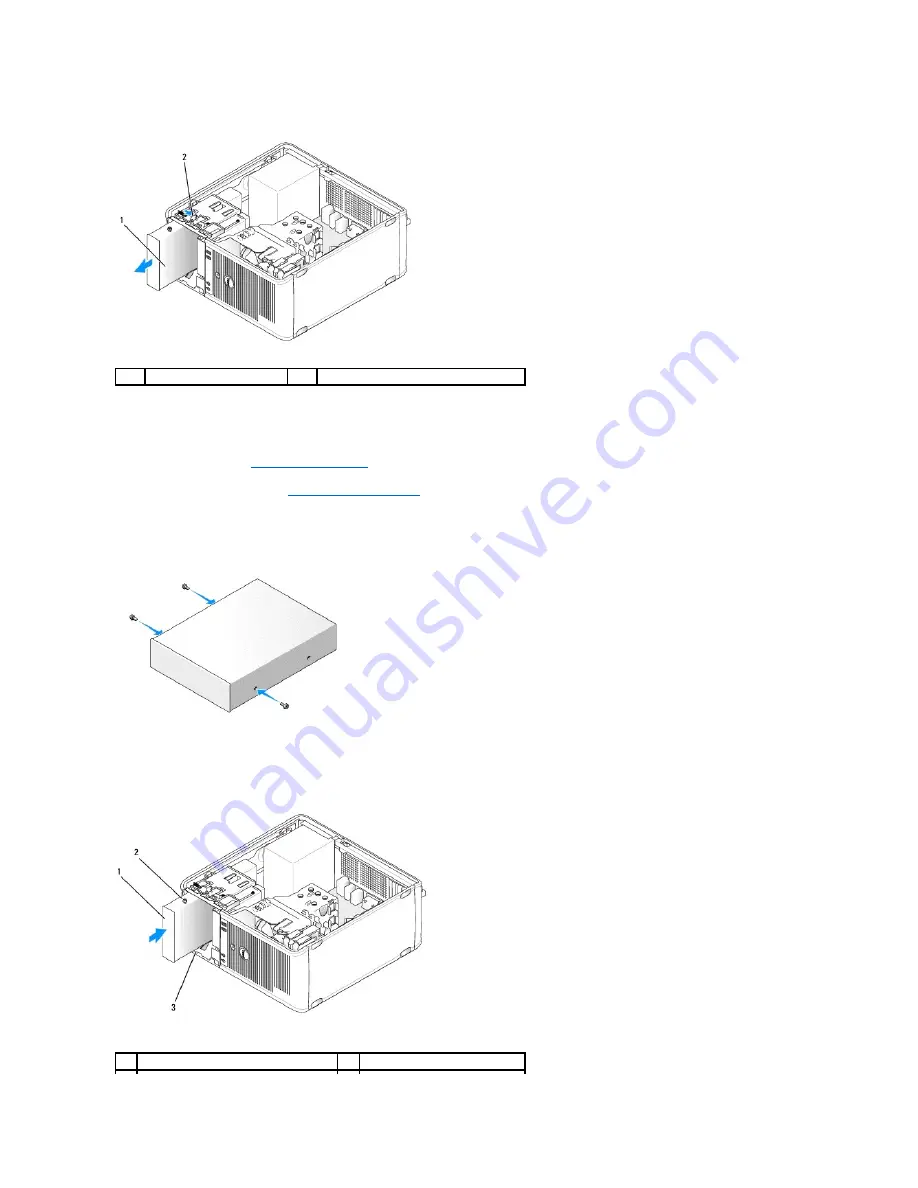
Grasp the sliding plate lever and slide it downwards until the drive panel snaps open; while holding the lever down, slide the drive out of the computer.
Installing an Optical Drive
1.
Follow the procedures in
Working on Your Computer
.
2.
Remove the computer cover (see
Removing the Computer Cover
).
3.
If you are replacing an optical drive, remove the shoulder screws from the existing drive and attach the screws to the replacement drive.
4.
If you are installing a new optical drive, remove the drive-panel insert, remove the shoulder screws from the inside of the drive-panel insert, and attach
the screws to the new drive.
5.
Check the documentation that accompanied the drive to verify that the drive is configured for your computer.
6.
Align the shoulder screws on the optical drive with the shoulder screw slots, and slide the drive into the bay until it clicks into place.
1
optical drive
2
drive release latch
1
optical drive
2
shoulder screws (3)
Содержание OptiPlex 760
Страница 29: ......
Страница 48: ......
Страница 56: ...Back to Contents Page 17 PS 2 or serial connector SERIAL2 18 floppy connector DSKT 19 fan connector FAN_CPU ...
Страница 101: ......
Страница 106: ...Back to Contents Page 1 release knob ...
Страница 140: ...5 Replace the computer cover 6 Turn on power to the computer Back to Contents Page ...
Страница 143: ...Back to Contents Page 19 fan connector FAN_CPU ...
Страница 146: ...Desktop System Board Screws Small Form Factor System Board Screws 1 screws 9 1 screws 9 ...
Страница 148: ...Back to Contents Page ...
Страница 157: ...Mini Tower Desktop Small Form Factor Ultra Small Form Factor ...
Страница 194: ...7 Replace the cable cover if used Back to Contents Page ...
Страница 196: ...Back to Contents Page ...
Страница 199: ...5 Replace the computer cover 6 Turn on power to the computer Back to Contents Page ...


