


8.
Replace the computer cover (see
Replacing the Computer Cover
).
9.
Verify that your computer works correctly by running the Dell Diagnostics (see
Dell Diagnostics
).
Hard Drive
Removing a Hard Drive
1.
Check the documentation for the drive to verify that it is configured for your computer.
2.
Follow the procedures in
Working on Your Computer
.
3.
Remove the computer cover (see
Removing the Computer Cover
).
4.
Remove the optical drive from the bay and carefully set it aside (see
Optical Drive
).
5.
Remove the floppy drive from the 3.5-inch bay and carefully set it aside (see
Floppy Drive
).
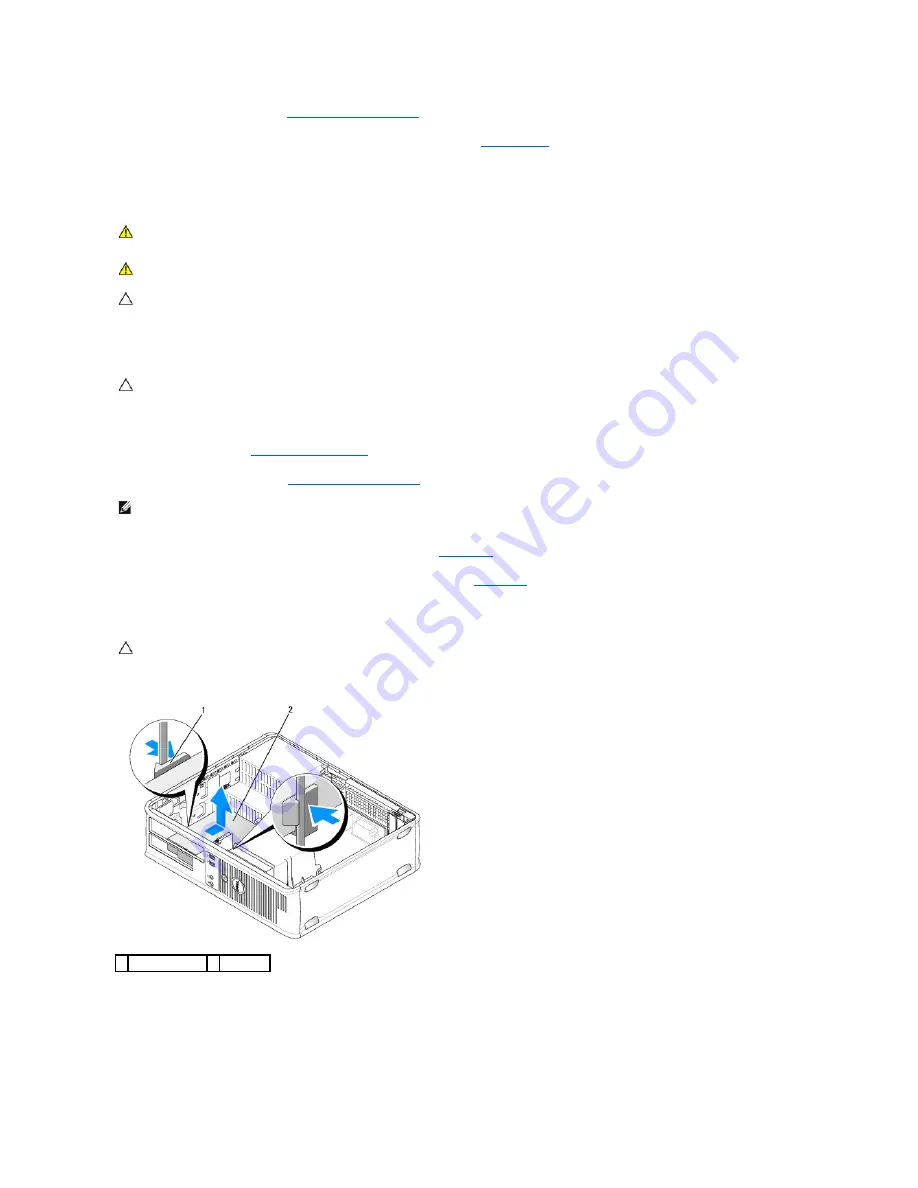
6.
Press in on the two plastic securing clips on each side of the drive and slide the drive towards the back of the computer.
7.
Lift the drive out of the computer and disconnect the power and data cables from the drive.
Installing a Hard Drive
1.
Check the documentation for the drive to verify that it is configured for your computer.
WARNING:
Before working inside your computer, read the safety information that shipped with your computer. For additional safety best
practices information, see the Regulatory Compliance Homepage at www.dell.com/regulatory_compliance.
WARNING:
To guard against electrical shock, always unplug your computer from the electrical outlet before removing the computer cover.
CAUTION:
To avoid damage to the drive, do not set it on a hard surface. Instead, set the drive on a surface, such as a foam pad, that will
sufficiently cushion it.
CAUTION:
If you are replacing a hard drive that contains data you want to keep, back up your files before you begin this procedure.
NOTE:
Since the following steps do not require the complete removal of the optical drive and the floppy drive, it is not necessary to disconnect the
cables connecting the two drives.
CAUTION:
Do not pull the drive out of the computer by the drive cables. Doing so may cause damage to cables and the cable connectors.
1 securing clips (2) 2 hard drive
Содержание OptiPlex 760
Страница 29: ......
Страница 48: ......
Страница 56: ...Back to Contents Page 17 PS 2 or serial connector SERIAL2 18 floppy connector DSKT 19 fan connector FAN_CPU ...
Страница 101: ......
Страница 106: ...Back to Contents Page 1 release knob ...
Страница 140: ...5 Replace the computer cover 6 Turn on power to the computer Back to Contents Page ...
Страница 143: ...Back to Contents Page 19 fan connector FAN_CPU ...
Страница 146: ...Desktop System Board Screws Small Form Factor System Board Screws 1 screws 9 1 screws 9 ...
Страница 148: ...Back to Contents Page ...
Страница 157: ...Mini Tower Desktop Small Form Factor Ultra Small Form Factor ...
Страница 194: ...7 Replace the cable cover if used Back to Contents Page ...
Страница 196: ...Back to Contents Page ...
Страница 199: ...5 Replace the computer cover 6 Turn on power to the computer Back to Contents Page ...