


Back to Contents Page
Dell™ OptiPlex™ 760 Service Manual
Heat Sink and Processor
Heat Sink and Processor
Removing the Processor
1.
Follow the procedures in
Working on Your Computer
.
2.
Remove the computer cover (see
Removing the Computer Cover
).
3.
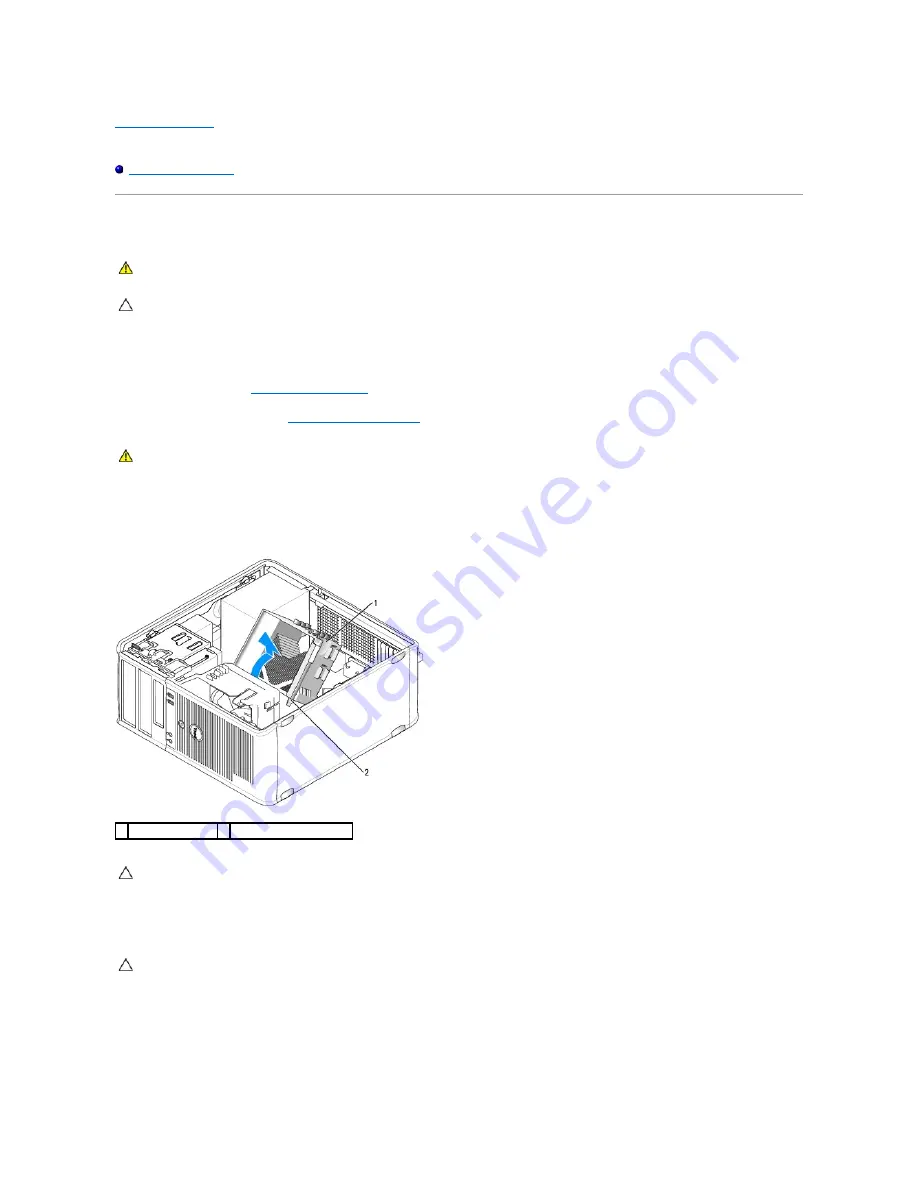
Loosen the captive screws on each side of the heat sink assembly.
4.
Rotate the heat sink assembly upward, and remove it from the computer.
Lay the heat sink down on its top, with the thermal grease facing upward.
5.
Open the processor cover by sliding the release lever from under the center cover latch on the socket. Then, pull the lever back to release the
processor.
WARNING:
Before working inside your computer, read the safety information that shipped with your computer. For additional safety best
practices information, see the Regulatory Compliance Homepage at www.dell.com/regulatory_compliance.
CAUTION:
To prevent static damage to components inside your computer, discharge static electricity from your body before you touch any of
your computer's electronic components. You can do so by touching an unpainted metal surface on the computer chassis.
WARNING:
Despite having a plastic shield, the heat sink assembly may be very hot during normal operation. Be sure that it has had sufficient
time to cool before you touch it.
1 heat sink assembly 2 captive screw housings (2)
CAUTION:
Unless a new heat sink assembly is required for the new processor, reuse the original heat sink assembly when you replace the
processor.
CAUTION:
When replacing the processor, do not touch any of the pins inside the socket or allow any objects to fall on the pins in the socket.
Содержание OptiPlex 760
Страница 29: ......
Страница 48: ......
Страница 56: ...Back to Contents Page 17 PS 2 or serial connector SERIAL2 18 floppy connector DSKT 19 fan connector FAN_CPU ...
Страница 101: ......
Страница 106: ...Back to Contents Page 1 release knob ...
Страница 140: ...5 Replace the computer cover 6 Turn on power to the computer Back to Contents Page ...
Страница 143: ...Back to Contents Page 19 fan connector FAN_CPU ...
Страница 146: ...Desktop System Board Screws Small Form Factor System Board Screws 1 screws 9 1 screws 9 ...
Страница 148: ...Back to Contents Page ...
Страница 157: ...Mini Tower Desktop Small Form Factor Ultra Small Form Factor ...
Страница 194: ...7 Replace the cable cover if used Back to Contents Page ...
Страница 196: ...Back to Contents Page ...
Страница 199: ...5 Replace the computer cover 6 Turn on power to the computer Back to Contents Page ...