background image

Chapter 14: System Maintenance 
 

222


Entering Maintenance Mode 

1.  Choose System Maintenance > Maintenance Mode > Enter 

Maintenance Mode. 

2.  Password: Type your password. Only users with the CC Setup and 

Control privilege can enter maintenance mode.   

3.  Broadcast message: Type the message that will display to users who 

will be logged out of CC-SG. 

4.  Enter maintenance mode after (min): Enter the number of minutes 

(from 0-720) that should elapse before CC-SG enters maintenance 
mode. Entering zero minutes causes Maintenance Mode to begin 
immediately. 

If specifying over 10 minutes, the broadcast message displays to 
users immediately, and then repeats at 10 and 5 minutes before the 
event occurs. 

5.  Click OK. 

6.  Click OK in the confirmation dialog box. 


Exiting Maintenance Mode 

1.  Choose System Maintenance > Maintenance Mode > Exit 

Maintenance Mode. 

2.  Click OK to exit Maintenance Mode. 

3.  A message appears when CC-SG has exited Maintenance Mode. All 

users will now be able to access CC-SG normally. 


Backing Up CC-SG 

The best practice is to enter Maintenance Mode before backing up 
CC-SG. Entering Maintenance Mode ensures that no changes are made 
to the database while it is being backed up. 

You can store up to 50 backup files on CC-SG. Once you have reached 
50 backup files, you cannot create any new backups until you delete 
some old backup files from CC-SG. See 

Saving and Deleting Backup 

Files

 (on page 224). 


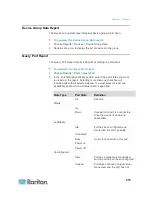
To backup CC-SG: 

1.  Choose System Maintenance > Backup. 

2.  Type a name for this backup in the Backup Name field. 

3.  Type a description for the backup in the Description field. 

Optional.


Summary of Contents for CCA-0N-V5.1-E

Page 1: ...Copyright 2011 Raritan Inc CCA 0N v5 1 E February 2011 255 80 5140 00 0N CommandCenter Secure Gateway Administrators Guide Release 5 1...

Page 2: ...s A digital device pursuant to Part 15 of the FCC Rules These limits are designed to provide reasonable protection against harmful interference in a commercial installation This equipment generates us...

Page 3: ...New Customers Physical Appliance 14 Licensing Clusters New Customers 16 Licensing Virtual Appliance with License Server 17 Virtual Appliance Installation Requirements 17 Download Installation Files 18...

Page 4: ...Associations Categories and Elements 41 About Associations 41 Association Terminology 41 Associations Defining Categories and Elements 41 How to Create Associations 42 Adding Editing and Deleting Cate...

Page 5: ...s Ports to Normal KX2 Ports 68 Bulk Copying for Device Associations Location and Contacts 69 Configuring Analog KVM Switches Connected to KX2 2 3 or Higher 70 Add a KVM Switch Connected to KX2 70 Conf...

Page 6: ...KSX2 or P2SC Device 96 Configuring PowerStrips Connected to SX 3 0 and KSX 96 Add a PowerStrip Connected to an SX 3 0 or KSX device 96 Delete a PowerStrip Connected to an SX 3 0 or KSX Device 97 Chan...

Page 7: ...ing the Virtual Topology View 123 Connecting to a Node 124 Firefox Users of the Access Client Must Download JNLP File 124 Pinging a Node 124 Adding Editing and Deleting Interfaces 125 Add an Interface...

Page 8: ...C SG Super User s Username 173 Logging Users Out 173 Bulk Copying Users 174 Chapter 10 Policies for Access Control 175 Adding a Policy 176 Editing a Policy 177 Deleting a Policy 178 Support for Virtua...

Page 9: ...0 Renaming and Moving AD Groups 201 About LDAP and CC SG 201 Add an LDAP Netscape Module to CC SG 201 LDAP General Settings 202 LDAP Advanced Settings 202 Sun One LDAP iPlanet Configuration Settings 2...

Page 10: ...ode 221 Scheduled Tasks and Maintenance Mode 221 Entering Maintenance Mode 222 Exiting Maintenance Mode 222 Backing Up CC SG 222 What is the difference between Full backup and Standard backup 224 Savi...

Page 11: ...ion mode 246 Recommended DHCP Configurations for CC SG 248 Configuring Logging Activity 248 Purge CC SG s Internal Log 249 Configuring the CC SG Server Time and Date 249 Connection Modes Direct and Pr...

Page 12: ...k 284 Reschedule a Task 284 Schedule a Task that is Similar to Another Task 284 Delete a Task 285 SSH Access to CC SG 285 Get Help for SSH Commands 286 SSH Commands and Parameters 287 Command Tips 289...

Page 13: ...Utilization 327 Perform Disk or RAID Tests 328 Schedule Disk Tests 330 Repair or Rebuild RAID Disks 331 View Top Display with Diagnostic Console 333 Display NTP Status 333 Take a System Snapshot 335 C...

Page 14: ...ritan Devices 351 CC SG Clustering 351 Access to Infrastructure Services 352 PC Clients to CC SG 352 PC Clients to Nodes 353 CC SG and Client for IPMI iLO RILOE DRAC RSA 354 CC SG and SNMP 354 CC SG I...

Page 15: ...CC SG Disk Monitoring 376 Appendix H Two Factor Authentication 379 Supported Environments for Two Factor Authentication 379 Two Factor Authentication Setup Requirements 379 Two Factor Authentication...

Page 16: ...9 Node Information 389 Location Information 390 Contact Information 390 Service Accounts 390 Device Information 390 Port Information 391 Associations 391 Administration 391 Appendix L Diagnostic Conso...

Page 17: ...M Module Connection Details on page 131 Assigning Policies To User Groups on page 179 Upgrading a Cluster on page 232 Primary Node Upgrade Failure on page 233 Migrating a CC SG Database on page 233 Re...

Page 18: ......

Page 19: ...not administrators should see Raritan s CommandCenter Secure Gateway User Guide In This Chapter Prerequisites 1 Terminology Acronyms 2 Client Browser Requirements 4 Prerequisites Before configuring a...

Page 20: ...pe which may have elements such as Windows or Unix or Linux CIM Computer Interface Module hardware used to connect a target server and a Raritan device Each target requires a CIM except for the Domini...

Page 21: ...discovered by CC SG they have to be manually added as nodes In this guide the term iLO RILOE includes both iLO RILOE and iLO2 RILOE2 In band Access going through the TCP IP network to correct or troub...

Page 22: ...evice to a node SASL Simple Authentication and Security Layer method for adding authentication support to connection based protocols SSH clients such as PuTTY or OpenSSH that provide a command line in...

Page 23: ...Thick Client Access 6 CC SG Admin Client 8 Browser Based Access via the CC SG Admin Client The CC SG Admin client is a Java based client that provides a GUI for both administrative and access tasks d...

Page 24: ...ation instead of running an applet through a web browser The thick client can be faster than a browser The minimum Java version required for running the thick client is 1 6 0 10 Install the Thick Clie...

Page 25: ...n window 5 Click Start A warning message appears if you are using an unsupported Java Runtime Environment version on your machine Follow the prompts to either download a supported Java version or cont...

Page 26: ...Chapter 2 Accessing CC SG 8 CC SG Admin Client Upon valid login the CC SG Admin Client appears...

Page 27: ...er their parent devices Click the and signs to expand or collapse the tree Click a port to view the Port Profile Right click a port and select Connect to connect to that port You can sort the ports by...

Page 28: ...ensing Rehosting 29 Add a License 30 Confirming IP Address 30 Setting CC SG Server Time 30 Checking the Compatibility Matrix 31 Checking and Upgrading Application Versions 32 Licensing Getting Started...

Page 29: ...m the Raritan Licensing Page website See Licensing New Customers Physical Appliance on page 14 If you are an existing pre 5 0 customer you do not need to download license files When a pre 5 0 CC SG un...

Page 30: ...D and Check Number of Nodes In Database The License Manager page contains information about your licenses including the number of licensed nodes currently in your database You can retrieve the physica...

Page 31: ...Chapter 3 Getting Started 13 3 Check the number of nodes in your database on this page You can determine how many more nodes you can add up to your licensed limit...

Page 32: ...censing Portal from the email address licensing raritan com with the subject line Thank You for Registering 2 Click the link in the email to go to the Software License Key Login page on Raritan s webs...

Page 33: ...e Management page See Find Your Host ID and Check Number of Nodes In Database see Find Your Physical Appliance Host ID and Check Number of Nodes In Database on page 12 7 Click Create License The detai...

Page 34: ...ating your cluster license file on the Raritan Licensing Portal you must enter the Host IDs for each CC SG unit Find these numbers on the Administration License Management page of each CC SG unit To d...

Page 35: ...datastore with 40GB minimum available Must have 2GB memory available 2 virtual NICs A high availability cluster with shared storage is recommended Client computer running vSphere Client 4 0 A physical...

Page 36: ...deploy the virtual appliance The flexserver 11 8 raritan ZIP file contains Raritan vendor daemons for Linux and Windows Flexera FlexNet Publisher license server tool kit for Linux and Windows Install...

Page 37: ...reate a folder called flexnet win 2 Unpack the raritan win32 1 0 zip to C flexnet win i86_n3 Get Your License 1 The license administrator designated at time of purchase will receive an email from Rari...

Page 38: ...create the base license first 7 Select New License Server Deployment if this is the first time you are creating a license If you have multiple CC SG deployments with more than 1 license server select...

Page 39: ...icense file Copy the License File to the License Server License files must be added to the license server If you have more than 1 license file you can copy and paste the full contents of each file int...

Page 40: ...ails about the virtual machine that will be created display You can change the default name of the virtual machine Click Next 6 Select the inventory location Click Next 7 Select the Host where you wan...

Page 41: ...er and type the URL of the CC SG https IP address admin For example https 192 168 0 192 admin Note The default setting for browser connections is HTTPS SSL encrypted 2 When the security alert window a...

Page 42: ...server at all times If a license file is moved or deleted from the license server CC SG will not be able to verify the license when it polls the license server If a license that is checked out cannot...

Page 43: ...e to manage the license server For the examples use these values for the items in brackets feature name is the value in the Feature column on the Administration License Manager page in the Admin Clien...

Page 44: ...specified feature The license server manager can be configured to prevent unauthorized execution of lmremove lmreread lmreread vendor raritan is used to cause the Raritan vendor daemon to re read the...

Page 45: ...e Tools This mounts the files onto the virtual machine so that CC SG can do the installation 4 Open a browser and login to the Admin Client 5 Choose System Maintenance Install Upgrade VMware Tools Whe...

Page 46: ...cure Gateway To view Message Of The Day Print Print Screen Logout and Exit Administration Cluster Configuration To configure the cluster and assign roles to the cluster nodes Building the cluster is a...

Page 47: ...ry section shows high level information about your license or licenses You can view the CC SG Host ID associated with the license file The number of nodes in use and number of nodes allowed is listed...

Page 48: ...Browse then select the license file 5 Click Open Note If you are using a license server CC SG will contact the license server and display the full list of features found on the server 6 Select the fea...

Page 49: ...nize the attached computer s date and time data with a referenced NTP server When CC SG is configured with NTP it can synchronize its clock time with the publicly available NTP reference server to mai...

Page 50: ...ent PC 2 Click the Application name drop down arrow and select the application that must be upgraded from the list If you do not see the application you must add it first See Add an Application on pag...

Page 51: ...to CC SG Configure device ports See Device Setup on page 34 Create Groups Categorize the devices and nodes that CC SG manages into groups and create full access policies for each group See Creating G...

Page 52: ...the Elements table To delete an element select its row and then click the Delete Row icon 5 Repeat these steps until you have added all the elements within the category to the Elements table 6 To crea...

Page 53: ...the Discover Devices panel Click the black arrow at the top of the panel to hide the top section expanding your view of the discovery results in the bottom section of the panel 7 In the table of disc...

Page 54: ...ies and elements 18 If you want the Element to apply to the device and to the nodes connected to the device select the Apply to Nodes checkbox 19 If you want to add another device click Apply to save...

Page 55: ...create a table of rules that describe the devices you want to assign to the group b Click the Add New Row icon to add a row to the table c Double click the cell created for each column to activate a...

Page 56: ...to use from each list See Policies for Access Control on page 175 9 Select the Create Full Access Policy for Group checkbox if you want to create a policy for this node group that allows access to al...

Page 57: ...group to have access to In band and Out of band nodes and to Power Management functions Select the checkboxes that correspond to the types of access you want to assign to the group 6 Click the Polici...

Page 58: ...ant the user to be forced to change the assigned password the next time the user logs in 17 Select the Force Password Change Periodically checkbox if you want to specify how often the user will be for...

Page 59: ...ific and Europe in the CC SG interface You can customize the CC SG to organize and display your servers however you like Association Terminology Associations the relationships between categories eleme...

Page 60: ...nterface Guided Setup is recommended for your initial CC SG configuration Once you have completed Guided Setup you can always edit your configurations individually See Configuring CC SG with Guided Se...

Page 61: ...t the category you want to delete 3 Click Delete in the Category panel of the screen to delete the category The Delete Category window opens 4 Click Yes to delete the category Add an Element To add an...

Page 62: ...ore elements to an existing category then you do not have to include a row to redefine the category that the new elements belong to Export a file from CC SG to view the Comments which include all tags...

Page 63: ...e and select the CSV file to import Click Open 3 Click Validate The Analysis Report area shows the file contents If the file is not valid an error message appears Click OK and look at the Problems are...

Page 64: ...t categories and elements 1 Choose Administration Export Export Categories 2 Click Export to File 3 Type a name for the file and choose the location where you want to save it 4 Click Save The first ti...

Page 65: ...ting a Device 59 Configuring Ports 60 Editing a Port 61 Deleting a Port 62 Configuring a Blade Chassis Device Connected to KX2 63 Restore Blade Servers Ports to Normal KX2 Ports 68 Bulk Copying for De...

Page 66: ...ports appear in the list with a symbol Click the or to expand or collapse the list of ports Device and Port Icons For easier identification KVM Serial and Power devices and ports have different icons...

Page 67: ...ort Sorting Options Configured ports are nested under their parent devices in the Devices tab You can change the way ports are sorted Ports arranged by status are sorted alphabetically within their co...

Page 68: ...ice so they will not appear in order with the other KX2 ports unless you restore these blade servers ports to normal KX2 ports See Restore Blade Servers Ports to Normal KX2 Ports on page 68 Device Pro...

Page 69: ...y in the tab with the date username and IP address of the user who added the note If you have the Device Port and Node Management privilege you can clear all notes from the node profile by clicking Cl...

Page 70: ...turn devices as results and will not include port names The method of searching can be configured in My Profile See Change your default search preference on page 172 To search for a device At the bott...

Page 71: ...ck to select more than one device type 5 Select the Include IPMI Agents checkbox to find targets that provide IPMI power control 6 Click Discover to start the search At any time during the discovery y...

Page 72: ...rip Device on page 56 For instructions on adding Dominion PX devices see Add a Dominion PX Device on page 56 Add a KVM or Serial Device KVM and serial devices may support 256 bit AES encryption which...

Page 73: ...ch has been entered in KX2 See the KX II User Guide A Web Browser interface is assigned to a blade chassis node in CC SG by default A virtual blade chassis device will be created in the Devices tab fo...

Page 74: ...ee Naming Conventions on page 389 for details on CC SG s rules for name lengths 2 Type the IP Address or Hostname of the device in the IP Address Hostname field See Terminology Acronyms on page 2 for...

Page 75: ...KX2 Device Change the HTTP and HTTPS ports for a KX2 device version 2 3 or later by editing the device profile CC SG propagates the new port numbers to the KX2 device The new ports will be used for co...

Page 76: ...select the checkbox next to the outlet name 8 Click OK to save your changes A message appears when the device has been modified Adding Notes to a Device Profile You can use the Notes tab to add notes...

Page 77: ...ts information Primary Contact Name and Secondary Contact Name Maximum 64 characters Telephone Number and Cell Phone Maximum 32 characters 5 Click OK to save your changes Deleting a Device You can del...

Page 78: ...4 Type a name in the Port Name field For ease of use name the port after the target that is connected to the port See Naming Conventions on page 389 for details on CC SG s rules for name lengths 5 Typ...

Page 79: ...a device a node is created automatically for each port An interface is also created for each node When a node is automatically created it is given the same name as the port to which it is associated...

Page 80: ...5 Edit the port settings 6 Click OK to save your changes Close the administrative page and return to CC SG To edit an SX serial port s settings such as baud rate flow control or parity data bits 1 Cl...

Page 81: ...e KX2 device is configured See Add a Blade Chassis Device on page 64 The blade servers in this type of blade chassis are not configured yet so you must configure the blade servers later See Configurin...

Page 82: ...chassis appears as a node with a Web Browser interface added to it Note For this type of blade chassis you must configure blade servers later See Configuring Slots on a Blade Chassis Device on page 65...

Page 83: ...e 3 Choose Devices Port Manager Configure Ports To configure multiple slots with the default names shown on the screen select the checkbox for each slot you want to configure and then click OK to conf...

Page 84: ...nstalled you should change their status on the KX2 device to make CC SG reflect the status properly To change the blade server status 1 Click the Devices tab and select the KX2 device whose blade slot...

Page 85: ...Elements associated with this device 4 Click the Blades tab to view all slots of this blade chassis device 5 If a slot has been configured as a node you can click the Node hyperlink to open the Node P...

Page 86: ...orts to Normal KX2 Ports This section applies only to the blade chassis without an integrated KVM switch such as HP BladeSystem series You may re configure blade servers beneath the virtual blade chas...

Page 87: ...device to the Selected Devices list 5 Select the device and click to remove it from the Selected Devices list 6 In the Associations tab select the Copy Associations checkbox to copy all categories and...

Page 88: ...e in CC SG properly See Add a KVM or Serial Device on page 54 3 CC SG detects the KVM switch on the KX2 s port and adds the device icon in one or two tabs In the Devices tab the KVM switch device appe...

Page 89: ...rom the list Click OK to configure the port To configure slots using the Configure Blades command 1 In the Devices tab click the next to the KX2 device that is connected to the KVM switch device 2 Sel...

Page 90: ...of existing device groups is displayed on the left Click a device group to view the details of the group in the device group manager If the group was formed arbitrarily the Select Devices tab will be...

Page 91: ...the group To remove a device from the group select the device name in the Selected list and click Remove You can search for a device in either the Available or Selected list Type the search terms in t...

Page 92: ...iple criteria for evaluating devices 5 The table of rules only makes available criteria for evaluating nodes To write a description for the device group add the rules by Rule Name to the Short Express...

Page 93: ...when you delete any rule from the table To remove a row from the table select the row and then click the Remove Row icon To see the list of devices whose parameters follow the rules you have defined c...

Page 94: ...he same method Switching methods will overwrite the current group settings Edit a Device Group To edit a device group 1 Choose Associations Device Groups The Device Groups Manager window opens 2 Exist...

Page 95: ...nfigure the power strip If device ports are configured CC SG also adds a node with out of band KVM or out of band Serial interface for each port To add blades the blade server must be connected to a K...

Page 96: ...ettings tab 9 TCP Port Default is configured in the Admin Client in Administration Configuration Device Settings tab 10 Configure All Ports TRUE or FALSE Default is TRUE for Dominion PX devices Defaul...

Page 97: ...Required field Enter the port type as shown here KVM SERIAL OUTLET or POWER Use OUTLET or POWER for configuring outlets on a PX device 5 Port or Outlet Number Required field 6 Port or Outlet Name Opti...

Page 98: ...PORT Enter the tag as shown Tags are not case sensitive 3 Device Name Required field 4 Port Number The port that the KVM Switch is connected to Required field 5 KVM Switch Port Number Required field 6...

Page 99: ...eck for errors then import it Duplicate records are skipped and are not added To import devices 1 Choose Administration Import Import Devices 2 Click Browse and select the CSV file to import Click Ope...

Page 100: ...rmware version is compatible with your CC SG firmware version If you need to upgrade both CC SG and a device or group of devices perform the CC SG upgrade first and then perform the device upgrade To...

Page 101: ...backup See Restore All Configuration Data to a KX2 KSX2 or KX2 101 Device on page 86 Each device may back up different components of the configuration See the User Guide for the device you want to bac...

Page 102: ...to another device of the same model KX2 KSX2 and KX2 101 only Full The entire content of the selected backup file will be restored to the device Custom Allows you to restore Device Setting User and U...

Page 103: ...e to the device 4 Restore Type select Protected 5 Click OK 6 Click Yes to restart the device A message appears when all user and system configuration data has been restored Restore Only Device Setting...

Page 104: ...backup files in the Restore Device Configuration page to a location on your network or local machine If you need to make space for new backups to be stored on CC SG you can delete device backup files...

Page 105: ...device whose configuration you wish to copy to other devices from the Devices tree 2 Choose Devices Device Manager Configuration Copy Configuration 3 Select the configuration copying method To copy c...

Page 106: ...1 Click the Devices tab and select the device you want to ping 2 Choose Devices Device Manager Ping Device The Ping Device screen appears showing the result of the ping Pausing CC SG s Management of a...

Page 107: ...h exceptions if the task completes but some device operations fail even after the allowed number of retries are attempted The task is logged as failed if all device operations fail To bulk pause and r...

Page 108: ...rStrip and a Dominion SX or Dominion KSX unit When you add the PowerStrip device you must define which Raritan device is providing the connection This will associate it with the SX serial port or the...

Page 109: ...disconnect users 2 Choose Devices Device Manager Disconnect Users 3 Select the users whose session you want to disconnect in the Disconnect users table 4 Click Disconnect to disconnect the users from...

Page 110: ...T IP devices connected to your Paragon System setup directly from the CC SG interface After adding the Paragon System device to CC SG it appears in the Devices tree To access Remote User Station Admin...

Page 111: ...eate power associations between the outlets and the nodes they power See Interfaces for Managed Powerstrip Connections on page 130 Special Note about Dominion PX Regardless of which method you choose...

Page 112: ...hese powerstrips To configure managed powerstrips in CC SG 1 Complete all physical connections between the device the powerstrip and the nodes that are powered by the powerstrip See the RPC Quick Setu...

Page 113: ...ll appear in the Devices tab beneath the device to which it is connected Next Steps 1 Configure outlets See Configuring Outlets on a PowerStrip on page 99 2 Associate each outlet with the node that it...

Page 114: ...a PowerStrip Connected to an SX 3 0 or KSX device 1 Add the SX 3 0 or KSX device to CC SG See Add a KVM or Serial Device on page 54 2 Choose Devices Device Manager Add Device 3 Click the Device type d...

Page 115: ...erstrip is still physically connected If you physically disconnect a powerstrip from the SX 3 0 KSX or P2SC device with which it is associated the powerstrip still appears in the Devices tab beneath t...

Page 116: ...ts the PowerStrip and adds it automatically The PowerStrip will appear in the Devices tab beneath the SX 3 1 device to which it is connected If the SX 3 1 device has already been added to CC SG and th...

Page 117: ...want to delete 2 Choose Devices Device Manager Delete Device 3 Click OK to delete the powerstrip A message appears when the powerstrip has been deleted The powerstrip icon is removed from the Devices...

Page 118: ...each outlet individually click the Configure button next to the outlet and then type a name for the outlet in the Port name field Click OK to configure the port To delete an outlet 1 In the Devices t...

Page 119: ...cation and Contacts 137 Using Chat 138 Adding Nodes with CSV File Import 138 Editing IP Addresses with CSV File Import 149 Adding Editing and Deleting Node Groups 150 Nodes and Interfaces Overview Abo...

Page 120: ...KVM interface for the keyboard mouse and monitor ports and a power interface to manage the outlet to which the server is connected Some interfaces only work in Direct mode even though you configure C...

Page 121: ...Chapter 8 Nodes Node Groups and Interfaces 103 Node Profile Click a Node in the Nodes tab to open the Node Profile page The Node Profile page includes tabs that contain information about the node...

Page 122: ...vice You can change the information in the fields by typing in new information See Adding Location and Contacts to a Node Profile on page 111 Notes tab The Notes tab contains a tool that enables users...

Page 123: ...evice Port and Node Management permission you can Reboot and Force Reboot the virtual host server Virtual Machine Data tab Virtual machine nodes such as VMware s Virtual Machines include the Virtual M...

Page 124: ...apply to the VNC server For Web Browser interfaces the login credentials apply to the form available at the URL specified in the interface To view service accounts Choose Nodes Service Accounts The Se...

Page 125: ...ption field 8 Click OK To edit a service account 1 Choose Nodes Service Accounts The Service Accounts page opens 2 Find the service account you want to edit 3 Edit the fields You cannot edit the Servi...

Page 126: ...5 You must have the Device Port and Node Management privilege to assign service accounts to interfaces See Adding Editing and Deleting User Groups on page 159 To assign a service account to interfaces...

Page 127: ...his node See Associations Categories and Elements on page 41 Optional For each Category listed click the Element drop down menu and then select the element you want to apply to the node from the list...

Page 128: ...Click the Nodes tab and then select the node you want to edit The Node Profile appears 2 Edit the fields as needed 3 Click OK to save your changes Note 1 Changing the node name of a blade chassis does...

Page 129: ...aximum 64 characters Telephone Number and Cell Phone Maximum 32 characters 5 Click OK to save your changes Adding Notes to a Node Profile You can use the Notes tab to add notes about a node for other...

Page 130: ...al Machine is a virtual server that resides on a Virtual Host A Virtual Machine can be relocated from one Virtual Host to a different Virtual Host VMware s Virtual Machine or VM VI Client interface Co...

Page 131: ...The VMW Viewer interface provides access to the virtual machine s viewer application For VMware virtual machines the VMW Viewer interface provides access to the virtual machine remote console The VMW...

Page 132: ...the table in descending order Optional 10 Add virtual machines to CC SG One node will be created for each virtual machine Each associated virtual host will also be configured Only one virtual host no...

Page 133: ...figured Optional Leave these fields blank if you prefer to add names and login credentials to each interface individually The interface will take the name of the node if the field is left blank a Ente...

Page 134: ...rtual host Maximum 64 characters 6 Connection Protocol Specify HTTP or HTTPS communications between the virtual host and CC SG 7 TCP Port Enter the TCP port The default port is 443 8 Check Interval se...

Page 135: ...SSH columns Optional To add more than one virtual machine Use Ctrl click or Shift click to select multiple virtual machines that you want to add In the Check Uncheck Selected Rows section select the...

Page 136: ...systems One node for each virtual host Each virtual host node has a VI Client interface Virtual host nodes are named with their IP addresses or host names Edit Control Systems Virtual Hosts and Virtua...

Page 137: ...virtual machine nodes or virtual host nodes from this page You must delete the interfaces from the node profile See Delete an Interface on page 135 9 Click Next If you chose to delete virtual machines...

Page 138: ...tems 3 Click Delete Delete a Virtual Machine Node There are two ways to delete virtual machine nodes Use the Delete Node feature See Delete a Node on page 110 Deselect the Configure checkbox for the v...

Page 139: ...ve Programs and look for an older VI Client If VI client 2 5 is installed uninstall it After the uninstalling the VI client 2 5 the plug in will be removed To remove the old plug in from Firefox users...

Page 140: ...the number of virtual machines or hosts that are configured in CC SG The Last Synchronization Date shows the date and time of the synchronization The Node Status column shows the status of the virtua...

Page 141: ...tab 3 Click Reboot or Force Reboot Accessing the Virtual Topology View The Topology View is a tree structure that shows the relationships of the control system virtual hosts and virtual machines asso...

Page 142: ...nt to connect Double click the name of the interface to which you want to connect or right click the interface and select Connect Firefox Users of the Access Client Must Download JNLP File Firefox use...

Page 143: ...M connection to a Dell DRAC server through the DRAC interface You will be required to configure a DRAC Power interface as well In Band iLO Processor KVM Select this item to create a KVM connection to...

Page 144: ...RSA Select this item to create a power control connection to an RSA server See Interfaces for DRAC Power Control Connections on page 129 Interfaces for ILO Processor Integrity ILO2 and RSA Power Contr...

Page 145: ...n access a node simultaneously 4 Enter authentication information To use a service account for authentication select the Use Service Account Credentials checkbox Select the service account to use in t...

Page 146: ...See About Connection Modes on page 250 Interfaces for Out of Band KVM Out of Band Serial Connections To add an Interface for out of band KVM or out of band serial connections 1 Application name select...

Page 147: ...Username and Password for authentication 4 Type a description of this interface in the Description field Optional 5 Click OK to save your changes Interfaces for ILO Processor Integrity ILO2 and RSA Po...

Page 148: ...t have simultaneous KVM and power access to the RSA server when using a Service Account on the interfaces RSA Compatibility with JRE IBM RSA II version 1 14 is compatible with JRE versions 1 6 0_10 an...

Page 149: ...this interface in the UDP Port field 3 Authentication select an authentication scheme for connecting to this interface 4 Type a check interval for this interface in the Check Interval seconds field 5...

Page 150: ...change this value If the IT device has already been added to Power IQ find the external key on the IT device s page in the Data Center tab then enter the text in the External Key field If the IT devic...

Page 151: ...dd a web browser interface 1 The default name for a Web Browser Interface is Web Browser You can change the name in the Name field See Naming Conventions on page 389 for details on CC SG s rules for n...

Page 152: ...is reason there isn t a single method for finding the field names See the procedure below for one possible method You may want the help of a software engineer or system administrator to locate and ide...

Page 153: ...erface 1 Click the Nodes tab and select the node with the interface you want to edit The Node Profile page opens 2 In the Interfaces tab select the row of the interface you want to edit 3 Click Edit 4...

Page 154: ...n Internet Explorer add an interface to your Favorites 1 In the Nodes tab select the interface you want to bookmark You must expand the node to view the interfaces 2 Choose Nodes Bookmark Node Interfa...

Page 155: ...tact information of the node in the Node Name field 4 Click to add a node to the Selected Nodes list 5 Select the node and click to remove it from the Selected Nodes list 6 In the Associations tab sel...

Page 156: ...ick Yes to close the chat session for all participants Click No to exit the chat session but leave it running for other participants Adding Nodes with CSV File Import You can add nodes and interfaces...

Page 157: ...t be configured in CC SG You cannot import virtual infrastructure nodes and interfaces Use the options in Nodes Virtualization The first interface in the CSV file after the ADD NODE command is assigne...

Page 158: ...ame will be copied to the device with the exception of SX devices 8 Interface Name Enter the same value as entered for Raritan Port Name 9 Description Optional To add an out of band serial interface t...

Page 159: ...P INTERFACE Enter the tag as shown Tags are not case sensitive 3 Node Name Required field 4 Interface Name Required field 5 IP Address or Hostname Required field 6 TCP Port Default is 3389 7 Service A...

Page 160: ...Interface Name Required field 5 IP Address or Hostname Required field 6 TCP Port Default is 22 for SSH Default is 23 for TELNET 7 Service Account Name Optional Leave blank if specifying username and...

Page 161: ...Column number Tag or value Details 1 ADD The first column for all tags is the command ADD 2 NODE DRAC KVM INTERFAC E for DRAC KVM interfaces NODE DRAC POWER INTERF ACE for DRAC Power interfaces NODE...

Page 162: ...RSA KVM interface to the CSV file When importing DRAC ILO and RSA interfaces you must specify both the KVM interface and the Power interface or the import will fail Column number Tag or value Details...

Page 163: ...DP Port Default is 623 7 Authentication MD5 None OEM or PASSWORD Default is PASSWORD 8 Interval Enter the check interval in seconds Default is 550 9 Service Account Name Leave blank if specifying user...

Page 164: ...terface to the CSV file Column number Tag or value Details 1 ADD The first column for all tags is the command ADD 2 NODE WEB INTERFACE Enter the tag as shown Tags are not case sensitive 3 Node Name Re...

Page 165: ...ernal Key If the IT device has already been added to Power IQ find the external key on the IT device s page in the Data Center tab and enter the text in this field If the IT device has not been added...

Page 166: ...ed field Sample Nodes CSV File ADD NODE NJSomersetEmailServer Physical Server ADD NODE OOBKVM INTERFACE NJSomersetEmailServer NJSomersetEmailServer DKX2 NY Rack7 NJSomersetEmailServer ADD NODE RDP INT...

Page 167: ...ch item in the file The comments can be used as instructions for creating a file for importing To export nodes 1 Choose Administration Export Export Nodes 2 Click Export to File 3 Type a name for the...

Page 168: ...s Choose Associations Node Groups The Node Groups Manager window appears A list of existing node groups is displayed on the left while details about the selected node group appear in the main panel A...

Page 169: ...h as the categories and elements The advantage of the describe method is that when you add more devices or nodes with the same attributes as described they will be pulled into the group automatically...

Page 170: ...a drop down menu then select the appropriate value for each component Prefix Leave this blank or select NOT If NOT is selected this rule will filter for values opposite of the rest of the expression...

Page 171: ...sfy one rule on either side of this operator for the description or that section of a description to be evaluated as true and grouping operators This breaks the description into a subsection contained...

Page 172: ...t to create a policy that allows access to the nodes in this group at all times select the Create Full Access Policy for Group checkbox 9 When you are done describing the nodes that belong in this gro...

Page 173: ...Chapter 8 Nodes Node Groups and Interfaces 155...

Page 174: ...nal authentication See Remote Authentication on page 187 You must also create policies for access that you can assign to user groups See Policies for Access Control on page 175 In This Chapter The Use...

Page 175: ...s are nested underneath the user groups to which they belong User groups with users assigned to them appear in the list with a symbol next to them Click the to expand or collapse the list Active users...

Page 176: ...Super User group Strong password requirements are Passwords must contain at least one lowercase letter Passwords must contain at least one uppercase letter Passwords must contain at least one number...

Page 177: ...dd User Group screen appears 2 Type a name for the user group in the User Group Name field User Group names must be unique See Naming Conventions on page 389 for details on CC SG s rules for name leng...

Page 178: ...the policy name in the Selected Policies list and then click Remove 10 When you are done configuring policies for this group click Apply to save this group and create another Repeat the steps in this...

Page 179: ...pear 11 For each policy you want to add to the group select policy in the All Policies then click Add to move the policy to the Selected Policies list Policies in the Selected Policies list will allow...

Page 180: ...have high traffic See Access Report on page 212 Limits on number of KVM sessions are set per user group You can enable limits when you add or edit a user group manually in Guided Setup or by CSV impo...

Page 181: ...To add a user 1 In the Users tab select the group to which you want to add a user 2 Choose Users User Manager Add User 3 In the Username field type the user name of the user you want to add This name...

Page 182: ...group you select the Require User to Enter Information When Connecting to a Node checkbox may or may not be selected If selected then this user is required to enter information when accessing a node...

Page 183: ...user accounts that are no longer needed This procedure deletes all instances of a user even if the user exists in multiple user groups See Deleting a User From a Group on page 166 to remove the user f...

Page 184: ...her assigned groups Deleting a user from a group does not delete the user from CC SG If a user belongs to only one group you cannot delete the user from the group You can only delete the user from CC...

Page 185: ...sers on page 171 Follow the additional requirements for all CSV files See Common CSV File Requirements on page 369 To add a user group to the CSV file Column number Tag or value Details 1 ADD The firs...

Page 186: ...Security Management TRUE or FALSE 9 Node IBA TRUE or FALSE Default is TRUE 10 Node OOB TRUE or FALSE Default is TRUE 11 Node Power TRUE or FALSE To assign a policy to a user group in the CSV file Col...

Page 187: ...case sensitive 3 User Group Name Required field User Group names are case sensitive You must add the user to one user group You can add the user to more user groups with the USERGROUP MEMBER tag 4 Us...

Page 188: ...ample Users CSV File ADD USERGROUP Windows Administrators MS IT Team ADD USERGROUP PERMISSIONS Windows Administrators FALSE TRUE TRUE TRUE TRUE TRUE TRUE TRUE ADD USERGROUP POLICY Windows Administrato...

Page 189: ...s area to see the import results Items that imported successfully show in green text Items that failed import show in red text Items that failed import because a duplicate item already exists or was a...

Page 190: ...Password field A message appears if Strong Passwords are required 5 Type your new password again in the Retype New Password field 6 Click OK to save your changes Change your name You cannot change you...

Page 191: ...s CC SG will use to send you notifications 3 Click OK to save your changes Change the CC SG Super User s Username You must be logged into CC SG using the CC Super User account to change the CC Super U...

Page 192: ...ns have existing group affiliations the existing affiliations will be removed To perform a Bulk Copy for users 1 In the Users tab click the symbol to expand the user group that contains the user whose...

Page 193: ...all user groups If you completed Guided Setup a number of basic policies may already have been created See Configuring CC SG with Guided Setup on page 33 To control access using policies Create Node...

Page 194: ...drop down arrow and select the Node Group to which this policy governs access 7 If the policy will cover only one type of group select a value only for that type 8 Click the Days drop down arrow and t...

Page 195: ...e Mode all current users are logged out of CC SG until you exit Maintenance Mode when users can log in again See Maintenance Mode on page 221 To edit a policy 1 On the Associations menu click Policies...

Page 196: ...Control in the Device Node Access Permission field the Virtual Media Permission section will become enabled In the Virtual Media Permission field select an option to allow or deny access to virtual me...

Page 197: ...icy is assigned to a User Group the members of the group will have their access governed by that policy See Users and User Groups on page 156 for details on assigning policies to a user group If a use...

Page 198: ...ode groups you specify will appear in the nodes list when a Filter by Node Group custom view is applied The first level of organization is the node group name A node may appear several times in the li...

Page 199: ...des according to the categories you specify 6 Click OK 7 In the Custom View Details section a In the Available list select the item you want to include in the custom view and then click Add to add the...

Page 200: ...he custom view in the Enter new name for custom view field and then click OK The new view name appears in the Name field in the Custom View screen To change the custom view s contents 1 In the Custom...

Page 201: ...iew panel click Set as Default The next time you log in the selected custom view will be used by default Assign a Default Custom View of Nodes for All Users If you have the CC Setup and Control privil...

Page 202: ...you want b Arrange the items in the Selected list in the order you would like each grouping to display in the Nodes tab Select an item and click the up and down arrow buttons to move the item into the...

Page 203: ...n click Add to add the item to the list Repeat this step to add as many items as you want b Arrange the items in the Selected list in the order you would like each grouping to display in the Nodes tab...

Page 204: ...will be used by default Assign a Default Custom View of Devices for All Users If you have the Device Port and Node Management privilege you can assign a default custom view for all users To assign a d...

Page 205: ...Authentication and Authorization AA Overview Users of CC SG can be locally authenticated and authorized on the CC SG or remotely authenticated using the following supported directory servers Microsof...

Page 206: ...and on CC SG must be the same although the passwords may be different The local CC SG password is used only when remote authentication is disabled See Users and User Groups on page 156 for details on...

Page 207: ...D container in which the users can be found For example entering ou DCAdmins ou IT dc xyz dc com will search all users in the DCAdmins and IT organizational units under the xyz com domain Specifying M...

Page 208: ...his allows users to be maintained exclusively on the AD server Once your AD server is configured as a module in CC SG CC SG can query all domain controllers for a given domain You can synchronize your...

Page 209: ...he same domain or on different domains that trust each other Note CC SG will query all known domain controllers for the domain specified 2 Type the IP addresses of the Primary and Secondary DNS server...

Page 210: ...nced Settings To configure advanced AD settings 1 Click the Advanced tab 2 Type the port number on which the AD server is listening The default port is 389 If you are using secure connections for LDAP...

Page 211: ...the username and password you specified in the General tab to connect to the AD server The entry is searched in the specified Base DN and is found if it meets the specified filtering criterion and if...

Page 212: ...should match the trusts configured in AD 1 Click the Trusts tab If you have configured more than one AD domain all other domains are listed in the Trusts tab 2 For each domain in the Trust Partner co...

Page 213: ...gain 6 Click OK to save your changes 7 You must synchronize the AD user groups you changed or you can synchronize all AD modules to synchronize all groups and users in all modules See Synchronize All...

Page 214: ...arch for User Group field and then click Go Click a column header to sort the list of user groups by the information in that column Click Select all to select all user groups for import Click Deselect...

Page 215: ...ever you choose 1 All Active Directory Modules This option performs the same operation as daily synchronization of all modules but you can use it to synchronize at any time on demand This synchronizat...

Page 216: ...ent the matches and allow you to select which groups in AD you want to associate with CC SG This does not update user access information in CC SG Synchronizing AD User Groups only maps the group names...

Page 217: ...ization and Authentication Servers appear in a table 3 In the On Demand Synchronization list select All Active Directory Modules then click Synchronize Now A confirmation message appears when all AD m...

Page 218: ...When daily synchronization is enabled you can specify the time at which automatic synchronization occurs By default daily synchronization occurs at 23 30 To change the daily AD synchronization time 1...

Page 219: ...ot be found in AD module module name Moving a group in AD within the search base When an AD group moves within the search base no warning is reported and the group functions as usual About LDAP and CC...

Page 220: ...e common name organizational unit and domain For example type uid admin ou Administrators ou TopologyManagement o Netscape Root Separate the values with commas but do not use spaces before or after th...

Page 221: ...ocally compare the associated password with the one entered On some LDAP servers the password cannot be retrieved as part of the LDAP object Select the Use bind after search checkbox to instruct CC SG...

Page 222: ...ed Crypt Use Bind Unchecked Use Bind After Search Checked IBM LDAP Configuration Settings If using an IBM LDAP server for remote authentication use this example Parameter Name IBM LDAP Parameters IP A...

Page 223: ...6 Click Next The General tab opens TACACS General Settings 1 Type the IP address or hostname of the TACACS server in the IP Address Hostname Name field See Terminology Acronyms on page 2 for hostname...

Page 224: ...he RADIUS server in the Module name field 6 Click Next to proceed The General tab opens RADIUS General Settings 1 Click the General tab 2 Type the IP address or hostname of the RADIUS server in the IP...

Page 225: ...C SG can make use of two factor authentication schemes with dynamic tokens In such an environment users logs into CC SG by first typing their usernames in the Username field then typing their fixed pa...

Page 226: ...filter for any report is the user policy For example the nodes or devices that the user has no access permission will not display in the reports Sort Report Data Click a column header to sort report d...

Page 227: ...l report including all details for each item Note Printing options work for all CC SG pages To print a screenshot of a report 1 Generate the report you want to print 2 Choose Secure Gateway Print Scre...

Page 228: ...hide the filtering section which will allow the report area to expand To hide or show the report filters Click the Filter toolbar at the top of the screen to hide the filtering section Click the Filt...

Page 229: ...in a series of Error Log files which can be accessed and used to help troubleshoot problems The Error Log includes a subset of the Audit Trail entries that are associated with an error condition To g...

Page 230: ...epted in these fields To limit the report by the message text associated with an activity type the text in the Message field To limit the report to a particular device type the device name in the Devi...

Page 231: ...successful login attempts You can unlock users from the report See Lockout settings on page 270 To generate the Locked Out Users report Choose Reports Users Locked Out Users To unlock a user who has b...

Page 232: ...User Group Data Report The User Group Data report displays data on users and the groups with which they are associated To generate the User Group Data report 1 Choose Reports Users User Group Data 2...

Page 233: ...ect the port states you want to include in the report Selecting more than one checkbox will include ports with all selected states You must select at least one Availability option when a Status option...

Page 234: ...displays node name interface name and type device name and type and node group for all nodes under CC SG management You can filter the report to include only data about nodes that correspond to a spe...

Page 235: ...node you want to disconnect then click Disconnect Node Creation Report The Node Creation report lists all node creation attempts both successful and unsuccessful within a specified time frame You can...

Page 236: ...e AD Users Group report displays all users in groups that were imported into CC SG from AD servers that have been configured for both authentication and authorization The report does not include users...

Page 237: ...ds are not allowed 5 Set the date range for the report in the Start Date and Time and End Date and Time fields Click each component of the default date month day year hour minute to select it then cli...

Page 238: ...in the Scheduled Reports list This report is generated when an Upgrade Device Firmware task is running View the report to get real time status information about the task Once the task has completed t...

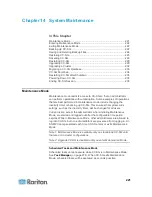
Page 239: ...sures that system wide settings such as the inactivity timer will be changed for all users Current users except the administrator who is initiating Maintenance Mode are alerted and logged out after th...

Page 240: ...Click OK 6 Click OK in the confirmation dialog box Exiting Maintenance Mode 1 Choose System Maintenance Maintenance Mode Exit Maintenance Mode 2 Click OK to exit Maintenance Mode 3 A message appears...

Page 241: ...irectory to save the backup file in a level below the default home directory on the FTP server For example to save the backup file in a folder called Backups under the default home directory enter Bac...

Page 242: ...include RRC MPC RC and VNC Saving and Deleting Backup Files Use the Restore CommandCenter screen to save and delete backups stored on CC SG Saving backups allows you to maintain a copy of the backup f...

Page 243: ...dialog window You can retrieve the file from anywhere on your client s network c Click Open to upload this file to CC SG When complete the backup file appears in the Available Backups table 3 Select t...

Page 244: ...plete their work and log out If specifying over 10 minutes the broadcast message displays to users immediately and then repeats at 10 and 5 minutes before the event occurs 6 In the Broadcast Message f...

Page 245: ...thorization servers are removed Your CC Super User account will be reset to default After the reset operation is complete you must login with the default username and password admin raritan Save Perso...

Page 246: ...t whether you select the IP ACL Tables option or not Licenses This option removes all license files from CC SG To reset CC SG 1 Before you reset back up CC SG and save the backup file to a remote loca...

Page 247: ...G s firmware when a newer version is released You can find firmware files in the Support section of the Raritan website To upgrade CC SG from version 3 x to version 4 1 you must upgrade it to 4 0 firs...

Page 248: ...re logging into CC SG again You can monitor the upgrade in the Diagnostic Console a Access Diagnostic Console using the admin account See Access Administrator Console on page 303 b Choose Admin System...

Page 249: ...G See Backing Up CC SG on page 222 Clear the Browser s Cache These instructions may vary slightly for different browser versions To clear the browser cache in Internet Explorer 1 Choose Tools Internet...

Page 250: ...nit is still powered on and accessible through the Diagnostic Console See CC SG Shutdown on page 234 for details 3 Restart the former primary node that has been in Waiting status See Restart CC SG wit...

Page 251: ...G unit to a virtual CC SG follow this recommended migration procedure Requirements for Migration Both CC SG units must be at the same version of firmware and version 5 1 or higher You must have valid...

Page 252: ...on page 319 CC SG Shutdown Shutting down CC SG shuts down the CC SG software but it does not power off the CC SG unit After CC SG shuts down all users are logged out Users cannot log back in until you...

Page 253: ...page 317 To power down the CC SG 1 Remove the bezel and firmly tap the POWER button 2 Wait approximately one minute while CC SG gracefully powers down Note Users logged into CC SG via Diagnostic Cons...

Page 254: ...Chapter 14 System Maintenance 236 2 Click Yes to log out of CC SG Once you log out the CC SG login window opens Exit CC SG 1 Choose Secure Gateway Exit 2 Click Yes to exit CC SG...

Page 255: ...ring a Message of the Day The Message of the Day allows you to provide a message for all users to view upon login You must have the CC Setup and Control privilege to configure the Message of the Day T...

Page 256: ...ion Applications 2 Click the Application name drop down menu to view the list of applications available in CC SG Checking and Upgrading Application Versions Check and upgrade the CC SG applications in...

Page 257: ...n log in again to ensure that the new version of the application is launched Also see Older Version of Application Opens After Upgrading on page 239 Older Version of Application Opens After Upgrading...

Page 258: ...should ensure that the IP address of the device being accessed is included in their browser s Trusted Sites Zone and that Protected Mode is not on when accessing the device Enable AKC Download Server...

Page 259: ...ot be changed 5 Select the default application to use when connecting to the selected Interface or Port Type Auto Detect CC SG will automatically select an appropriate application based on the client...

Page 260: ...the IP address of a CC SG unit which is already a Neighborhood member see What is a Neighborhood on page 262 you must remove it from the Neighborhood configuration first Otherwise you are unable to d...

Page 261: ...1 0 Not labeled Top LAN port in set of 2 ports in center of unit back panel Not labeled Bottom LAN port in set of 2 ports in center of unit back panel E1 1 LAN1 Left LAN port LAN2 Right LAN port What...

Page 262: ...ility Optional To configure IP Failover mode in CC SG 1 Choose Administration Configuration 2 Click the Network Setup tab 3 Select IP Failover mode 4 Type the CC SG hostname in the Host name field See...

Page 263: ...ode drop down arrow and select a duplex mode from the list 8 Click Update Configuration to save your changes Your changes will not take effect until CC SG restarts Click Restart Now if you want to aut...

Page 264: ...AN ports on each CC SG model Note Clustering cannot be configured when using IP Isolation mode Setup for IP Isolation mode When implementing IP Isolation mode for your CC SG network Each CC SG LAN por...

Page 265: ...P address Subnet mask and Default gateway fields will be automatically populated if your DHCP server is configured to provide this information once you save this network setup and restart CC SG With t...

Page 266: ...to external logging servers and specify what level of message is reported in each of the logs To configure CC SG logging activity 1 Choose Administration Configuration 2 Click the Logs tab 3 To assign...

Page 267: ...ing tasks in Task Manager See Task Manager on page 278 The time set on your client PC may be different than the time set on CC SG Only the CC Super User and users with similar privileges can configure...

Page 268: ...sing all data through CC SG Proxy mode increases the load on your CC SG server which may cause slower connections However Proxy mode is recommended if you are more concerned about the security of the...

Page 269: ...nfigure CC SG to use a combination of Direct mode and Proxy mode Proxy mode will be the default connection mode and Direct mode will be used for the client IP addresses you specify To configure a comb...

Page 270: ...hanges To enable or disable a warning message for all power operations Select the Display Warning Message For All Power Operations checkbox to enable a warning message that alerts a user before a requ...

Page 271: ...alid certificate to the device or generate a self signed certificate on the device The certificate must have a valid host designation Each user must add the CA certificate or a copy of self signed cer...

Page 272: ...a remote location before you enable or disable this feature See Backing Up CC SG on page 222 2 Choose Administration Configuration 3 Click the Custom JRE tab 4 Select the Enable Custom JRE for Login c...

Page 273: ...r details To configure SNMP in CC SG 1 Choose Administration Configuration 2 Click the SNMP tab 3 Select the Enable SNMP Daemon checkbox to enable SNMP operations 4 To identify the SNMP agent running...

Page 274: ...Update Trap Configuration to save your changes MIB Files Because CC SG pushes its own set of Raritan traps you must update all SNMP managers with a custom MIB file that contains Raritan SNMP trap defi...

Page 275: ...o the specific Primary node Create a Cluster You should backup your configuration on both CC SG units before creating a cluster To create a cluster 1 Choose Administration Cluster Configuration 2 The...

Page 276: ...ages The Backup node will restart and the process takes several minutes 10 When the cluster creation is complete a message appears indicating the Backup node is successfully joined Configure Cluster S...

Page 277: ...and Secondary node status If the Primary and Secondary nodes lose communication with one another the Secondary node will assume the role of the Primary node When connectivity resumes you may have two...

Page 278: ...he information entered for the cluster and restores both of Primary and Secondary CC SG nodes to the Standalone state In addition all configuration data except for the networking settings personality...

Page 279: ...entical licensed node capacity at all times Cluster kit licenses automatically ensure this is the case since they are copied from the primary onto the backup When operating a cluster with standalone l...

Page 280: ...rhood and which is not a member of any Neighborhood yet After a Neighborhood is created all members in the Neighborhood share the same Neighborhood information If any member is the Primary Node of clu...

Page 281: ...s operate as standalone units and do not show up as one of the Neighborhood members to Access Client users Click the column header to sort the table by that attribute in ascending order Click the head...

Page 282: ...ber dialog Then make changes in the dialog as needed 5 Select the Active checkbox next to each new CC SG unit 6 To change any CC SG s Secure Gateway Name click the name type a new one and press Enter...

Page 283: ...or example a Neighborhood member becomes inappropriate when you Set the CC SG unit as a Backup CC SG node in a cluster configuration which is not a state meeting the Neighborhood criteria see What is...

Page 284: ...o confirm the deletion Security Manager The Security Manager is used to manage how CC SG provides access to users Within Security Manager you can configure authentication methods SSL access AES Encryp...

Page 285: ...in Windows Vista only It does not support any AES encryption in Windows XP In addition to browser support AES 256 encryption requires the installation of Java Cryptography Extension JCE Unlimited Str...

Page 286: ...inistration Security 2 Open the Encryption tab 3 Select the HTTP or HTTPS SSL option to specify the Browser Connection Protocol you want clients to use when connecting to CC SG 4 Click Update to save...

Page 287: ...least one special character for example an exclamation point or ampersand 8 Click Update to save your changes About CC SG passwords All passwords must meet all criteria that the administrator configur...

Page 288: ...lue by entering a number from 1 to 10 5 Choose a Lockout Strategy Lockout for Period specify the period of time in minutes the user will be locked out before they can login again The default number is...

Page 289: ...rs in the System Administrators user group Select the Other Users checkbox to allow concurrent logins by all other users 3 Click Update to save your changes Configure the Inactivity Timer You can conf...

Page 290: ...users agree to upon accessing the CC SG A user s acceptance of the Restricted Service Agreement is noted in the log files and the audit trail report To add a restricted service agreement to the CC SG...

Page 291: ...ificate option is selected To export current certificate and private key 1 Choose Administration Security 2 Click the Certificate tab 3 Select Export current certificate and private key 4 Click Export...

Page 292: ...vate Key appear in the corresponding fields of the Certificate screen 6 Select the text in the Certificate Request box and then press Ctrl C to copy it Using an ASCII editor such as Notepad paste the...

Page 293: ...nd Server is selected in the Administration Security Encryption screen AES 128 is the default If AES is not required DES 3 is the default b Private Key Length 1024 is the default c Validity Period day...

Page 294: ...ation Security 2 Click the Access Control List tab 3 Click the Add Row icon to add a row to the table 4 Specify a range of IP addresses to which you want to apply the rule by typing the starting IP va...

Page 295: ...ns can be sent from CC SG Notifications are used to email reports that have been scheduled email reports if users are locked out and to email status of failed or successful scheduled tasks See Task Ma...

Page 296: ...basis A task can be scheduled to run only once or periodically on a specified day of the week and at a specified interval For example you could schedule device backups to occur every three weeks on Fr...

Page 297: ...L for the version of the emailed report All reports that have a Finished status are stored in HTML format on CC SG for 30 days You can view the finished reports in HTML format only by selecting Schedu...

Page 298: ...ter See Backing Up CC SG on page 222 Backup Device Configuration See Backing Up a Device Configuration on page 83 Pause Resume Device Management See Pausing CC SG s Management of a Device on page 88 a...

Page 299: ...nterval c Daily Click the Every day radio button if you want the task to repeat every day of the week Click the Every weekday radio button if you want the task to repeat each day from Monday through F...

Page 300: ...sent if the task is successful To notify recipients of failed tasks select On Failure 13 Click OK to save your changes Schedule a Device Firmware Upgrade You can schedule a task to upgrade multiple de...

Page 301: ...7 Specify which devices will be upgraded and in what order Place higher priority devices at the top of the list a In the Available list select each device you want to upgrade and click Add to move it...

Page 302: ...a completed task that you want to run again This is also a convenient way to create a new task that is similar to a completed task To reschedule a task 1 Choose Administration Tasks 2 In the Task Mana...

Page 303: ...sting authentication and authorization policies are applied to the SSH client The commands available to the SSH client are determined by the permissions for the user groups to which the SSH client use...

Page 304: ...in depth help on a single command at a time To get help for a single SSH command 1 At the shell prompt type the command you want help for followed by a space and h For example connect h 2 Information...

Page 305: ...To backup a device configuration backup device host host id device_id backup_name description To clear the screen clear To establish a connection to a serial port If port_name or device_name contains...

Page 306: ...ist available devices listdevices To list firmware versions available for upgrade listfirmwares id device_id host To list all interfaces listinterfaces id node_id To list all nodes listnodes To list a...

Page 307: ...mmand Tips For commands that pass an IP address such as upgradedevice you can substitute the hostname for an IP address See Terminology Acronyms on page 2 for hostname rules The copydevice and restart...

Page 308: ...cter when establishing a port connection The command is connect e escape_char port_id For example to define m as the escape character when connecting to the port with id 2360 type connect e m 2360 Cre...

Page 309: ...face You can use SSH to connect to a node through its associated serial out of band interface The SSH connection is in proxy mode 1 Type listinterfaces to view the node ids and associated interfaces 2...

Page 310: ...e entire SSH connection to CC SG This command ends the entire SSH connection including any port device or node connections made through CC SG At the prompt type the following command and press the Ent...

Page 311: ...Y Set the baud rate in the terminal emulation program to match the SX or KSX baud rate SX requirements Use an ASCSDB9F adapter to connect the CC SG unit to the SX Use the default SX port settings 9600...

Page 312: ...complete configuration this agreement will also be available in the Access menu 3 Click Accept The New Web Services API Configuration window opens 4 Type in the data requested about your web services...

Page 313: ...the certificate request k Challenge Password Maximum 64 characters Note The Challenge Password is used internally by CC SG to generate the certificate You do not need to remember it l Password Enter a...

Page 314: ...bindings These appearance settings may differ from those in this documentation In This Chapter Accessing Diagnostic Console 296 Status Console 297 Administrator Console 303 Accessing Diagnostic Consol...

Page 315: ...ways to view the Status Console information VGA keyboard mouse port SSH or web browser Access Status Console via VGA Keyboard Mouse Port or SSH To access Status Console via VGA Keyboard Mouse Port or...

Page 316: ...same information as the Status Console Status Console Information Status Console via VGA Keyboard Mouse Port or SSH After typing status at the login prompt the read only Status Console appears This sc...

Page 317: ...Qualified Domain Name FQDN It consists of both the unit s hostname and the associated domain name CC SG Version CC SG s current firmware version It consists of 5 tuple value CC SG Serial CC SG s seria...

Page 318: ...more disk drives are having problems Contact Raritan Technical Support for assistance Cluster Status CC SG can work in conjunction with another CC SG to form a cluster See Configuring CC SG Clusters...

Page 319: ...displays the keyboard combination keys for invoking Help and exiting Status Console Status Console will ignore key inputs other than these keys described below Press F1 to bring up the help screen wh...

Page 320: ...ly Status Console web page appears The web page displays the same information as the Status Console and also updates the information approximately every 5 seconds For information on the links for CC S...

Page 321: ...html based Access Client Changing one of these passwords does not affect the other Access Administrator Console All information displayed in the Administrator Console is static If the configuration c...

Page 322: ...Ctrl X to activate the menu bar or click a menu item using the mouse if you access Administrator Console via the SSH client The File menu provides an alternative option to exit the Diagnostic Console...

Page 323: ...rd combinations to navigate Administrator Console For some sessions the mouse may also be used to navigate However the mouse may not work in all SSH clients or on the KVM console Press To Ctrl X Activ...

Page 324: ...s CC SG via the Web can access the Status Console web page Important Be careful not to lock out all Admin or Field Support access To edit Diagnostic Console configuration 1 Choose Operation Diagnostic...

Page 325: ...ield After you save this field will be updated to reflect the Fully Qualified Domain Name FQDN if known See Terminology Acronyms on page 2 for hostname rules 4 In the Mode field select either IP Isola...

Page 326: ...ions A Warning screen will appear informing you of the impending network reconfiguration and associated CC SG GUI user impact Select YES to proceed System progress can be monitored in a Diagnostic Con...

Page 327: ...tion between your computer and the domain is not working See Edit Static Routes on page 310 6 Press Ctrl C to terminate the session Note Press CTRL Q to display a statistics summary for the session so...

Page 328: ...static routes may actually improve the performance of your network allowing you to conserve bandwidth for important business applications Click with the mouse or use the Tab and arrow keys to navigat...

Page 329: ...Chapter 16 Diagnostic Console 311 Although you can delete all other routes including the Default Gateway doing this will greatly impact the communication with CC SG...

Page 330: ...data or the file size of the logfile Timestamp and file size abbreviations Timestamps s seconds m minutes h hours d days File sizes B Bytes K Kilobytes 1 000 bytes M Megabytes 1 000 000 bytes G Gigab...

Page 331: ...onfigured to buffer all the new information that comes along Remember Selected Items If this box is checked the current logfile selections if any will be remembered Otherwise selection is reset each t...

Page 332: ...utomatically delete them View View the selected log s When View is selected with Individual Windows the LogViewer displays While viewing log files press Q Ctrl Q or Ctrl C to return to the previous sc...

Page 333: ...A to add a regular expression For example to display information on the WARN messages in sg jboss console log log file enter WARN and select match Note This screen also shows the Default Filter Scheme...

Page 334: ...2 Either click Restart CC SG Application or press Enter Confirm the restart in the next screen to proceed Reboot CC SG with Diagnostic Console This option will reboot the entire CC SG which simulates...

Page 335: ...ion will power off the CC SG unit Logged in users will not receive a notification CC SG SSH and Diagnostic Console users including this session will be logged off Any connections to remote target serv...

Page 336: ...CC Super User Password with Diagnostic Console This option will reset the password for the CC Super User account to the factory default value Factory default password raritan Note This is not the pass...

Page 337: ...default Confirm the password reset in the next screen to proceed Reset CC SG Factory Configuration This option will reset all or parts of the CC SG system back to their factory default values All act...

Page 338: ...d Secure Communication between PC Clients and CC SG Enforce Strong Passwords Direct vs Proxy Connections to Out of Band nodes Inactivity Timer setting Network Reset This option changes the network set...

Page 339: ...ates the current reset status and you cannot control CC SG before reset is complete Do NOT power off power cycle or interrupt CC SG when reset is in progress Doing this may result in the loss of CC SG...

Page 340: ...be asked if you want to accept the new password You can either accept by typing in the new password twice or reject the random password You cannot select your own password Strong Enforce strong passw...

Page 341: ...the screen that appears you can view the settings for each account Status Admin FS1 and FS2 This screen is split into three main areas The top displays read only information about the accounts on the...

Page 342: ...r you cannot use Diagnostic Console Min Days The minimum number of days after a password has been changed before it can be changed again Default is 0 Max Days The maximum number of days the password w...

Page 343: ...SG unit 1 Choose Operation Utilities Remote System Monitoring 2 Select Enabled in the Remote Monitoring Service field 3 Enter the IP address of the client PC you want to allow to monitor the CC SG uni...

Page 344: ...lier time and date Data collection starts again when the time and date reaches the original time and date When the time and date is changed to a later time and date the reports show a gap in the data...

Page 345: ...SG 1 Choose Operation Utilities Disk RAID Utilities RAID Status Disk Utilization 2 Either click Refresh or press Enter to refresh the display Refreshing the display is especially useful when upgrading...

Page 346: ...Submit c The test is scheduled and a SMART information screen displays d When the required time has passed as indicated by the screen you can view the results in the Repair Rebuild RAID screen See Rep...

Page 347: ...n view the results in the Repair Rebuild RAID screen See Repair or Rebuild RAID Disks on page 331 If a non zero value displays in the Mis Match column for the given Array indicating that there may be...

Page 348: ...ts be aware of these guidelines Only one test can be performed on a given drive at a time Another test will not be scheduled if a drive is currently under test If two tests are scheduled for the same...

Page 349: ...time for running this test Type a number in the Month Day of Month Day of the Week and Hour fields Day of the Week field uses 1 for Monday through 7 for Sunday Hour must be in 24 Hour format Note A b...

Page 350: ...good system A contrived system showing multiple problems The system will update displayed information when you move between Disk Drive Status RAID Array Status and Potential Operations box using the T...

Page 351: ...the processes running on CC SG 1 Choose Operation Utilities Top Display 2 View the total running sleeping total number and processes that have stopped 3 Type h to view a help screen for the top comma...

Page 352: ...Chapter 16 Diagnostic Console 334 NTP is not enabled or not configured properly NTP is properly configured and running...

Page 353: ...uration shows a list of CC SG data that you can snapshot Snapshot Operations shows a list of operations that can be performed when activating the snapshot operation 5 Usually it is not necessary to ch...

Page 354: ...r the file named snapshot as it is the latest snapshot file The files are already compressed encrypted and signed so you must transfer them in the binary mode 5 When saving the file with IE save it as...

Page 355: ...if you have Power IQ with a large number of Dominion PX devices deployed and you want to get the current IT Device Names into CC SG as nodes you can export a file from Power IQ edit the file to speci...

Page 356: ...appears 4 Type a name for the device in the Power IQ Device Name field The name must be unique for the Power IQ Device providing the service CC SG does not accept duplicate names See Naming Convention...

Page 357: ...l or if an intermediate router is down Unknown host The IP address could not be resolved from the hostname entered Authentication failed Incorrect username and password Unable to communicate with mana...

Page 358: ...CC SG See Configuring Power IQ Services on page 338 Step 2 Create a filter optional Filters are optional If you do not create a filter all IT Devices configured in this Power IQ will be added to CC SG...

Page 359: ...synchronize on a recurring basis You must have the Device Port and Node Management permission to synchronize See Configuring Synchronization of Power IQ and CC SG on page 340 and Power IQ Synchroniza...

Page 360: ...adding a number in parentheses For example node node 2 node 3 Reject Duplicate Nodes If an IT Device as determined by the External Key is retrieved from more than one Power IQ the first instance will...

Page 361: ...7 Step 1 Export a CSV file from Power IQ 1 Login to Power IQ and go to the Dashboard 2 Click Outlet Naming 3 Next to the Import click the link to export a CSV file of the current outlet names 4 Open o...

Page 362: ...failed import show in red text Items that failed import because a duplicate item already exists or was already imported also show in red text 6 To view more import results details check the Audit Trai...

Page 363: ...the CSV file and import into Power IQ The export file contains three sections Read the comments in the CSV file for instructions on how to use each section as part of a Power IQ multi tabbed CSV impo...

Page 364: ...me Between Failure MTBF 36 354 hours KVM Admin Port DB15 PS2 or USB Keyboard Mouse Serial Admin Port DB9 Console Port 2 USB 2 0 Ports V1 Environmental Requirements Operating Humidity 8 90 RH Altitude...

Page 365: ...44 09 lbs 20 kg Power SP502 2S Hot Swappable 500W 2U power supply Operating Temperature 0 50 C Mean Time Between Failure MTBF 53 564 hours KVM Admin Port PS 2 keyboard and mouse ports 1 VGA port Seria...

Page 366: ...ure 40 70 C Humidity 5 90 non condensing Altitude Sea level to 40 000 feet Vibration 10 Hz to 300 Hz sweep at 2 g constant acceleration for one hour on each of the perpendicular axes X Y and Z Shock 3...

Page 367: ...This Chapter Required Open Ports for CC SG Networks Executive Summary 349 CC SG Communication Channels 350 Required Open Ports for CC SG Networks Executive Summary The following ports should be opene...

Page 368: ...umented For each communication channel the table includes The symbolic IP Addresses used by the communicating parties These addresses must be allowed over any communication path between the entities T...

Page 369: ...tional CC SG clustering feature is used the following ports must be available for the inter connecting sub networks If the optional clustering feature is not used none of these ports has to be open Ea...

Page 370: ...al industry standard services like DHCP DNS and NTP These ports and protocols are used to allow CC SG to communicate with these optional servers Communication Direction Port Number Protocol Configurab...

Page 371: ...Console 23 TCP yes Client server communication SSL AES 128 AES 256 encrypted if configured PC Clients to Nodes Another significant role of CC SG is to connect PC clients to various nodes These nodes c...

Page 372: ...telligent Platform Management Interface IPMI servers can also be controlled by CC SG Dell DRAC and RSA targets can also be managed by CC SG Note Some in band interfaces require additional ports to be...

Page 373: ...an be blocked CC SG Access via NAT enabled Firewall If the firewall is using NAT Network Address Translation along with PAT Port Address Translation then Proxy mode should be used for all connections...

Page 374: ...or 5900 must be open for VNC access to nodes SSH Access to Nodes Port 22 must be open for SSH access to nodes Remote System Monitoring Port When the Remote System Monitoring feature is enabled port 1...

Page 375: ...None Print Screen None Logout None Exit None Users This menu and the User tree are available only for users with the User Management privilege User Manager Add User User Management Editing users User...

Page 376: ...lete Device Device Port and Node Management Bulk Copy Device Port and Node Management Upgrade Device Device Configuration and Upgrade Management Configuration Backup Device Configuration and Upgrade M...

Page 377: ...iguration and Upgrade Management Tree View Device Port and Node Management or Device Configuration and Upgrade Management Port Manager Connect Device Port and Node Management and Node Out of band Acce...

Page 378: ...Add Node Device Port and Node Management Editing Nodes Device Port and Node Management Via the Node Profile Delete Node Device Port and Node Management interfaceName Node In band Access or Node Out of...

Page 379: ...ode In band Access or Node Out of band Access or Power Control By Node Status Any of the following Device Port and Node Management or Node In band Access or Node Out of band Access or Node Power Contr...

Page 380: ...bility to add modify and delete Node Groups User Security Management Includes ability to add modify and delete Policies User Security Management Includes ability to add modify and delete Reports This...

Page 381: ...gement Node Group Data Device Port and Node Management Active Directory AD Users Group Report CC Setup and Control or User Management Scheduled Reports CC Setup and Control or Device Configuration and...

Page 382: ...ompatibility Matrix Device Port and Node Management or Device Configuration and Upgrade Management Import Import Categories CC Setup and Control and User Security Management Import Users CC Setup and...

Page 383: ...ode Management Export Power IQ Data CC Setup and Control and Device Port and Node Management System Maintenance Backup CC Setup and Control Restore CC Setup and Control Reset CC Setup and Control Rest...

Page 384: ...ion failure ccLanCardFailure CC SG detected a LAN Card Failure ccHardDiskFailure CC SG detected a hard disk failure ccLeafNodeUnavailable CC SG detected a connection failure to a leaf node ccLeafNodeA...

Page 385: ...with another Dominion PX device ccSystemMonitorNotification CC SG is out of memory ccNeighborhoodActivated CC SG neighborhood has been activated ccNeighborhoodUpdated CC SG neighborhood has been upda...

Page 386: ...section contains more information about CSV file imports In This Chapter Common CSV File Requirements 369 Audit Trail Entries for Importing 370 Troubleshoot CSV File Problems 371 Appendix E CSV File...

Page 387: ...s the file type After that Excel will continue to save the file as CSV If you don t set the file type correctly the file will corrupt and cannot be used to import All import files must be in ASCII tex...

Page 388: ...n entry for each change that occurs when a record is imported These entries are logged between the entries for Import started and Import completed They are logged under a different Message Type depend...

Page 389: ...error includes the line number where the error occurs in the CSV file See the comments at the top of an export file to help you correct errors When the file has been corrected validate the file again...

Page 390: ...at states your client version is different from the server version and that behavior may be unpredictable you should clear the browser s cache and the Java cache and restart the browser See Clear the...

Page 391: ...Failed message that says you have an invalid certificate You can resume access by clearing the invalid certificate from your browser a In Firefox choose Tools Options b Click Advanced c Click the Enc...

Page 392: ...rrow key Press any key to enter the menu Booting CentOS x x x in x seconds 3 Highlight the Memtest86 vX X option where vX X is the current version using the up or down arrow keys and press Enter 4 CC...

Page 393: ...ooting 1 Turn on the debug mode 1 Using a supported Internet browser type this URL http s IP_address 8080 jmx console where IP_address is the IP address of the CC SG For example https 10 20 3 30 8080...

Page 394: ...Configure Remote System Monitoring on page 325 Important For CC SG units in a cluster configuration you must monitor both CC SG units To monitor the disk space via the Diagnostic Console 1 Log into th...

Page 395: ...apshots 1 Enter the System Snapshot menu See Take a System Snapshot on page 335 2 Deselect SNAP 3 Deselect Package Export 4 Select Clean up tmp 5 Click or select Submit To monitor the disk space via w...

Page 396: ...Diagnostic Utilities 378 Note For file system problems that are not mentioned in this section or when the corrective actions you take cannot resolve the problems contact Raritan Technical Support for...

Page 397: ...RADIUS Server 6 1 on Windows Server 2003 RSA Authentication Manager 6 1 on Windows Server 2003 RSA Secure ID SID700 hardware token Earlier RSA product versions should also work with CC SG but they ha...

Page 398: ...ems administrator or manager to access and manage all servers equipment and users from a single device Which Raritan products does CC SG support See the Compatibility Matrix on the Raritan website in...

Page 399: ...nder Firmware and Documentation An administrator added a new node to the CC SG database and assigned it to me How can I see it in my Nodes tree To update the tree and see the newly assigned node click...

Page 400: ...When configuring the blade slot enter the same name as the virtual host node and choose to add this interface to the existing node when a message appears Authentication FAQs Question Answer Authentica...

Page 401: ...refreshes the page from CC SG or you may close the current browser open a new browser and log in again This provides an additional security feature so that no one can recall information stored in the...

Page 402: ...erformance As a CC SG administrator I added over 500 nodes and assigned all of them to me Now it takes a long time to log into CC SG When you as administrator have many nodes assigned to you CC SG dow...

Page 403: ...too overloaded to be able to respond to a network login may still support console login So another benefit of console access is the ability to troubleshoot and diagnose system and network problems How...

Page 404: ...8 path box Currently the best possible implementation is to aggregate IP Reach boxes with CC SG In the future Raritan plans to increase simultaneous access paths per box These plans have yet to compl...

Page 405: ...l add ons if they are of the same type and the host IDs match For example a CC E1 512 could be used to replace a CC E1 256 If the host IDs were the same on both lic the add on licenses are still valid...

Page 406: ...following keyboard shortcuts can be used in the Java based Admin Client Operation Keyboard Shortcut Refresh F5 Print panel Ctrl P Help F1 Insert row in Associations table Ctrl I Appendix J Keyboard Sh...

Page 407: ...Device Information 390 Port Information 391 Associations 391 Administration 391 User Information Field in CC SG Number of characters CC SG allows Username 64 Full Name 64 User Password not strong pass...

Page 408: ...characters CC SG allows Primary Contact Name 64 Telephone Number 32 Cell Phone 32 Secondary Contact Name 64 Telephone Number 32 Cell Phone 32 Service Accounts Field in CC SG Number of characters CC S...

Page 409: ...formation Field in CC SG Number of characters CC SG allows Port Name 32 Associations Field in CC SG Number of characters CC SG allows Category Name 32 Element Name 32 Device Group Name 40 Node Group N...

Page 410: ...or The operating system is checking the DVD ROM drive and finds no media when it boots up There are other scenarios that invoke the message as well but will not be described in the section avc The mes...

Page 411: ...and Virtual Machines 113 119 Add a Custom View for Devices 183 Add a Custom View for Nodes 181 Add a Device Group 72 76 175 Add a Dominion PX Device 53 54 56 Add a KVM or Serial Device 53 54 64 70 96...

Page 412: ...ng Up a Device Configuration 83 280 Backing Up CC SG 222 228 229 231 233 254 280 Before You Use Guided Setup 33 Blade Chassis Overview 63 Blade Chassis with an Integrated KVM Switch 63 Blade Chassis w...

Page 413: ...es 238 Configuring CC SG Clusters 16 256 300 Configuring CC SG with Guided Setup 10 33 42 175 Configuring Custom JRE Settings 6 254 Configuring Default Applications 240 Configuring Direct Port Access...

Page 414: ...33 34 Devices CSV File Requirements 70 77 Devices Device Groups and Ports 47 Diagnostic Console 5 296 Diagnostic Console Account Configuration 323 Diagnostic Console Bootup Messages 392 Diagnostic Co...

Page 415: ...ers 171 Importing AD User Groups 195 Importing and Exporting Dominion PX Data from Power IQ 342 Install and Check Out Your License 23 24 387 Install CommandCenter Secure Gateway on VMware ESX Server 4...

Page 416: ...inder 301 Node and Interface Icons 105 Node Asset Report 136 216 218 Node Creation Report 217 Node Group Data Report 218 Node Groups Overview 150 Node Information 389 Node Names 102 Node Profile 103 N...

Page 417: ...ata to a KX2 KSX2 or KX2 101 Device 83 86 Restore Blade Servers Ports to Normal KX2 Ports 50 68 Restore Only Device Settings or User and User Group Data to a KX2 KSX2 or KX2 101 Device 85 Restoring CC...

Page 418: ...206 244 247 262 264 277 289 307 338 The Devices Tab 48 The Users Tab 157 Thick Client Access 6 Tips for Adding a Web Browser Interface 134 146 Topology View 51 Troubleshoot Connections to Power IQ 33...

Page 419: ...Plug In 121 W Web Browser Interface 126 133 Web Services API 294 What is a Neighborhood 242 262 263 265 What is IP Failover mode 242 243 What is IP Isolation mode 242 246 What is the difference betwe...

Page 420: ...India Monday Friday 9 a m 6 p m local time Phone 91 124 410 7881 Japan Monday Friday 9 30 a m 5 30 p m local time Phone 81 3 3523 5991 Email support japan raritan com Europe Europe Monday Friday 8 30...

Reviews: