Copy Functions
1-60
7
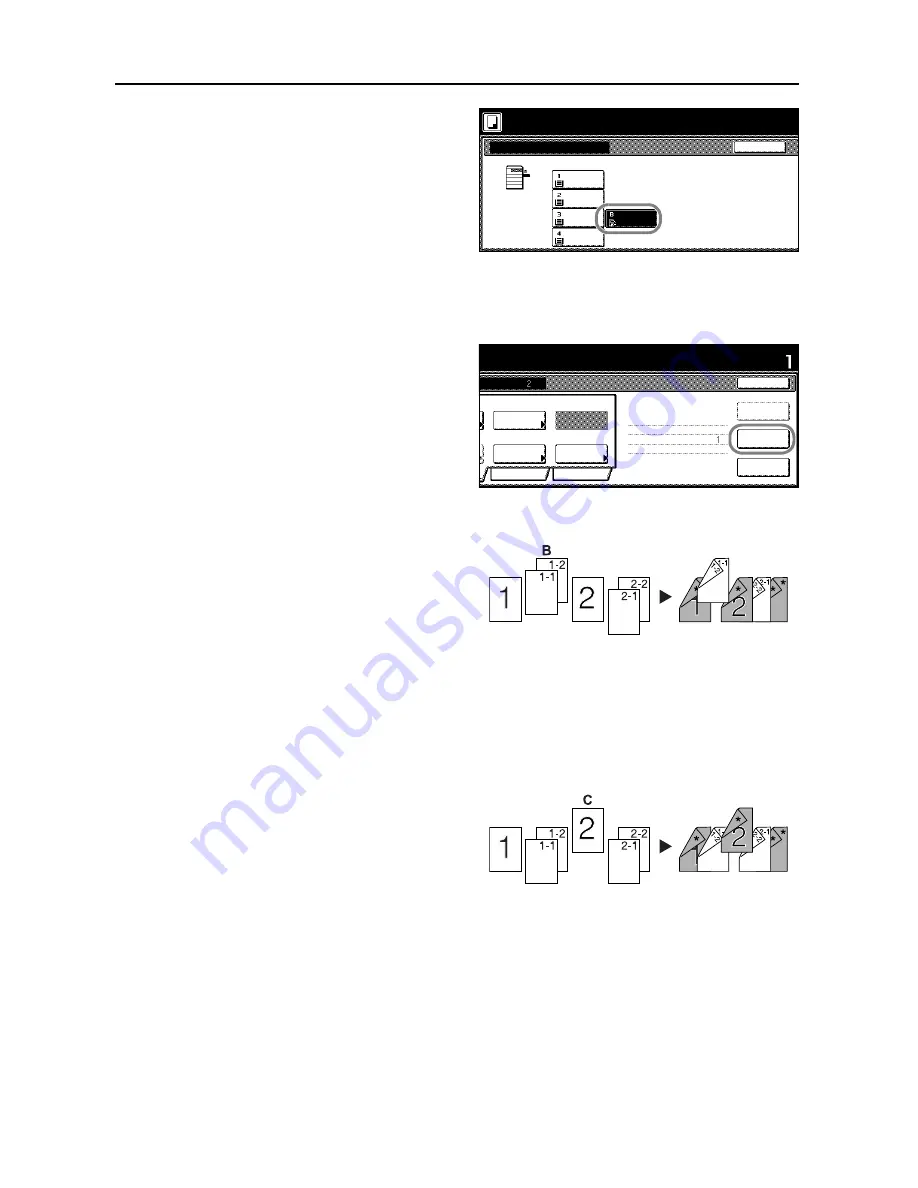
Select the MP tray and press the
[Close].
8
Place the Original A and press the
Start
key. Scanning of the original begins.
Step 2: Set Original A Back Side to Blank
9
Press [Print from Front page].
The back side of the page will be left
blank and copying will continue from the
next page.
Step 3: Complete the Settings for Original B.
Select Cassette 1 (standard paper) for
paper setting.
10
Press [Select Paper].
11
Select Cassette 1 and press [Close].
12
Place Original B and press the
Start
key. Scanning of the original begins.
Step 4: Complete the Settings for Original C
For paper selection, set MP tray (color
paper).
13
Press [Select Paper].
14
Select the MP tray and press [Close].
15
Place Original C and press the
Start
key. Scanning of the original begins.
Back
Select Paper
Color
11×8½"
Color
Plain
11×8½"
Plain
11×8½"
Plain
11×8½"
11×17"
Place originals then press Start key.
Ready to Job build.
( )
Full-Color
riginals and press start key.
Set
Cancel
1 sided
Quality
Reduce
Top Edge
Orig. Set
2 sided Copy
Edit
Insert
2 sided copy-Left
Finished page #:
Step
Auto %
Original
Front page
Print from
nning finished" key when starting copy.
riginal(s).
1 sided/
Next copy page: Rear
finished
Scanning
Type
2 sided
/Enlarge
Direction
-
page
Summary of Contents for C2525E
Page 1: ...Advanced Operation Guide C2525E C3225E C3232E C4035E ...
Page 2: ......
Page 16: ...xiv ...
Page 21: ...Copy Functions 1 5 5 Press the Start key Copying begins ...
Page 142: ...Printer Settings 3 48 ...
Page 166: ...Scanner Settings 4 24 ...
Page 300: ...System Menu 7 52 ...
Page 324: ...Job Accounting 8 24 ...
Page 344: ...Troubleshooting 9 20 ...
Page 364: ...Appendix Appendix 20 ...
Page 370: ...Index Index 6 ...
Page 372: ......
Page 373: ... 2007 is a trademark of Kyocera Corporation ...
Page 374: ...2007 2 Rev 1 0 ...


