System Menu
7-35
10
Press [Completed.] after all values have been entered. Color registration begins.
11
Press [Close] after color registration is complete.
12
Press [Close]. The display is returned to the
System Menu
screen.
Detailed Settings
Follow the steps below to perform more detailed correction.
1
Refer to Steps 1-4 of
Normal Registration
to display the
Color Registration
screen.
2
Press [Configuration].
3
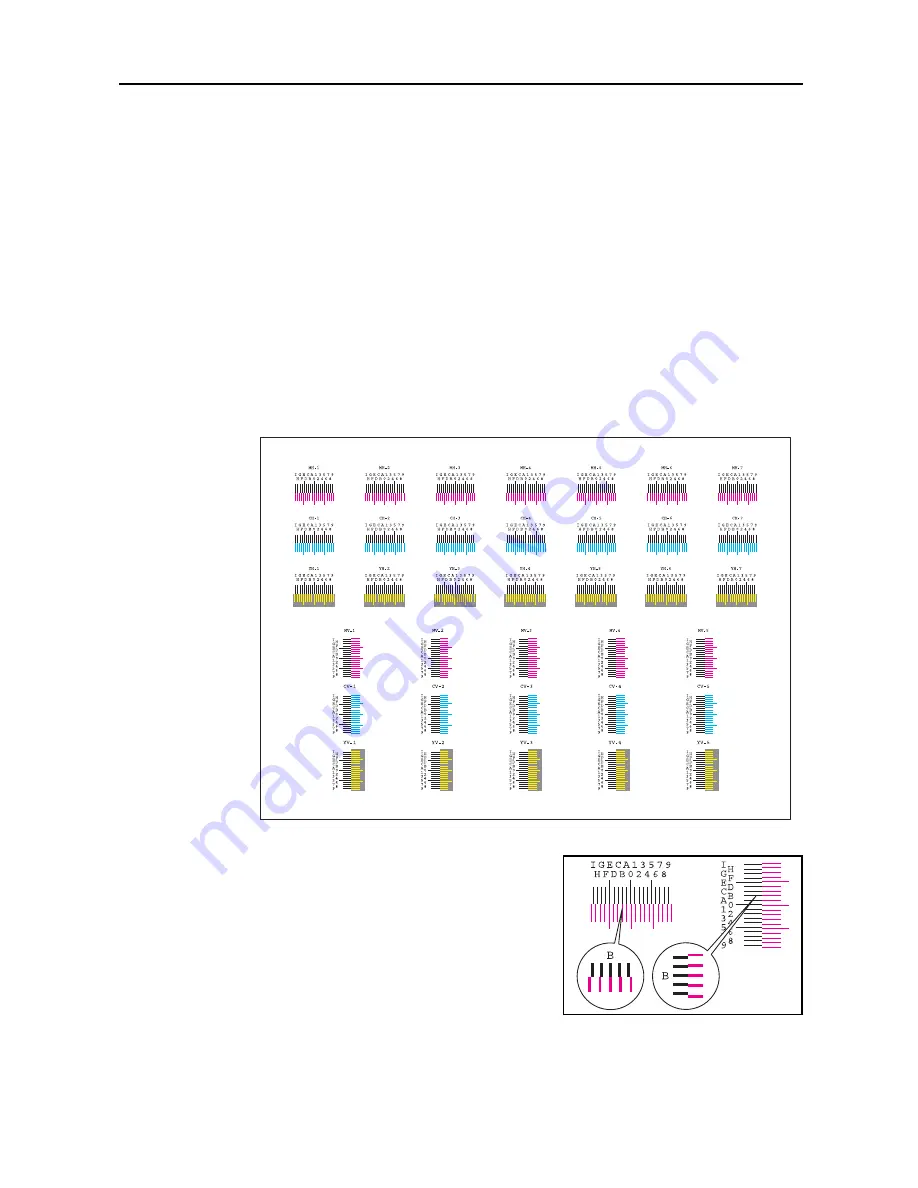
Press [PrintChart (Details)]. A chart is printed.
On the chart, for each of
M
(magenta),
C
(cyan) and
Y
(yellow), charts for
H-1
to
7
(upper) and
V-1
to
5
(lower) are printed.
Chart Example
4
Find the location on each chart where 2 lines most
closely match. If this is the 0 position, registration for
that color is not required. For the illustration, B is the
appropriate value.
From the
V-1
to
5
chart, read only the value for
V-3
(the
middle value).
5
Press [InputValue (Details)].
Summary of Contents for C2525E
Page 1: ...Advanced Operation Guide C2525E C3225E C3232E C4035E ...
Page 2: ......
Page 16: ...xiv ...
Page 21: ...Copy Functions 1 5 5 Press the Start key Copying begins ...
Page 142: ...Printer Settings 3 48 ...
Page 166: ...Scanner Settings 4 24 ...
Page 300: ...System Menu 7 52 ...
Page 324: ...Job Accounting 8 24 ...
Page 344: ...Troubleshooting 9 20 ...
Page 364: ...Appendix Appendix 20 ...
Page 370: ...Index Index 6 ...
Page 372: ......
Page 373: ... 2007 is a trademark of Kyocera Corporation ...
Page 374: ...2007 2 Rev 1 0 ...


